Retro-Cow Posted July 13, 2010 Report Share Posted July 13, 2010 The work so far on my XM607 Build Based off an Echo1 Stag Arms M4 lower and gearbox which I acquired from a friend. The rest of the parts are a bastardization of various airsoft, real-steel, and home improvement parts. Thanks to BaBaBooey for answering my questions about the stock operation as well as finding me the rear handguard cap. Note: The A2 Upper, Pistol grip and 10.5" barrel are just placeholders until I can acquire the correct parts. Fist off, I sanded down Echo1's incredibly lame etched trademarks. Filled the selector markings. The lower receiver originally started out as an A2 style lower with rear reinforcements which I filed down to more closely resemble an A1 lower. The fence around the mag release was also filed down to create a Partial Fence lower. (The areas where I dug in too deep were corrected with filler) Ordered the M16A1 grips off of eBay and cut them down to size. Got the rear handguard cap off of gunbroker. It fit perfectly. The lower rod that controls the locking and adjusting of the stock was threaded and screwed into a piece of sheet ABS cut to size. Next up I need to cut off the bayonet lug, and finish the stock adjustment and buttplate. Wish me luck! Parts: -Echo1 Lower Receiver -Marui M16A2 Upper (Temp) -G&P Flat Handguard/Delta Ring -JG 10.5 in. Barrel and Front Sight. -China M16 Stock cut down to size. -Real Steel M16A1 Handguards and Heatshield -Buffer Tube made from 1" Conduit -Steel rod + tube for the stock adjuster. Link to post Share on other sites
SteevoLS Posted July 13, 2010 Report Share Posted July 13, 2010 I'm not an AR historian by any means, but you're doing a bang-up job so far! Link to post Share on other sites
Burke Posted July 14, 2010 Report Share Posted July 14, 2010 You know G&P is releasing one soon right? Good job tho! Link to post Share on other sites
Azulsky Posted July 14, 2010 Report Share Posted July 14, 2010 What is the correct barrel length? Link to post Share on other sites
BaBaBooey Posted July 14, 2010 Report Share Posted July 14, 2010 What is the correct barrel length? I believe early Colt Carbines had 10" barrels. Link to post Share on other sites
Retro-Cow Posted July 15, 2010 Author Report Share Posted July 15, 2010 Thanks for the kind words. Yep, the correct barrel would be 10" however, I'm thinking about just covering up the excess barrel with the moderator. Burke: Yeah I've seen the G&P and it looks awesome,but unforntunately I don't have $350+ to spend on one. Plus there a few inaccuracies on the lower that stood out to me. Here's the progress on the buttplate so far. Made from ABS Plastic. Link to post Share on other sites
blablabla Posted July 15, 2010 Report Share Posted July 15, 2010 what paint did you use to cover up the sanding areas where you removed the full fence ? I am working on a 605,with also has a half fence it's all sanded down and filled, put dunno what paint to use to match the colour the rest has Link to post Share on other sites
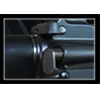
cosmic Posted July 15, 2010 Report Share Posted July 15, 2010 What make outer barrel are you using? The slip ring on mine is pretty wobbly Link to post Share on other sites
Retro-Cow Posted July 21, 2010 Author Report Share Posted July 21, 2010 blablabla I didn't use any paint. Since my receiver is plastic, when I sanded the finish, the color of the plastic showed through which was only a few shades darker. I planned to repaint the whole thing anyways so I sanded off the rest of the gray paint. The finish you see in the pictures is the original color of the plastic. cosmic I'm not 100% sure but I think its a JG outer barrel. My slip ring doesn't touch the barrel at all though, just the mounting thing that the barrel goes into. I sanded down the markings on the FSB as well as the little raised lip that the markings were on. Also sanded down the flashing. I'm doing a layer of silver before the gray hoping that as the gray wears down the silver will show through. Sorry for the crappy lighting. Link to post Share on other sites
BaBaBooey Posted July 21, 2010 Report Share Posted July 21, 2010 I sanded down the markings on the FSB as well as the little raised lip that the markings were on. Also sanded down the flashing. That's brilliant...can't wait to see the finished product. Good luck! Link to post Share on other sites
Retro-Cow Posted July 25, 2010 Author Report Share Posted July 25, 2010 Just a little update, I finished painting the lower and I noticed that I had missed a little detail while making the partial fence which I added here: Painted the the buttplate as well. I just need to add the "O" and "L" markings. (Sorry for bad pics, my phone is being weird) Next, I realized I don't have the money to buy an A1 Upper, nor can I even find one anywhere. So naturally I decided to just fabricate one myself. First up is the rear sight. I removed all the hardware from the A2 sight and started to form the A1 with epoxy putty. Link to post Share on other sites
Burke Posted July 26, 2010 Report Share Posted July 26, 2010 Cool, custom work. Im excited to see what you do for rear sight, this is creative. Link to post Share on other sites
judgeman Posted July 26, 2010 Report Share Posted July 26, 2010 Good show sir. Amazing work here. Link to post Share on other sites
Imperial Fist Posted July 26, 2010 Report Share Posted July 26, 2010 That work is hugely impressive. I wish I had half your ability/confidence to start chopping/filing/dremelling kit. I can't wait to see it finished, your attention to detail is excellent too. MR. Link to post Share on other sites
Kalashnikov_kid Posted July 28, 2010 Report Share Posted July 28, 2010 Did some similar A2 converting when making my A1 A few pics that might help Windage dial isn't very accurate but gives the impression I wanted Ta K_K Link to post Share on other sites
Burke Posted July 28, 2010 Report Share Posted July 28, 2010 Dang you did a good job too. Link to post Share on other sites
Retro-Cow Posted July 29, 2010 Author Report Share Posted July 29, 2010 Wow that looks great! What did you make the dial out of? Link to post Share on other sites
Kalashnikov_kid Posted July 30, 2010 Report Share Posted July 30, 2010 Disc of steel, Drilled in the middle, then the side for grub screw. Put a bolt through it with a nut. Then put it in a drill clamped in a vice (Ghetto Lathe) and turned it down using files. Holes were added after with a drill. Thanks for the Wow'ing took a while to dremel. Only tip I have is use some tape to back the hole where the brass deflector was prior to filling Ta Dave Link to post Share on other sites
Retro-Cow Posted October 13, 2010 Author Report Share Posted October 13, 2010 Okay, here we go. Sorry for the lack of updates, I just got lazy. Just started working on the upper again this past week, here is the progress: -Brunton Bump ground off and filled. -Real Steel A1 Rear Sight installed Link to post Share on other sites
Ledpocket Posted October 13, 2010 Report Share Posted October 13, 2010 Sweet. That's looking good. Do you have any more pictures? edit- like overall views and more detail on what you did with the stock. Very cool build up Link to post Share on other sites
Kenworth W900 Posted October 14, 2010 Report Share Posted October 14, 2010 I'm hugely impressed by your work on the rear site mate. It looks virtually seamless. Link to post Share on other sites
Retro-Cow Posted October 19, 2010 Author Report Share Posted October 19, 2010 Thanks guys. Ledpocket here are some more pics: Stock Operation: Stock "Tube Thing" mounting to Buttplate: Extended Link to post Share on other sites
abbadon101 Posted October 19, 2010 Report Share Posted October 19, 2010 Very nice work, the stock is clever. And the work you did on the rear sight is good too. I didn't realise it was not an A1 upper. Link to post Share on other sites
Kenworth W900 Posted October 19, 2010 Report Share Posted October 19, 2010 So, just waiting on some kind of oldschool flash hider and an A1 foward assist then? Link to post Share on other sites
Ledpocket Posted October 24, 2010 Report Share Posted October 24, 2010 Thanks for posting those pics. Really nice job on your build. Link to post Share on other sites
Recommended Posts
Archived
This topic is now archived and is closed to further replies.