A
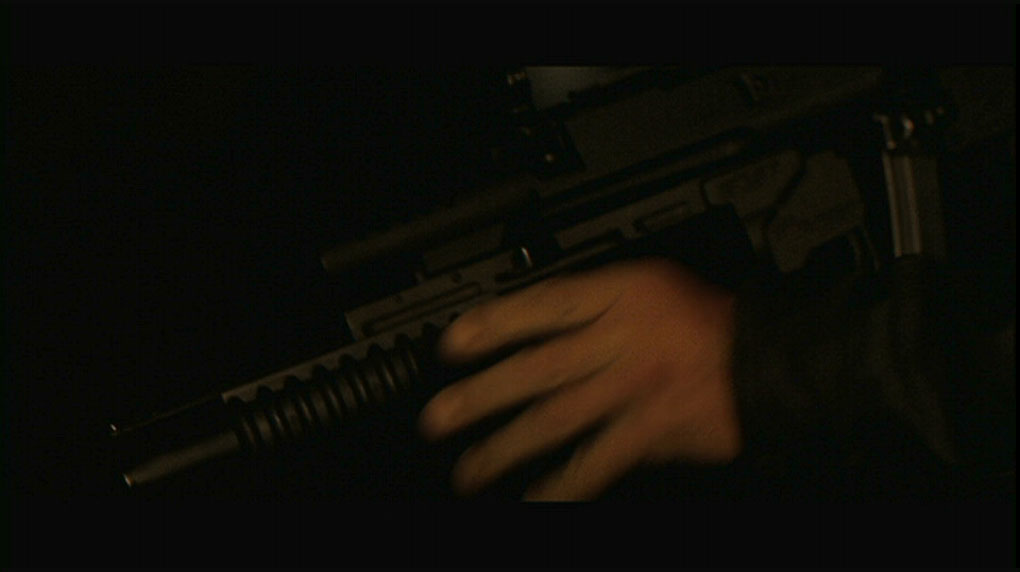
What? Well there's no prizes for guessing
where this project was inspired from, if you missed the
film End of Days (EOD) you really should go on out
and watch it.
So what's
this project? Well no, it's not just an opportunity for
me to grab a DVD off the shelf and page through the weapon
and action sections frame by frame (rather fun though I
must admit), rather it's a project inspired by CL's original
EOD MP5.
When
Clarence
Lai (CL) of DenTrinity made the original
MP5 it was based on the very few stills that were available
at that time, well here we are in 2002, and thankfully there's
more information available to creat a more accurate replica.
The film is quite dark, so sadly the new screen caps that
we have now are quite dim & grainy.
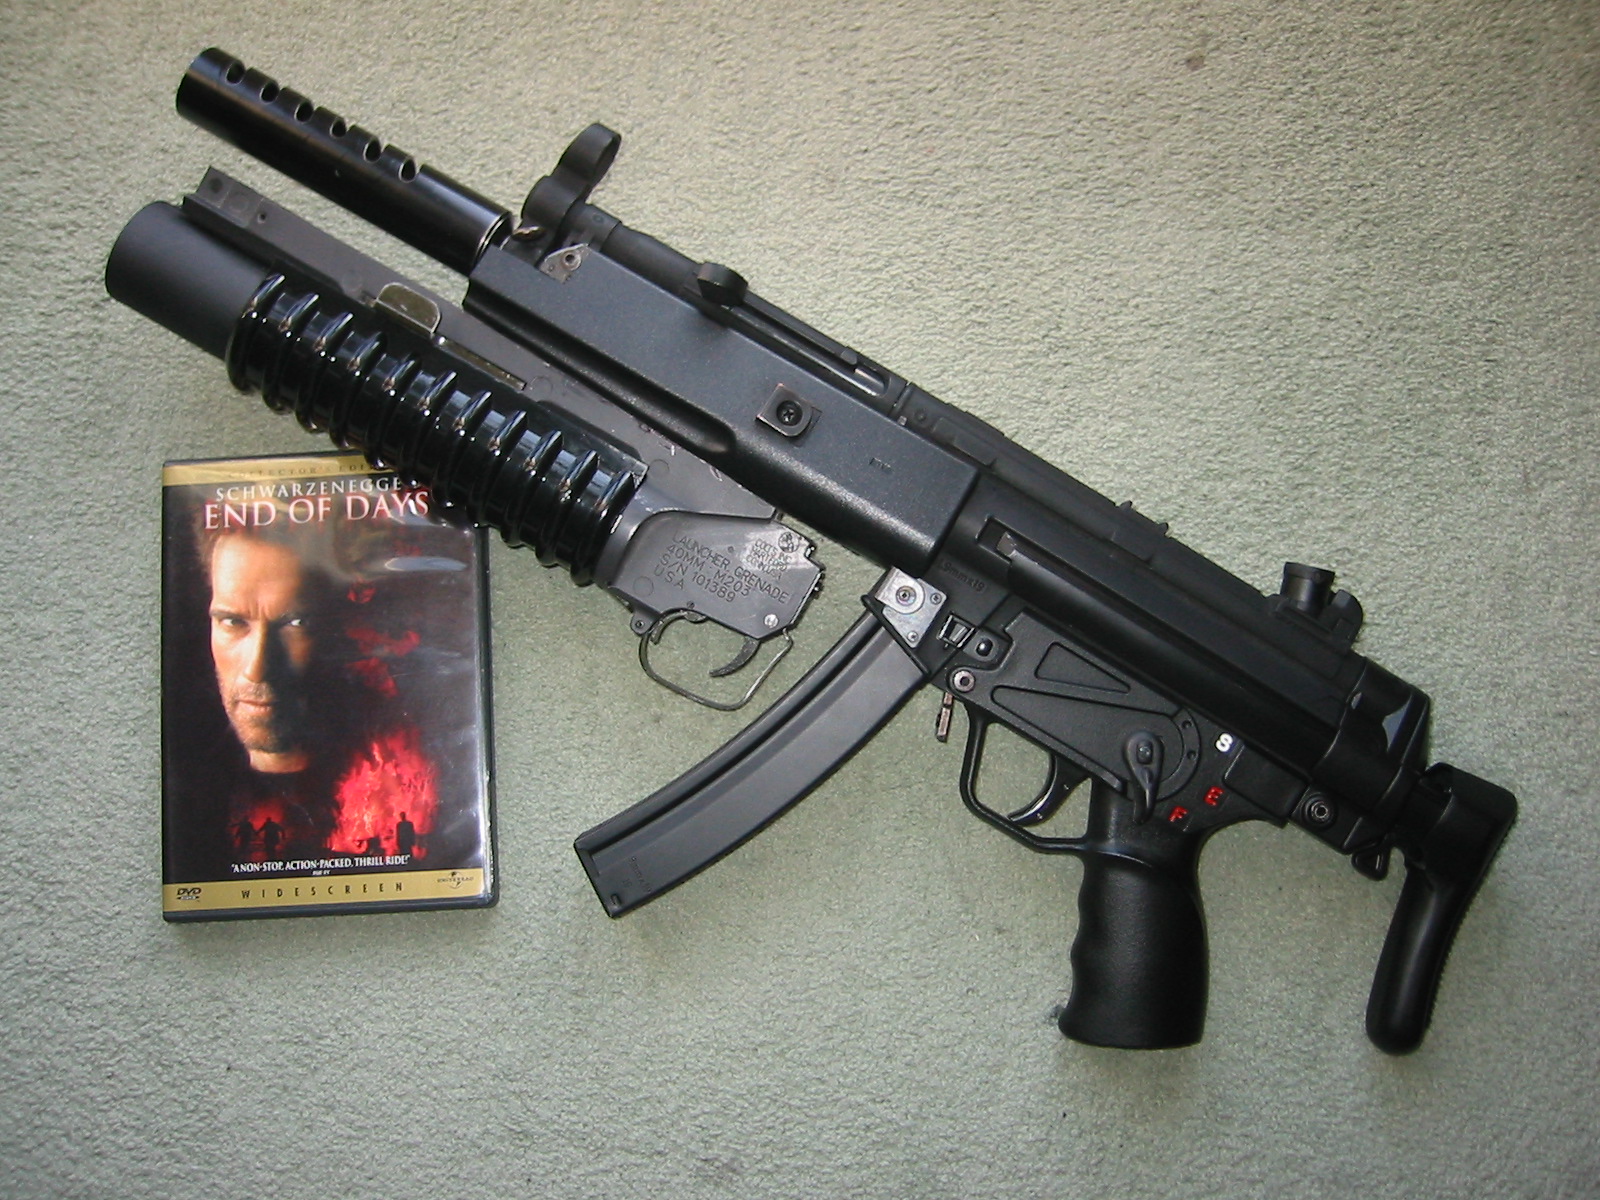
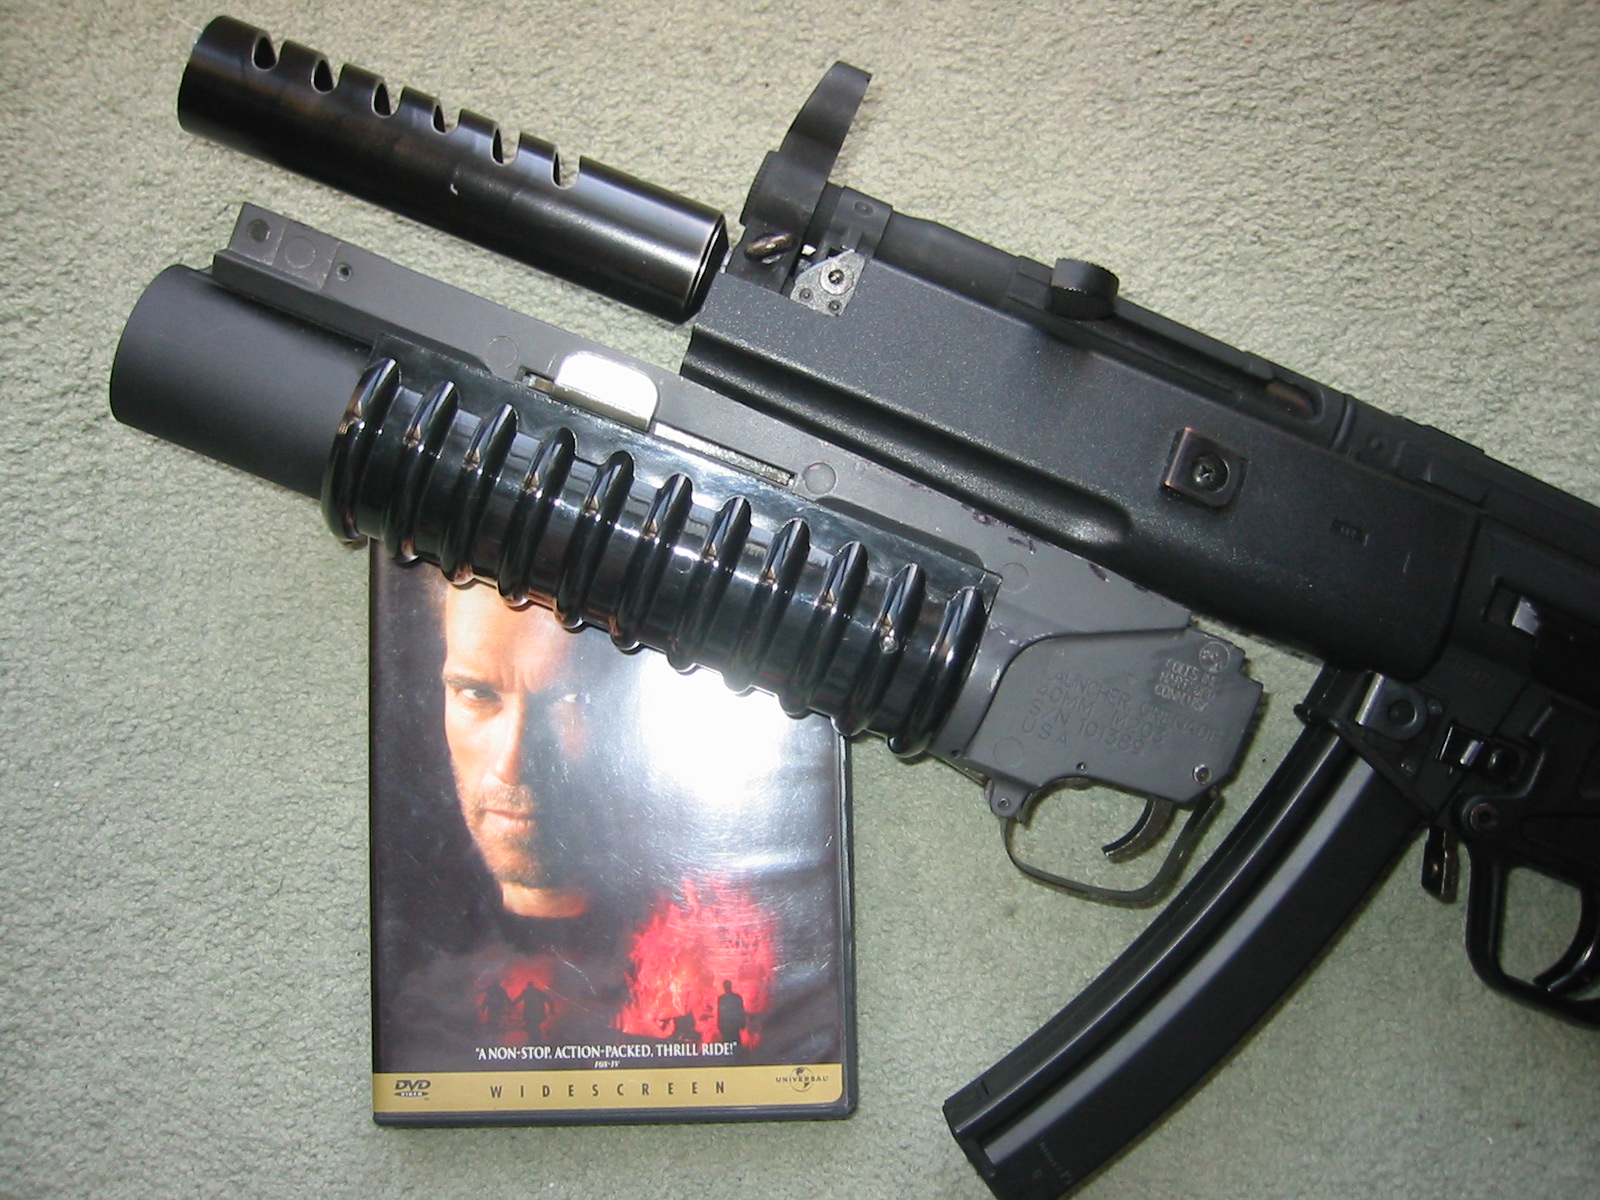
Here's
DENTrinity's
images of their EOD MP5 taken before sale. These images are here
with DENTrinity's
kind permission (thanks guys).
Now
I'm aiming to make my own version of this replica. As you will
see from the information that we have gathered there's quite a
bit more detail we can add to the design.
The
design? Well it's simple in essence basically
you'll need:
Classic
Army MP5
TM
G3 SG1 foregrip
Short
ZEKE M203 metal barrel
SP
M203 grenade launcher
The
parts for this project have come from AirsoftShop,
the parts arrived here in the UK via TNT, less than 24hours
after they left HK, which to me was astoundingly great service.
I would really recommend getting the parts from Eddie
at AirsoftShop
if you are thinking of a similar project.
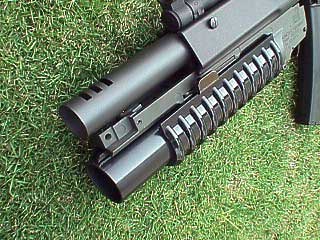
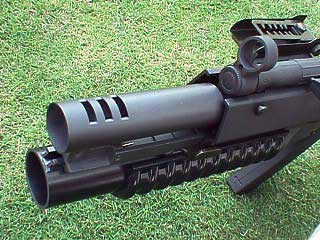
'Features'
The flashhider in the film has five slits cut into it, that cut
into the 'pipe' by about 40%. Other points of note include the
fact that the SG1 foregrip has been cut back to allow the sling
pin to be used, and that the M203 trigger guard is attached to
the replica in the film. Strangely the SG1 foregrip in the closeup
shots is missing the pin to hold it in place. This begs the question
as to how they actually attached the grip to the prop (superglue?).
It's worth mentioning that the EOD prop uses the 'SEF' style trigger
group, which is handily the same as that on the ClassicArmy replica.
Project
notes
As the project progresses I'll be adding notes here, with what's
happened, and how things are going. Please do give the project
time, there's no real deadline for this to be finished, so it
may take quite a bit to complete.
Start
date (January 2002) Well all the parts have arrived, bar
the SG1 foregrip. It seems to be really difficult to get hold
of spare TM parts at the moment. I do have one SG1 grip, but that
is on my own G3 SG1, but I may have to canibalize it if I can't
get another spare for the moment.
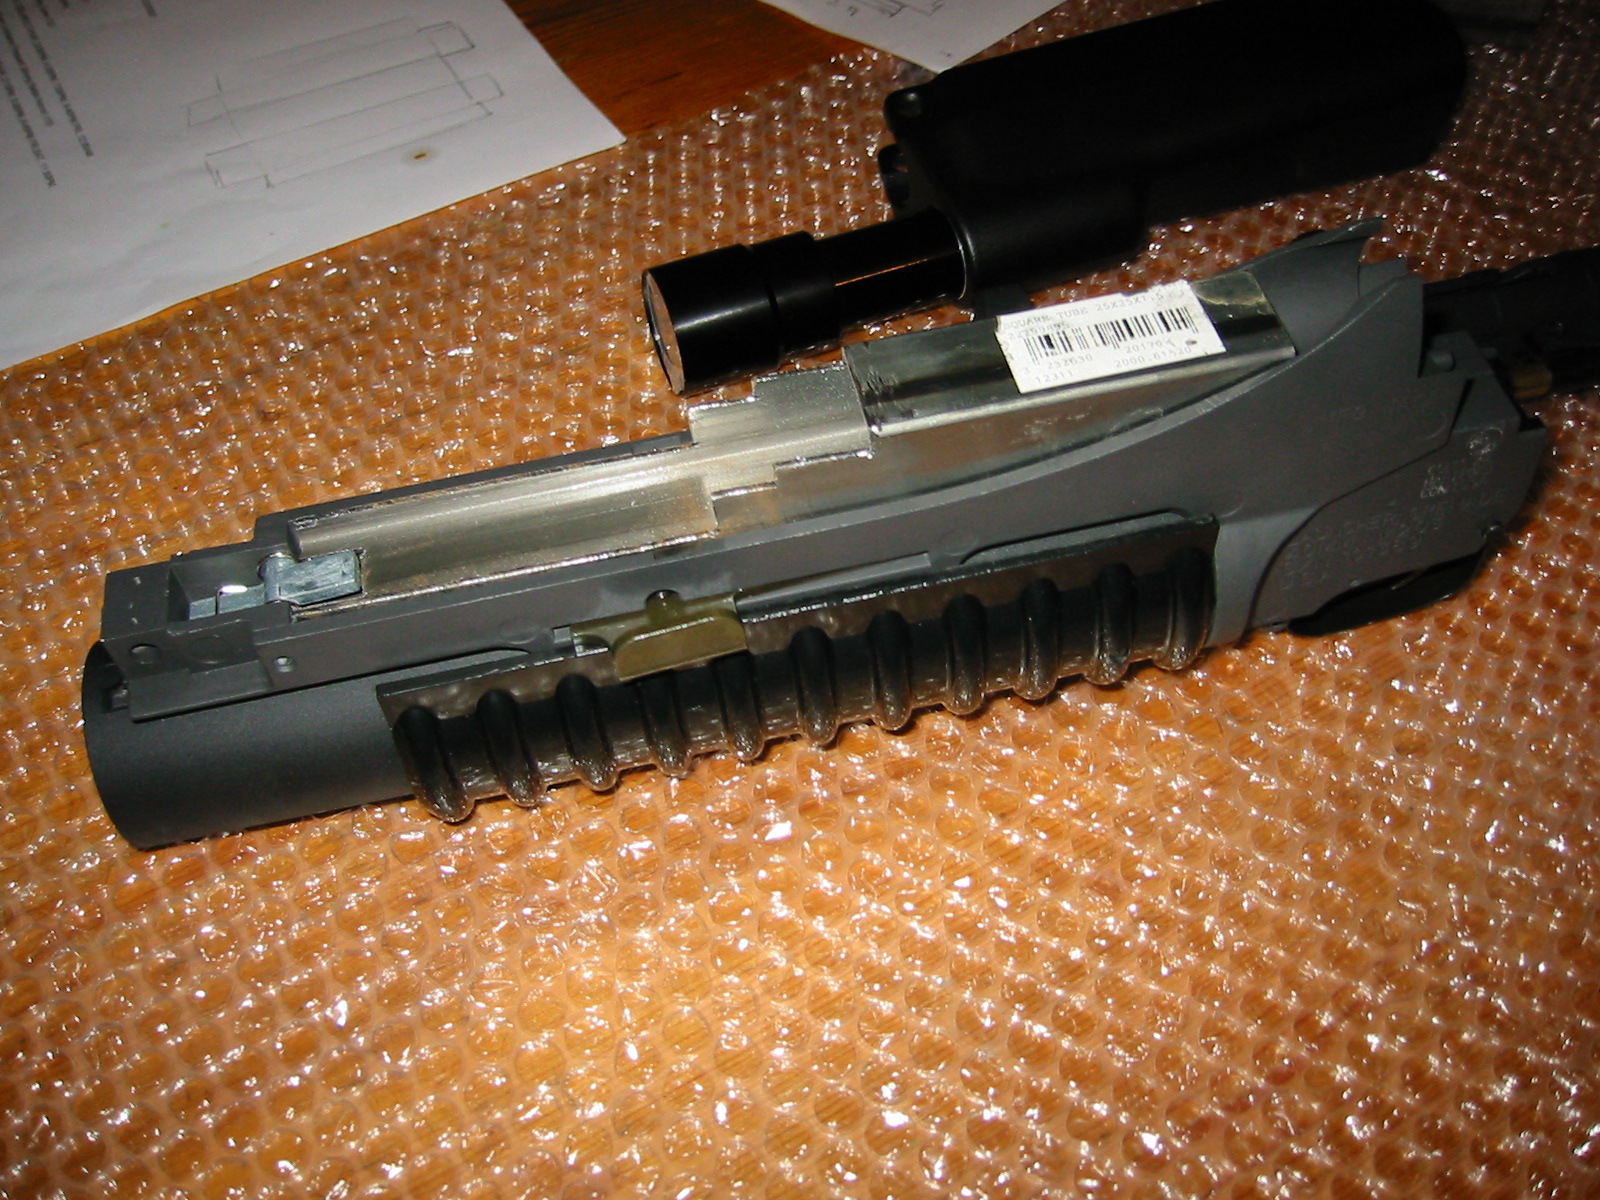
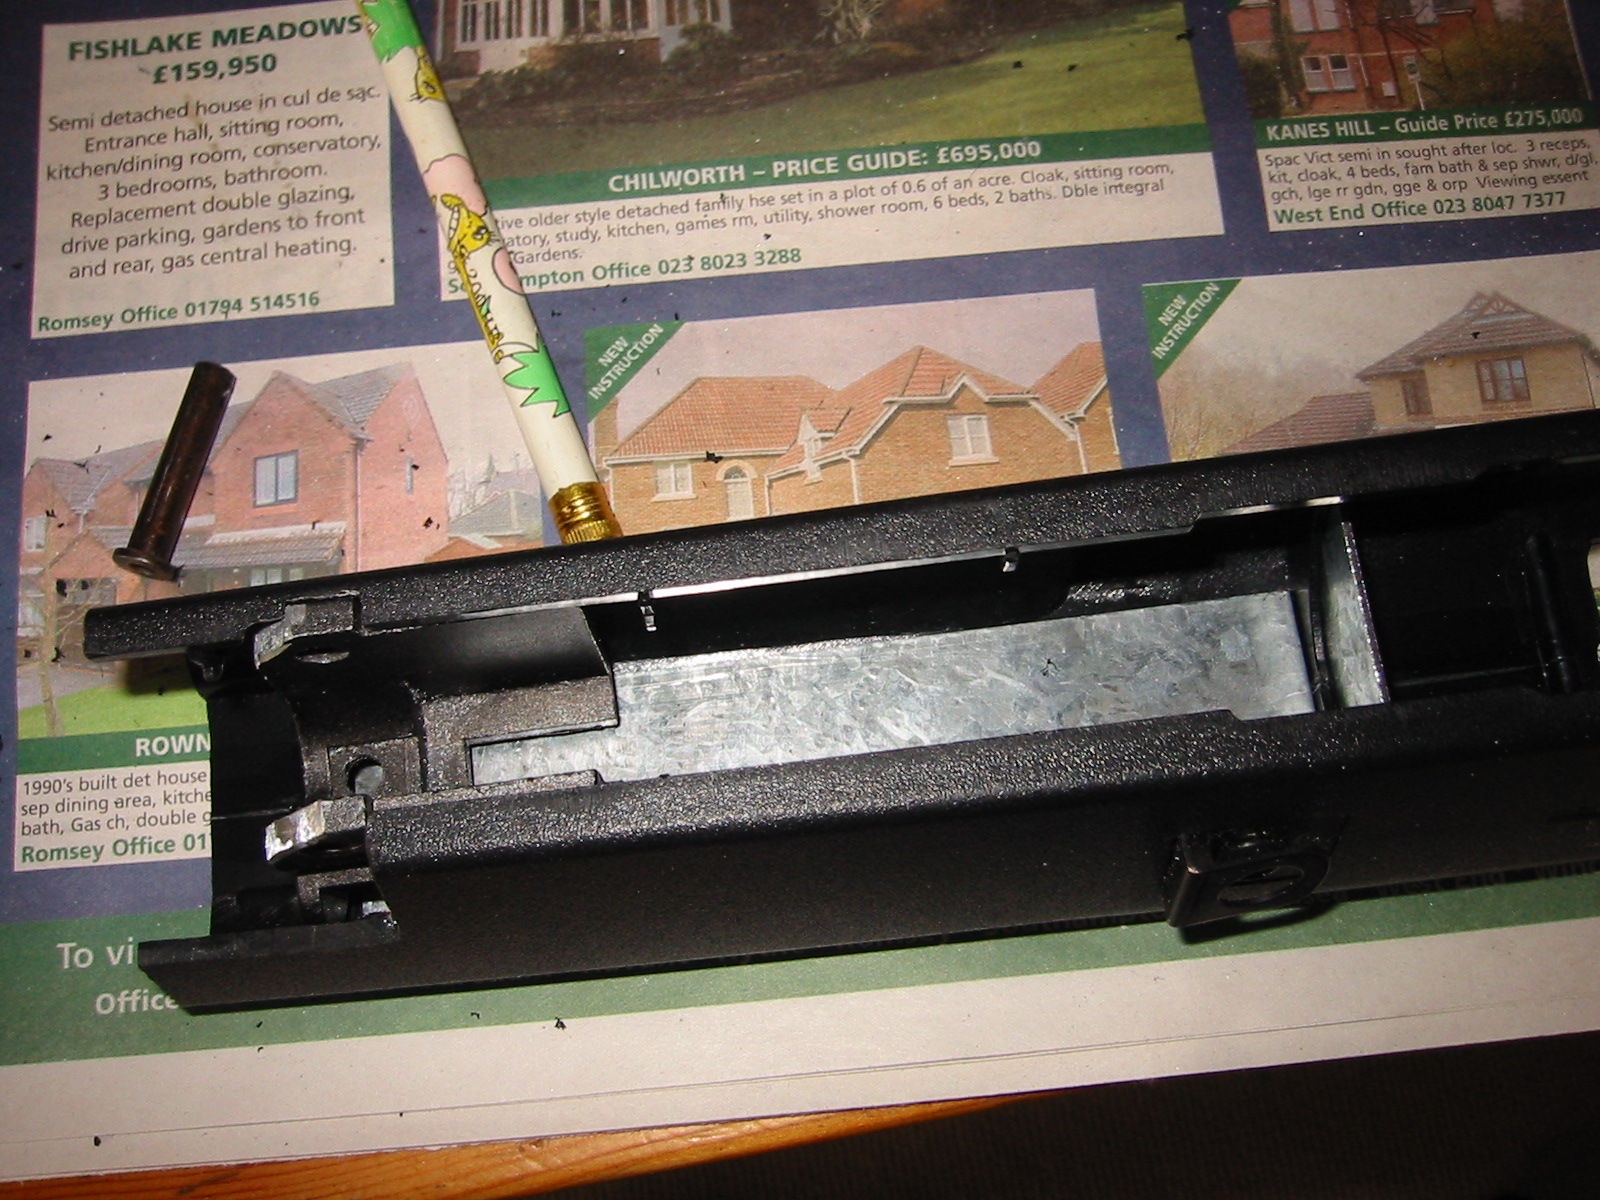
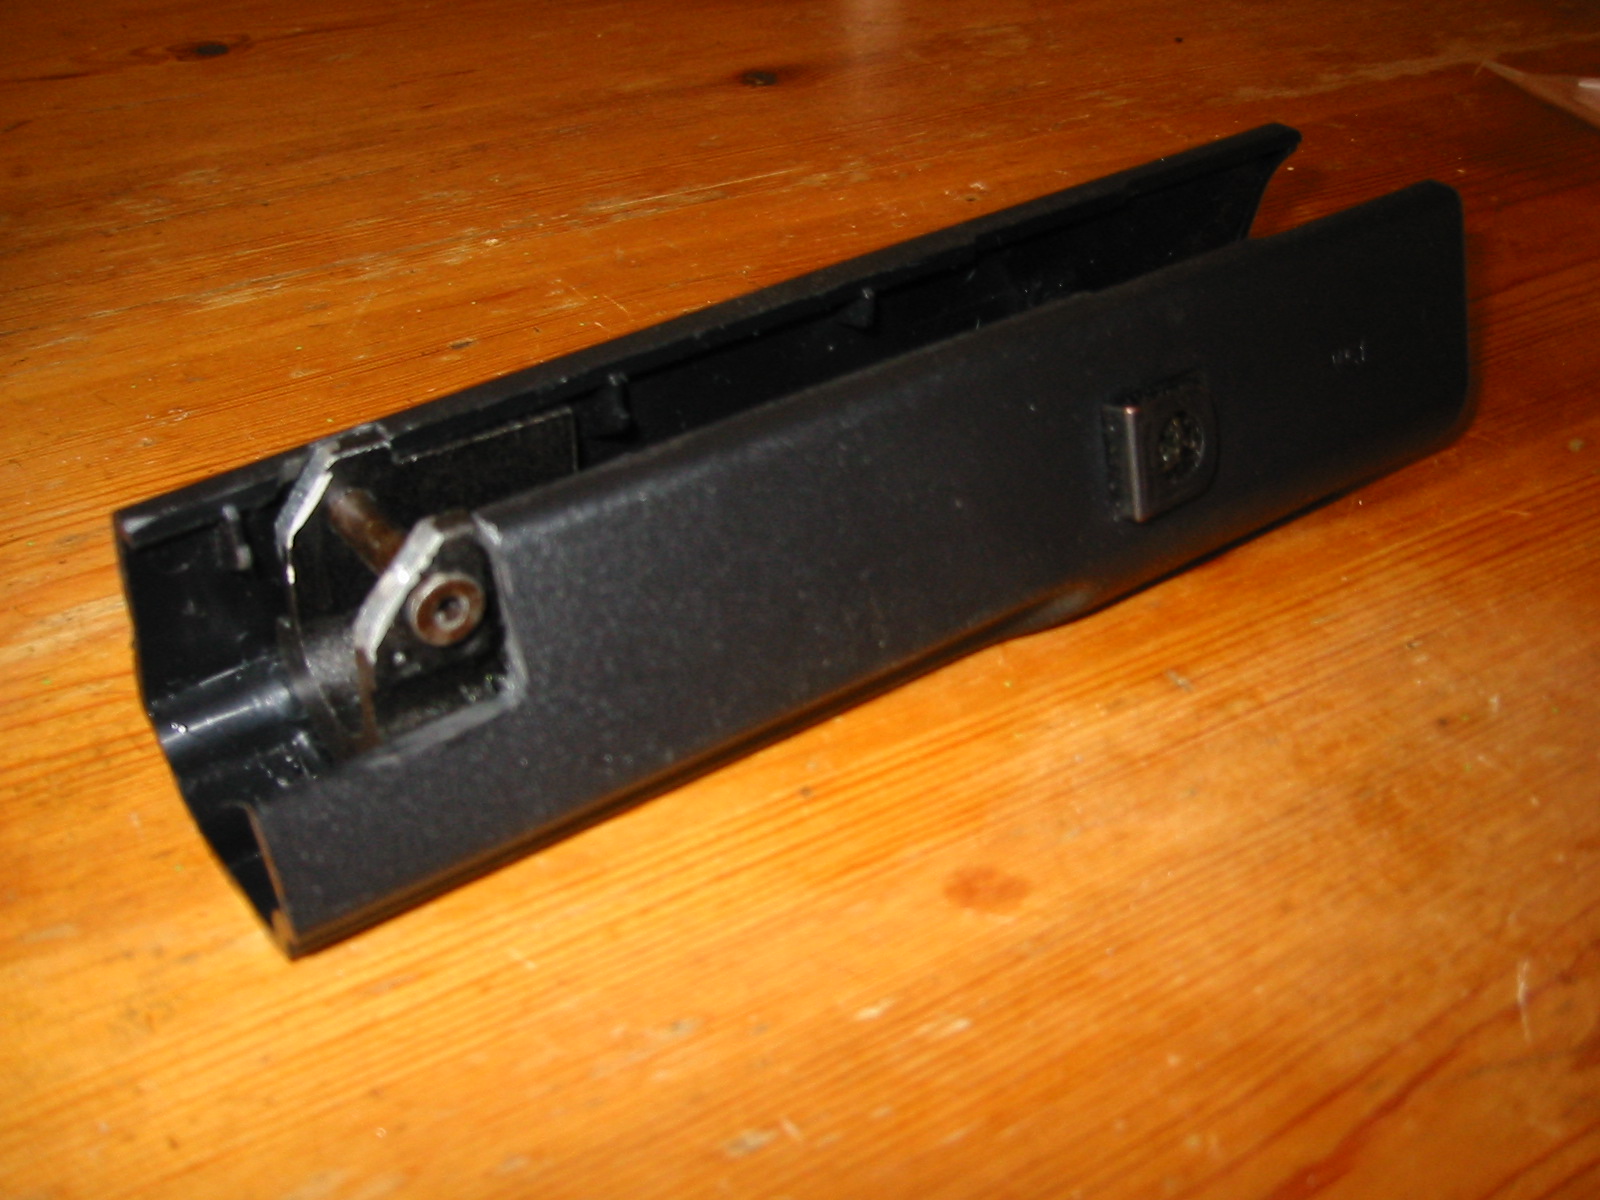
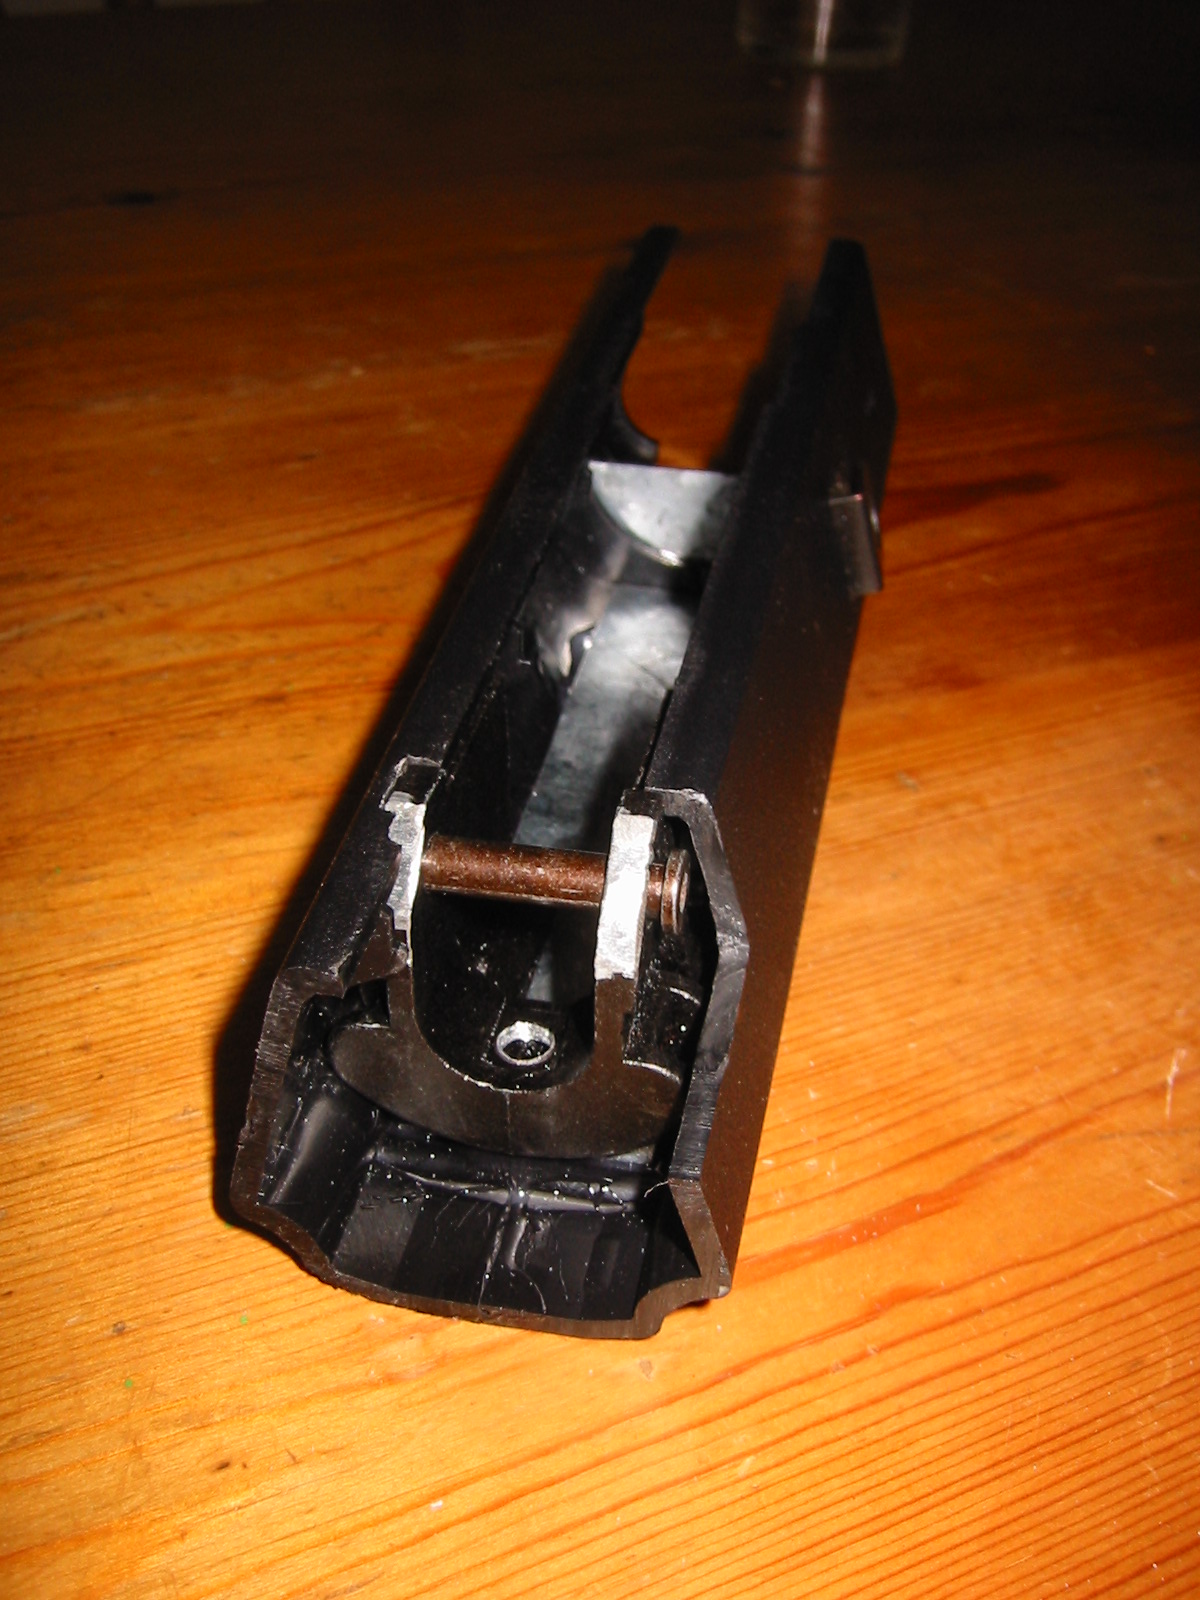
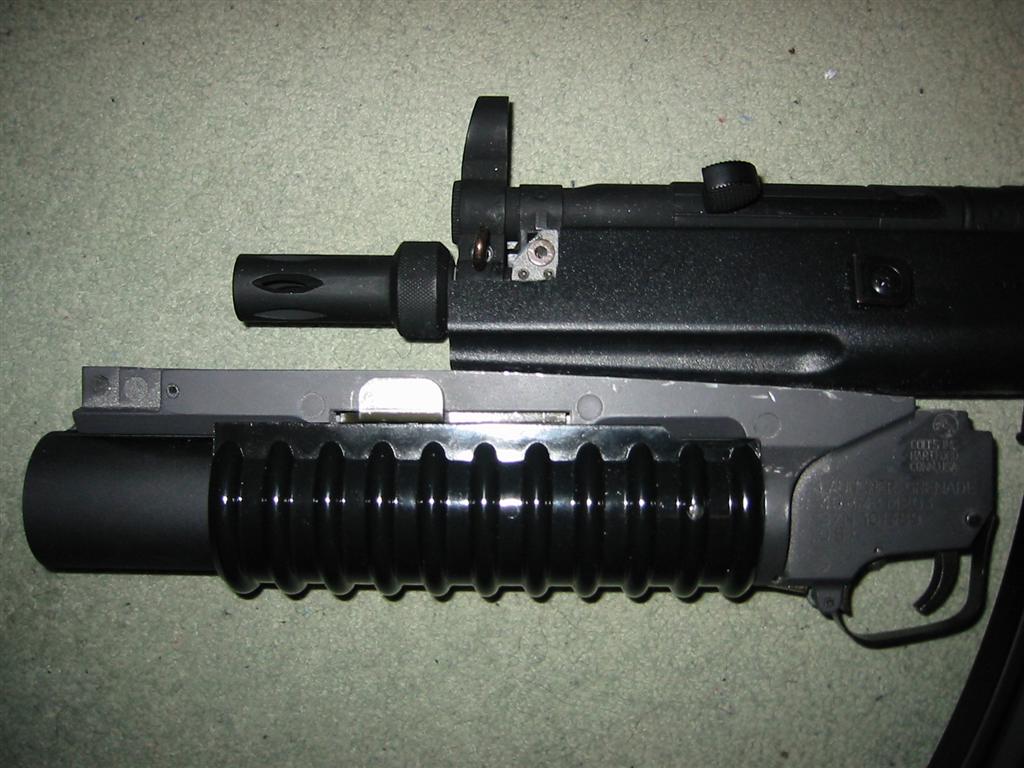
(February
3rd) Fitting the ZEKE metal barrel Well this is quite
easy (comparatively speaking) - here's how you do it: Simply take
you M203, release the pipe, and slide it forward. On top of the
mounting frame is a silver catch, depress this catch and you can
remove the shell pipe completely from the frame. On either side
of the grip you'll find several screws (3 I think). Carefully
remove these and slide the grip off, you will find two sprung
catches behind the grip, make a note of their positions and remove
them. You will not be left with the plastic pipe on a steel slide.
The steel slide is held onto the plastic pipe with some small
pins. Just tap them out gently with a tac hammer and a small punch.
To fit the barrel you simply follow the above instructions in
reverse order.
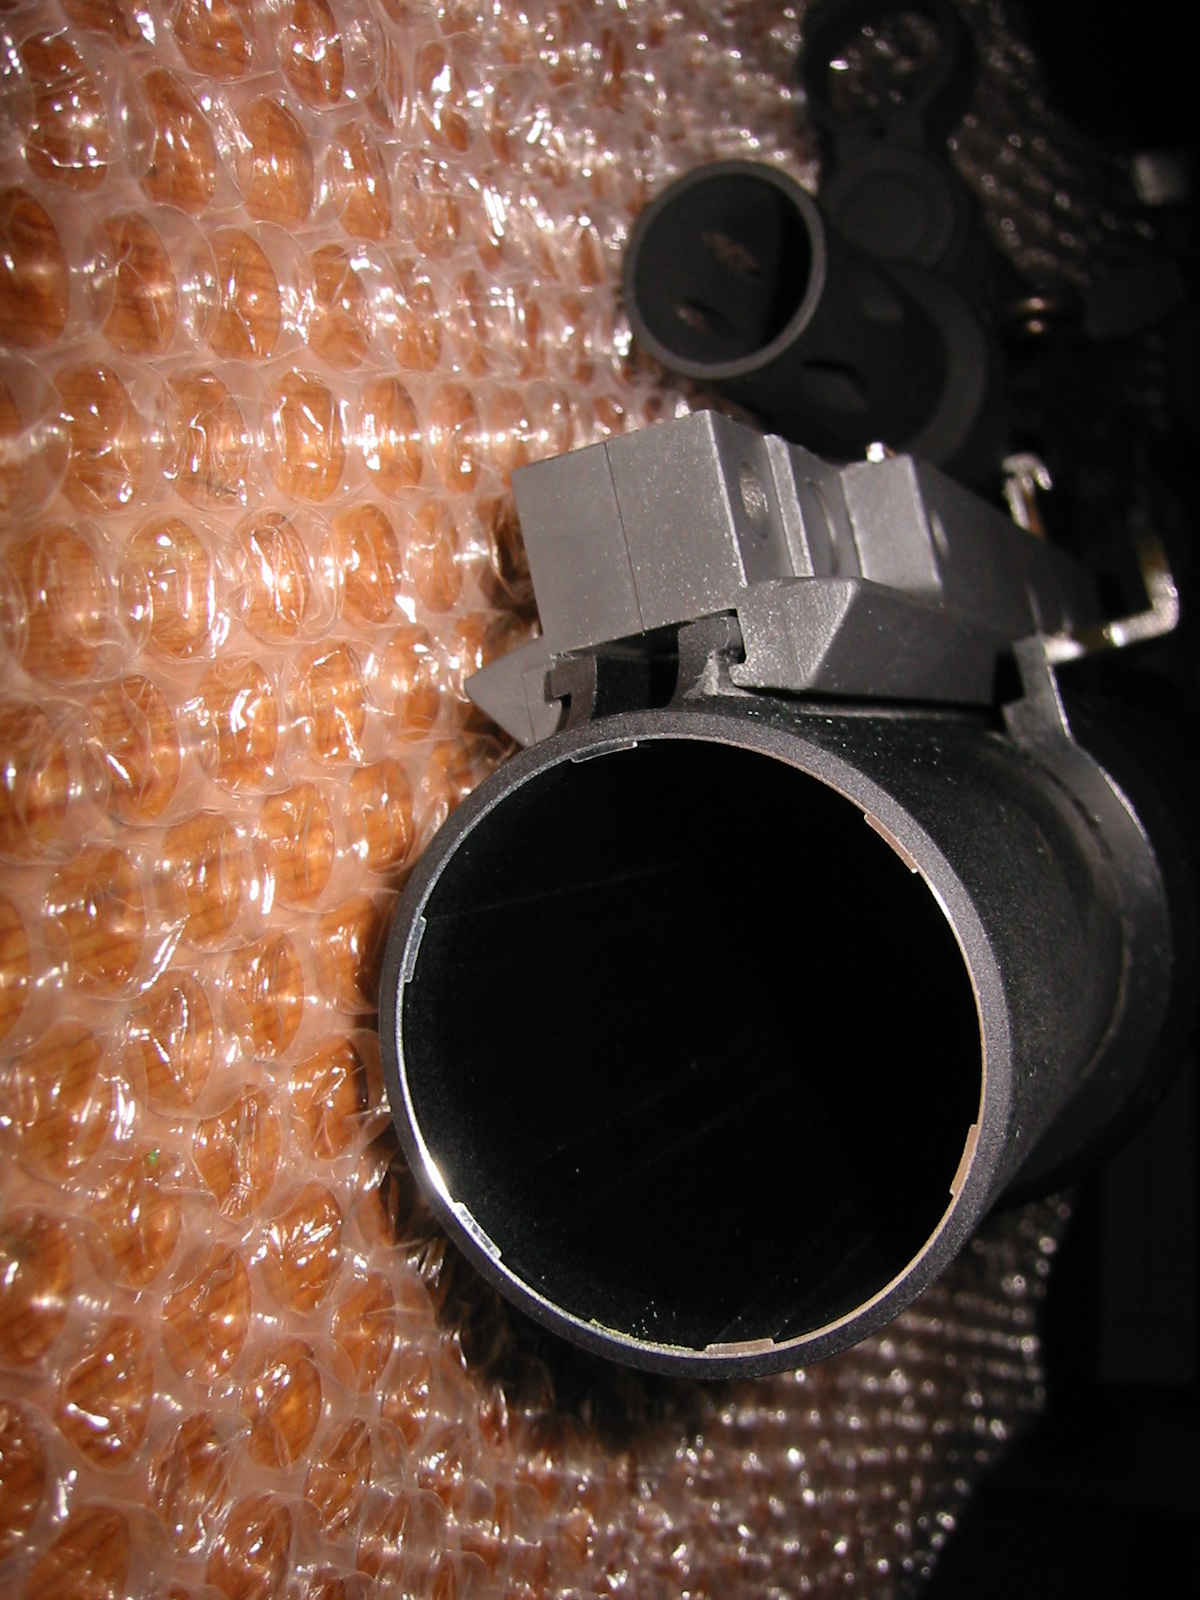
Well
that was the easy bit done, although it's possibly the most impressive
metal part I have ever seen! The ZEKE M203 barrel is gorgeous,
and features a rifled inner barrel, and a two tone cross through.
Just note the detail in the inset image above left.
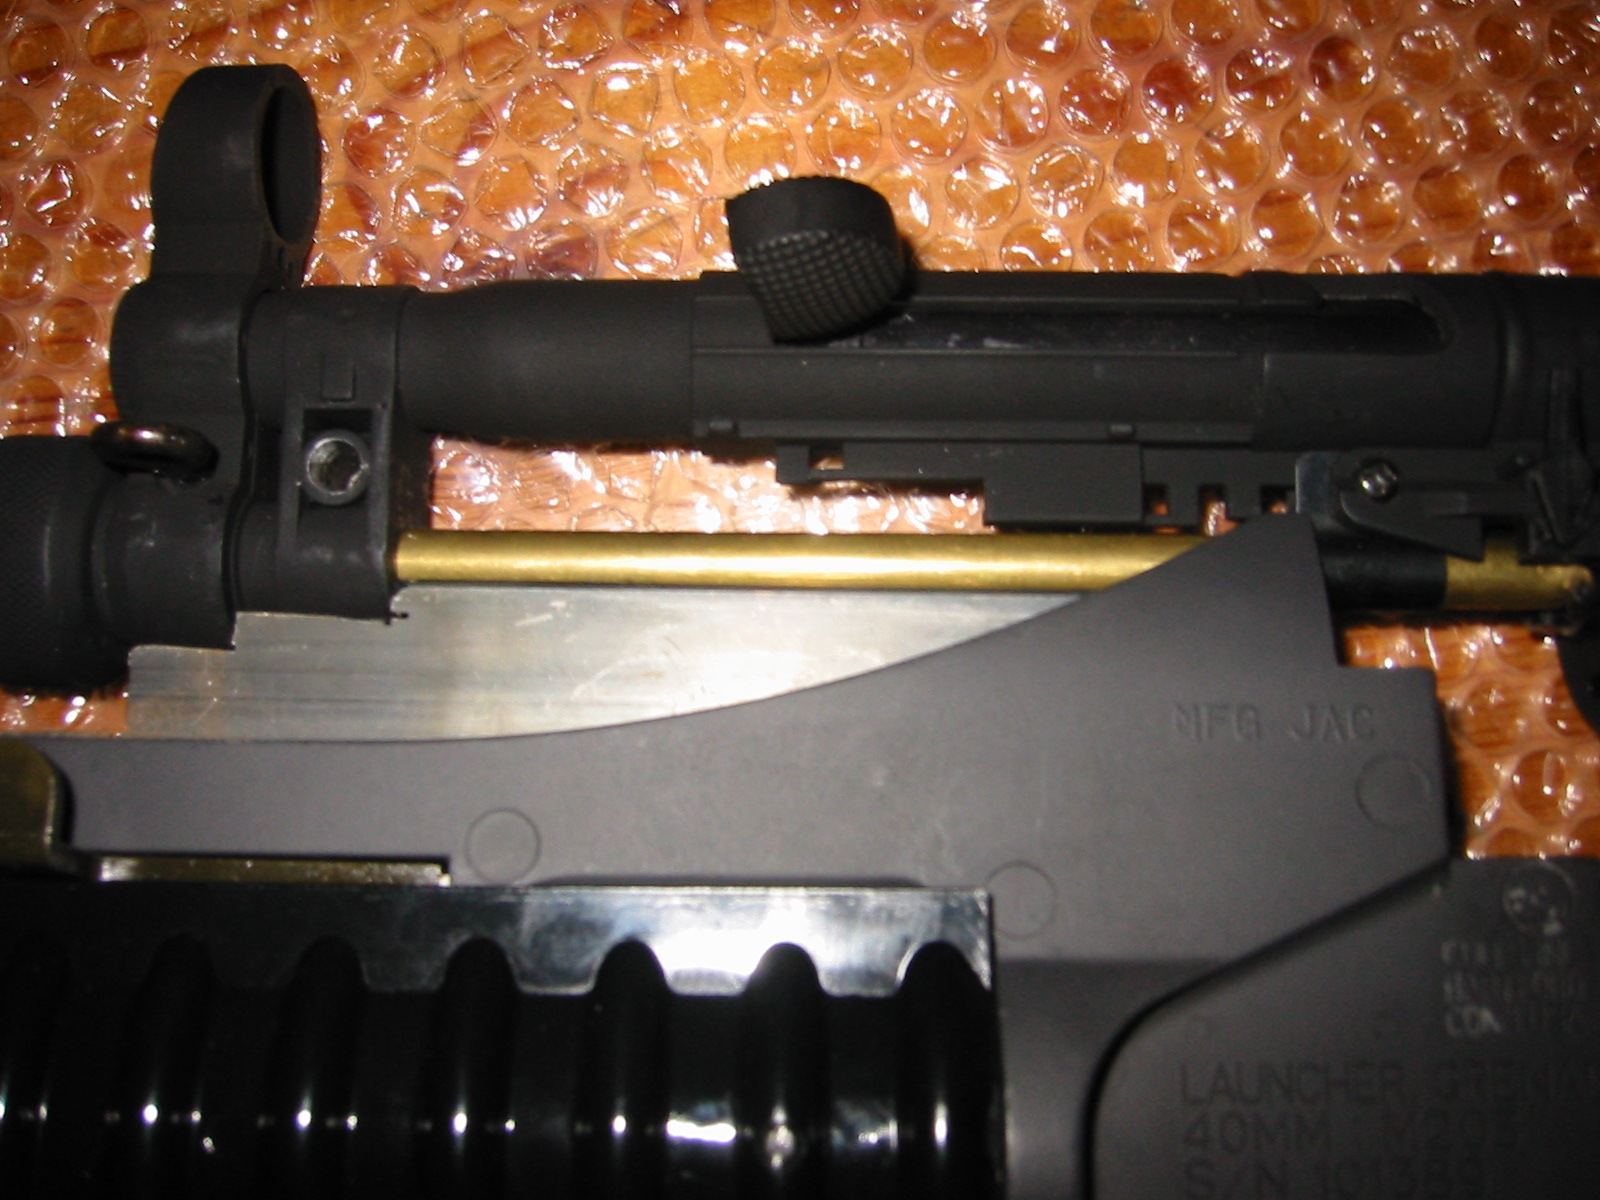
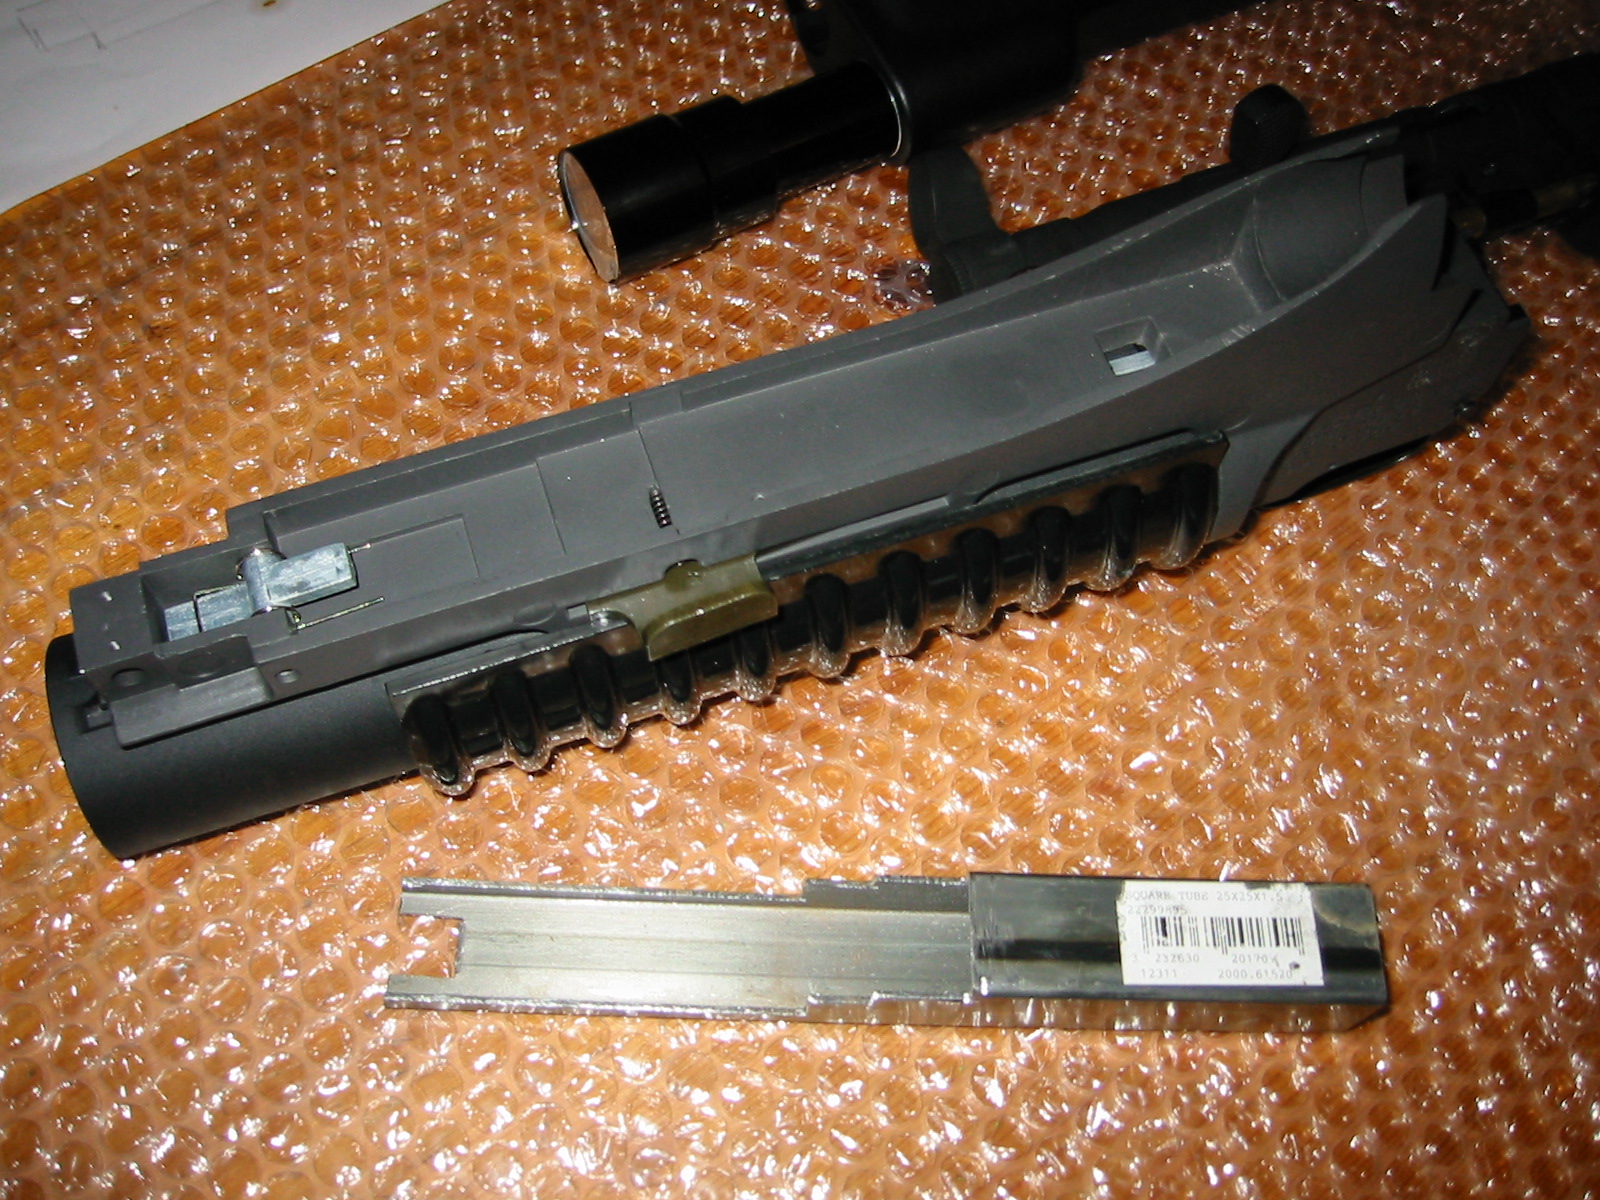
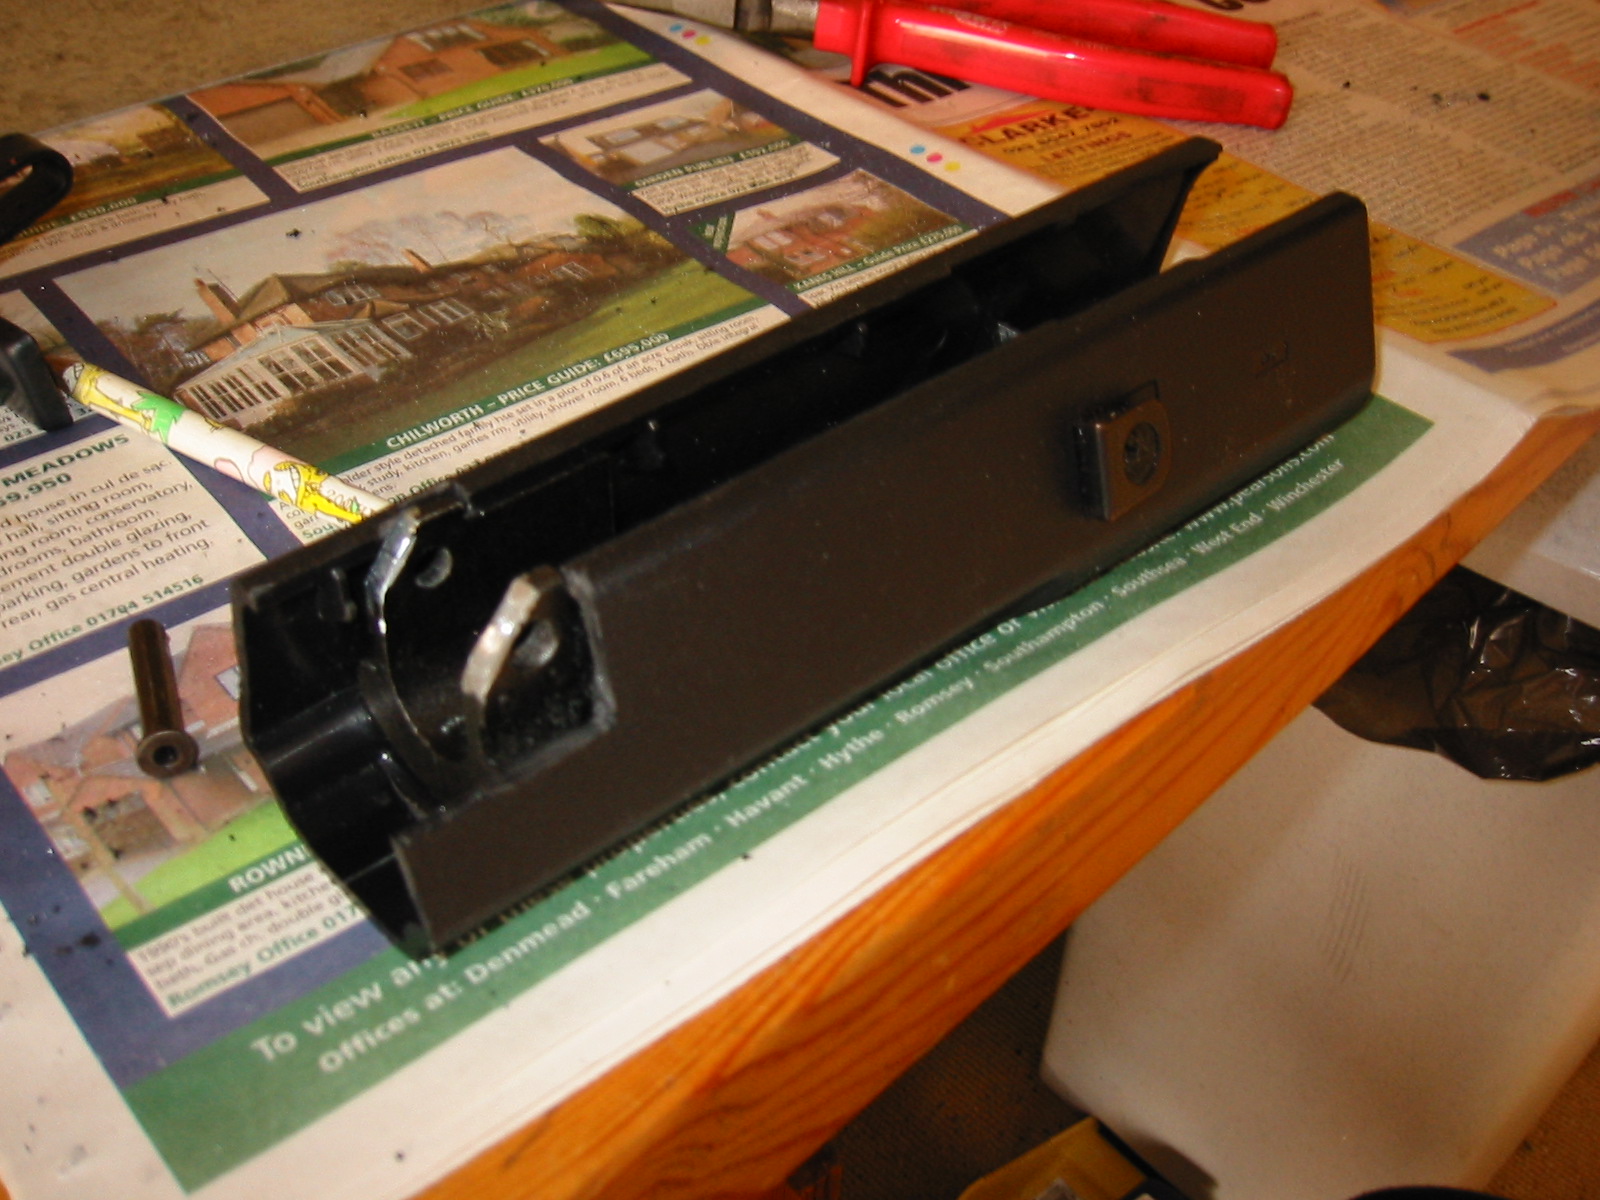
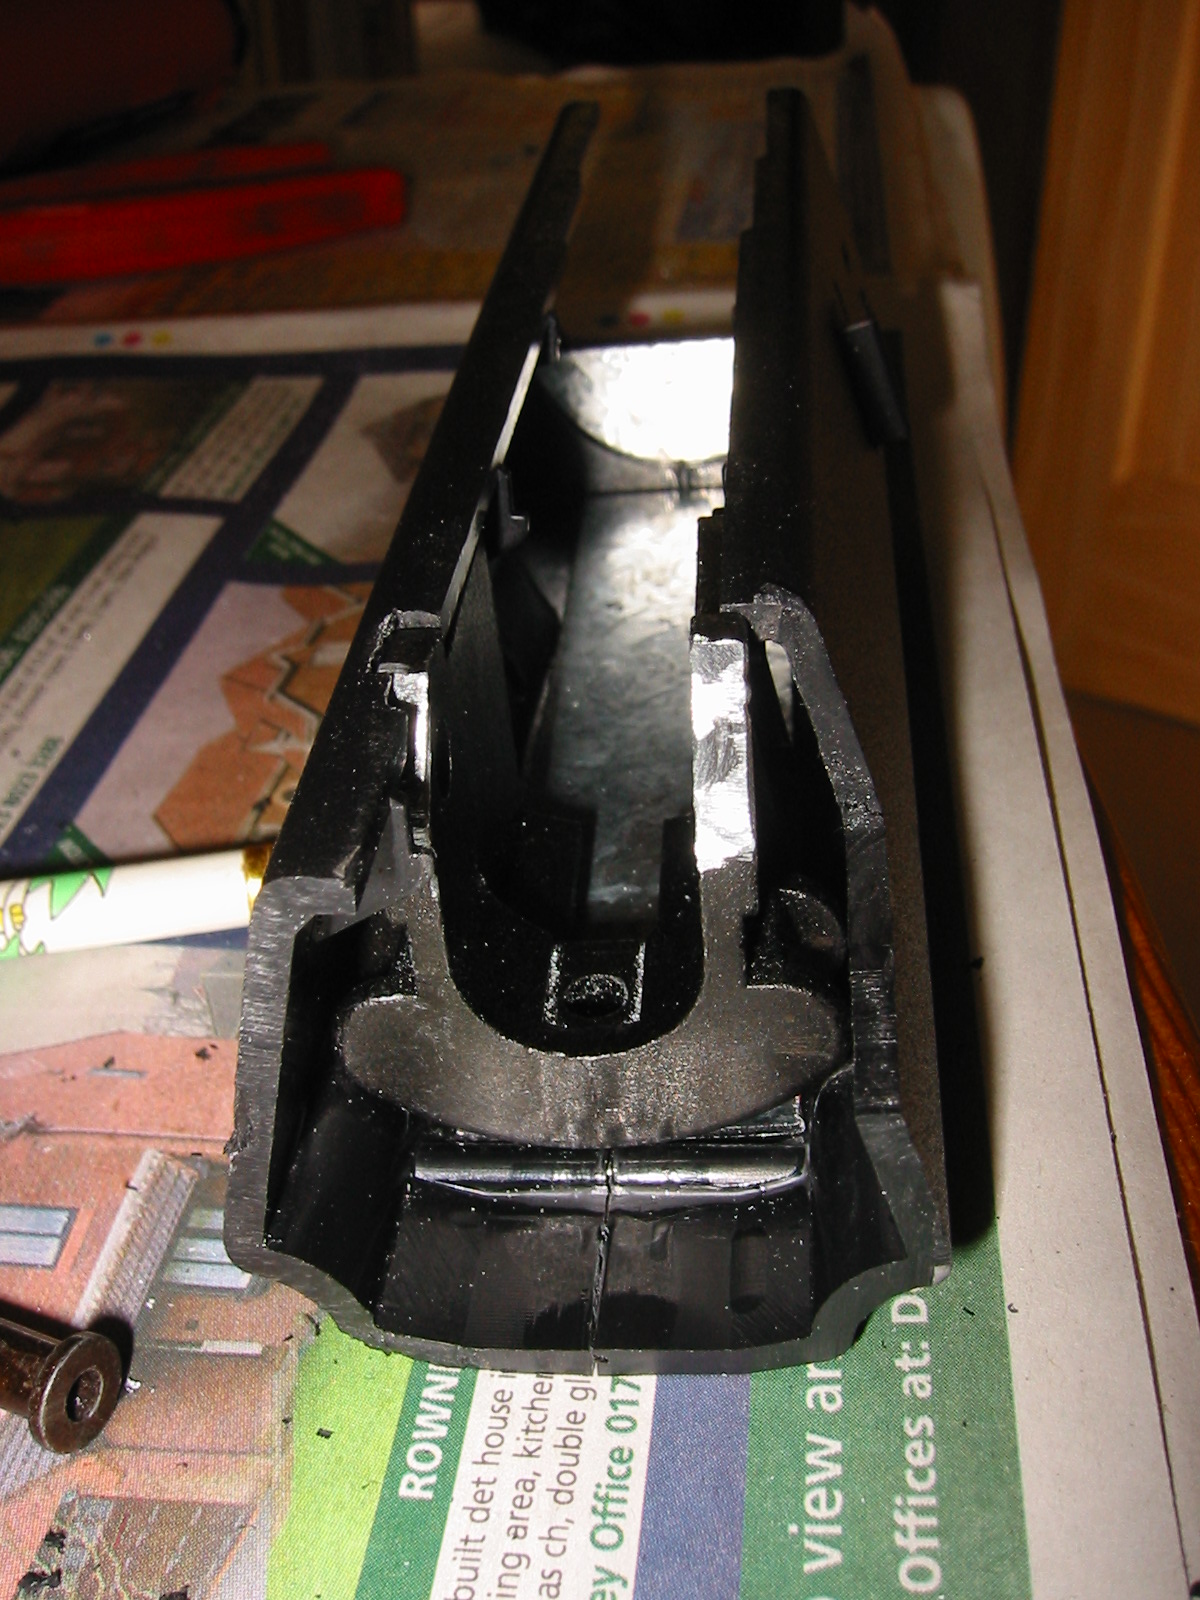
(February
9th, 2001) Day 2 Making up a frame to bolt the
M203 to. Well we've been off to B&Q and aquired some
sheet steel, and some 25mm square box steel. Handily this
is just big enough to fit inside the M203's frame, to
allow the grip to be mounted to the steel, and the M203
in turn to be bolted to the 25mm box.
I
dunno how much sense that makes, but hopefully the images
to the right (and below) make some sense of it all.
The
inner barrel itelf isn't IMHO strong enough to allow the
M203 to be mounted to it directly, so the SG1 foregrip
will have to have a metal frame built inside it that holds
the M203 to the grip itself. Sounds simple eh? Well I
wish It was :) The main problem is that the M203 doesn't
have a flat surface to bolt to, and will most probably
need to be cut down to fit properly. Now this is where
the big problem at this point lies, SPM203's aren't cheap,
so any choice made has to be the right one, as I'm not
going to make a mess of it at this stage.
To
help with the construction a new spare G3 SG1 foregrip
is on order and should be here shortly to aid in the design
of the front end.
(March
24th, 2002) Day 3 Well the two SG1 grips came
last week (thanks to Matt, and DENTrinity), so I started
work on the foregrip. Now that I actually have the grip,
I've taken a different tact to attaching the M203.
Firstly..
one recommendation, don't use a hacksaw, get a dremel
and a cheap(ish) jigsaw from your local hardware store.
I spent over 2 hours cutting the steel box pipe (above)
by hand, and spent 15 mins today, cutting down all kinds
of steel and plastic with ease. You have to love powertools.
Now please remember kiddies, take care with powertools.
I am rather assuming that you know what you are doing
here. If you're in any doubt seek help.
Anyway.
so what's the game plan now? Well if you look at the technical
manuals for the G3 series you'll spot that the G3 SG1
foregrip is two piece of plastic, bonded into two using
metal pins.
Now
in cutting the grip down to size, you significantly weaken
the grip. In fact it's highly likely that the two halves
will come to bits if you saw it with a jigsaw.
Given
the fragile nature of the grip, what I've done is detach
the two halves, and rebond them with some decent two part
epoxy glue (I used some hard as nails Araldite). Be sure
to do this is a ventilated room, as the stuff really stinks!
Now that the two halves are well attached they need reinforcing
to take the weight and strain of the M203. I cut some
1mm galvanised steel sheet down to fit. One piece was
inset into the bottom of the grip, and the other piece
was cut into a horseshoe style shape to bridge the grip
at the back - this makes the grip very 'unsquishable',
and also adds a lot to the weight. Make sure to use a
lot of glue to bond the steel to the grips, the more the
better, as it ensures that everything will stick well.
At
the front of the SG1 grip you'll find a steel attachment
to fit the bipod. Well being me I'm not one to cuck bits
away if they can be recycled. If you carefully split the
front of the grip (remember you hacked this part off to
cut the grip down in the first place) you can easily remove
the front attachment part. This new part easily fits inside
your new grip (as shown). You'll have to cut down the
cast metal, as otherwise you can't lever the grip on,
as the square fitments catch on the bottom of the foresight.
As you'll see after 10 mins with a sander and a dremel
with a cutting disk, I've cut the corners off so that
you can slide the grip on easily.
The
plastic of the grip has also been carefully filed down
so that the metal insert sits easily. It's not glued on
yet, but as you can see it features a 6mm bolt hole in
the bottom. I've tapped this so that it now fits some
6mm bolts that I have.
When
the glue has cured (normally takes about 12 hours to completely
harden) the M203 is going to be cut down to create a flat
mounting surface at the top, the M203 is then going to
be bolted on with 3 bolts (one will go through this new
bolt hole). In this way, a lot of the M203's weight will
be supported via the front foregrip pin.
There
is also a metal plate that I've cut to fit the underside
of the grip. As you'll see the grip has an angled bottom,
so the metal spacer (that goes between the M203 and the
grip) will need to be angled to ensure that the M203 doesn't
point skywards.
Three
6mm holes will be drilled into the frame of the m203,
and through the grip, and the two metal plates on either
side of the foregrip. The bolt heads will be recessed
into the M203 frame, and the nuts will be inside the foregrip.
What's
left to do? Anyway.. that's a lot of the
hard work done. The SP M203 needs to be cut down (this
will require a lot of care not to mess it up), the steel
wedge shaped spacer needs to be made, and a new pipe needs
to be cut to shape and mounted onto the present flashhider.
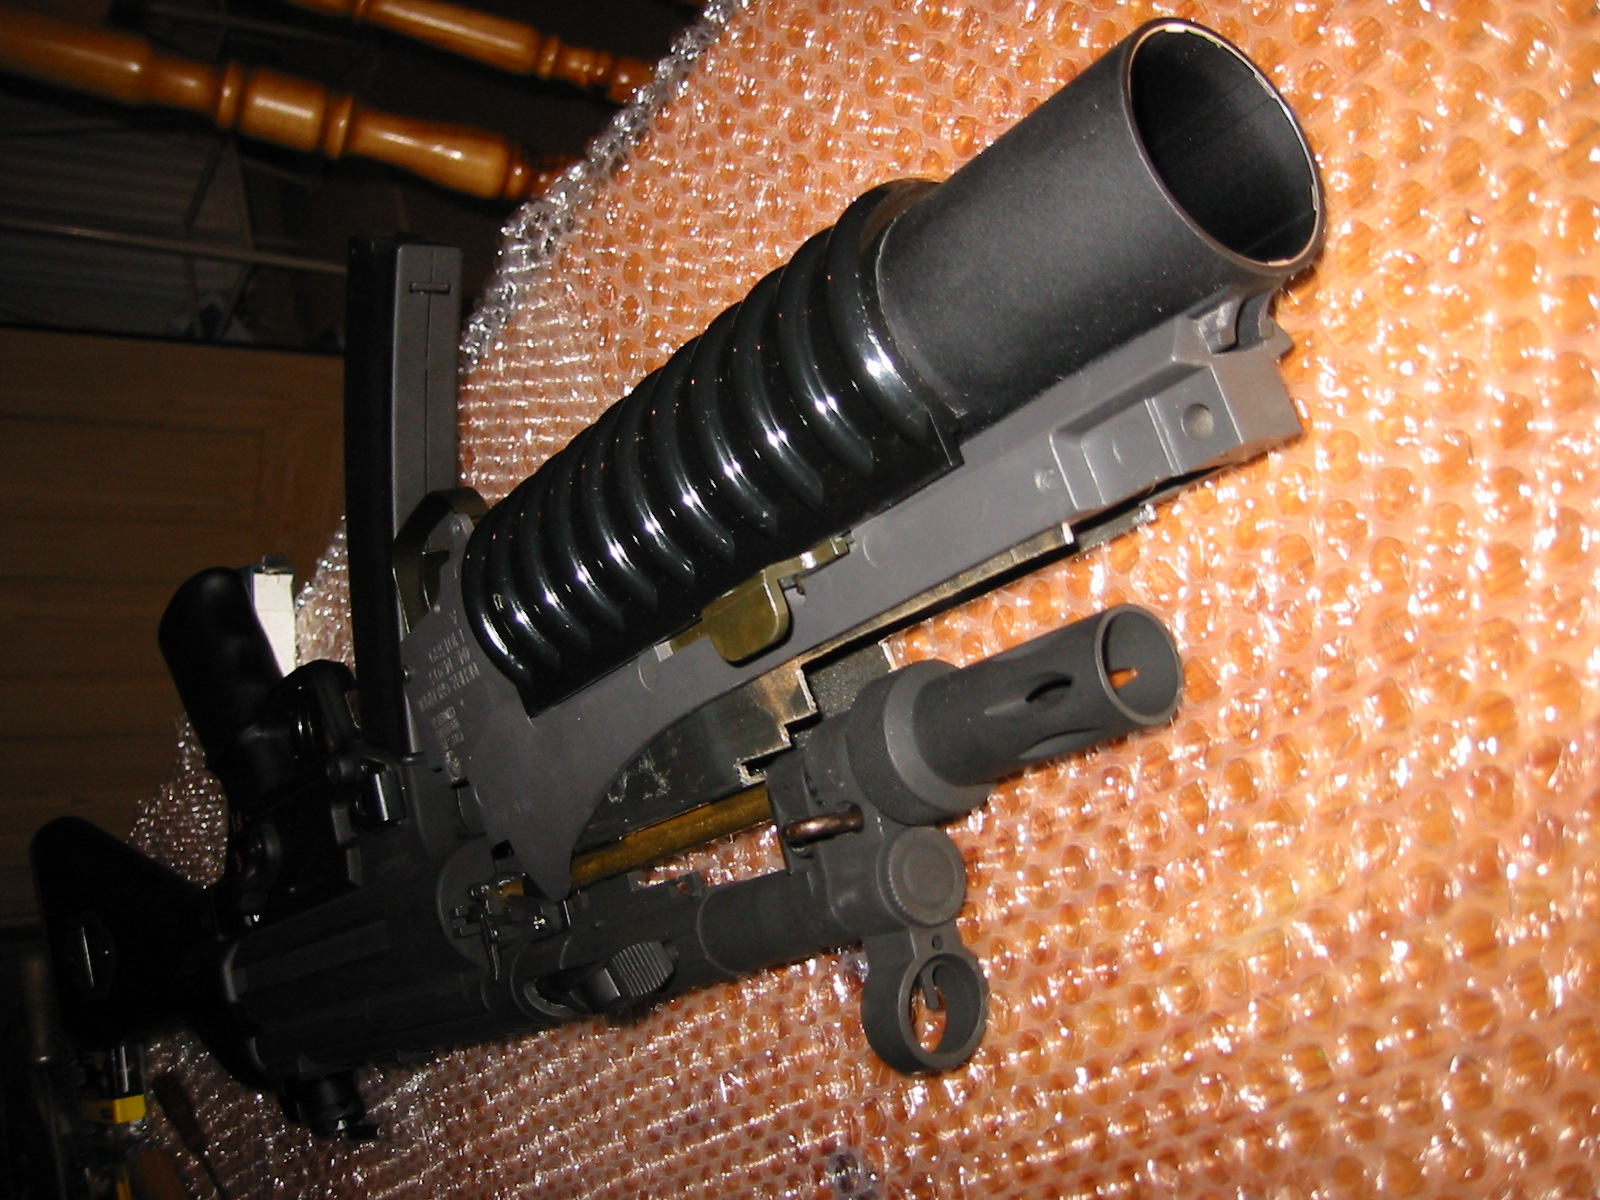
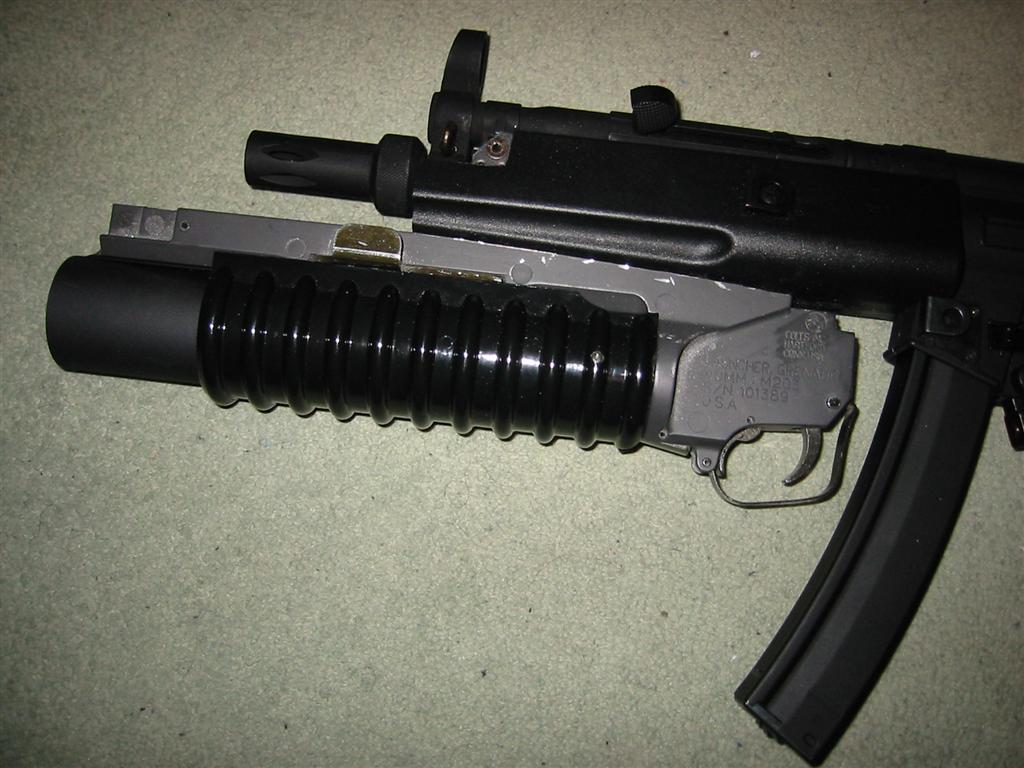
(April
22, 2002) Day 4 It's been a busy night and the dremel
has never seen so much work in one night. What's been done?
Well the M203 has been cut right down, and now bolted onto
the newly fabricated grip. Here's a photo:
Sadly
I scratched the SP M203 receiver a few times, but that doesn't
matter as it's going to be sprayed matt black with some
hammerite/plasticote spray in the next session.
There's
not a great deal left to do now. The SP M203 is attached
level and straight - believe me that's not easy to do. :)
The custom flashhider, M203 side sight and M203 trigger
guard need work now.
At
a guess I'm looking at another 2 full days work, but damn
is Jericho heavy now! The full metal body combined with
the full metal grenade launcher makes for a truly awsome
piece of kit.
I've
also managed to get the custom SG1 grip on real tight. This
was done by reusing the SG1 frontgrip metal front pin block,
and by reworking the inside of the grip. When I get a few
more free moments I'll snap a few more photos, and get some
sketches up of what I've done. Given the environment that
I was working in (high speed drills, and dust) I didn't
have my nice and expensive camera near me. :)
The
metal frame that I've used to mount the SP M203 to the grip
is a really a prototype, so I'm going to remake it in the
next day's work so that the M203 is mounted closer to the
flashhider. At the moment, I'm more than happy with where
I have got to.
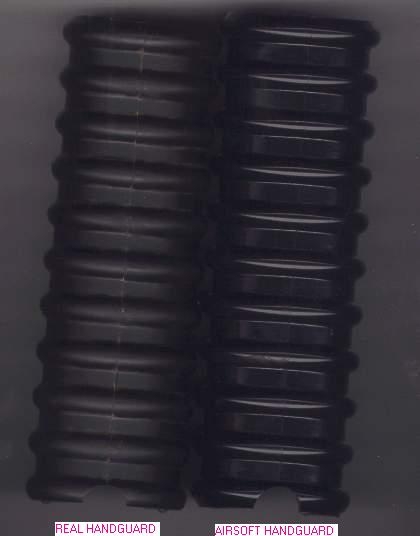
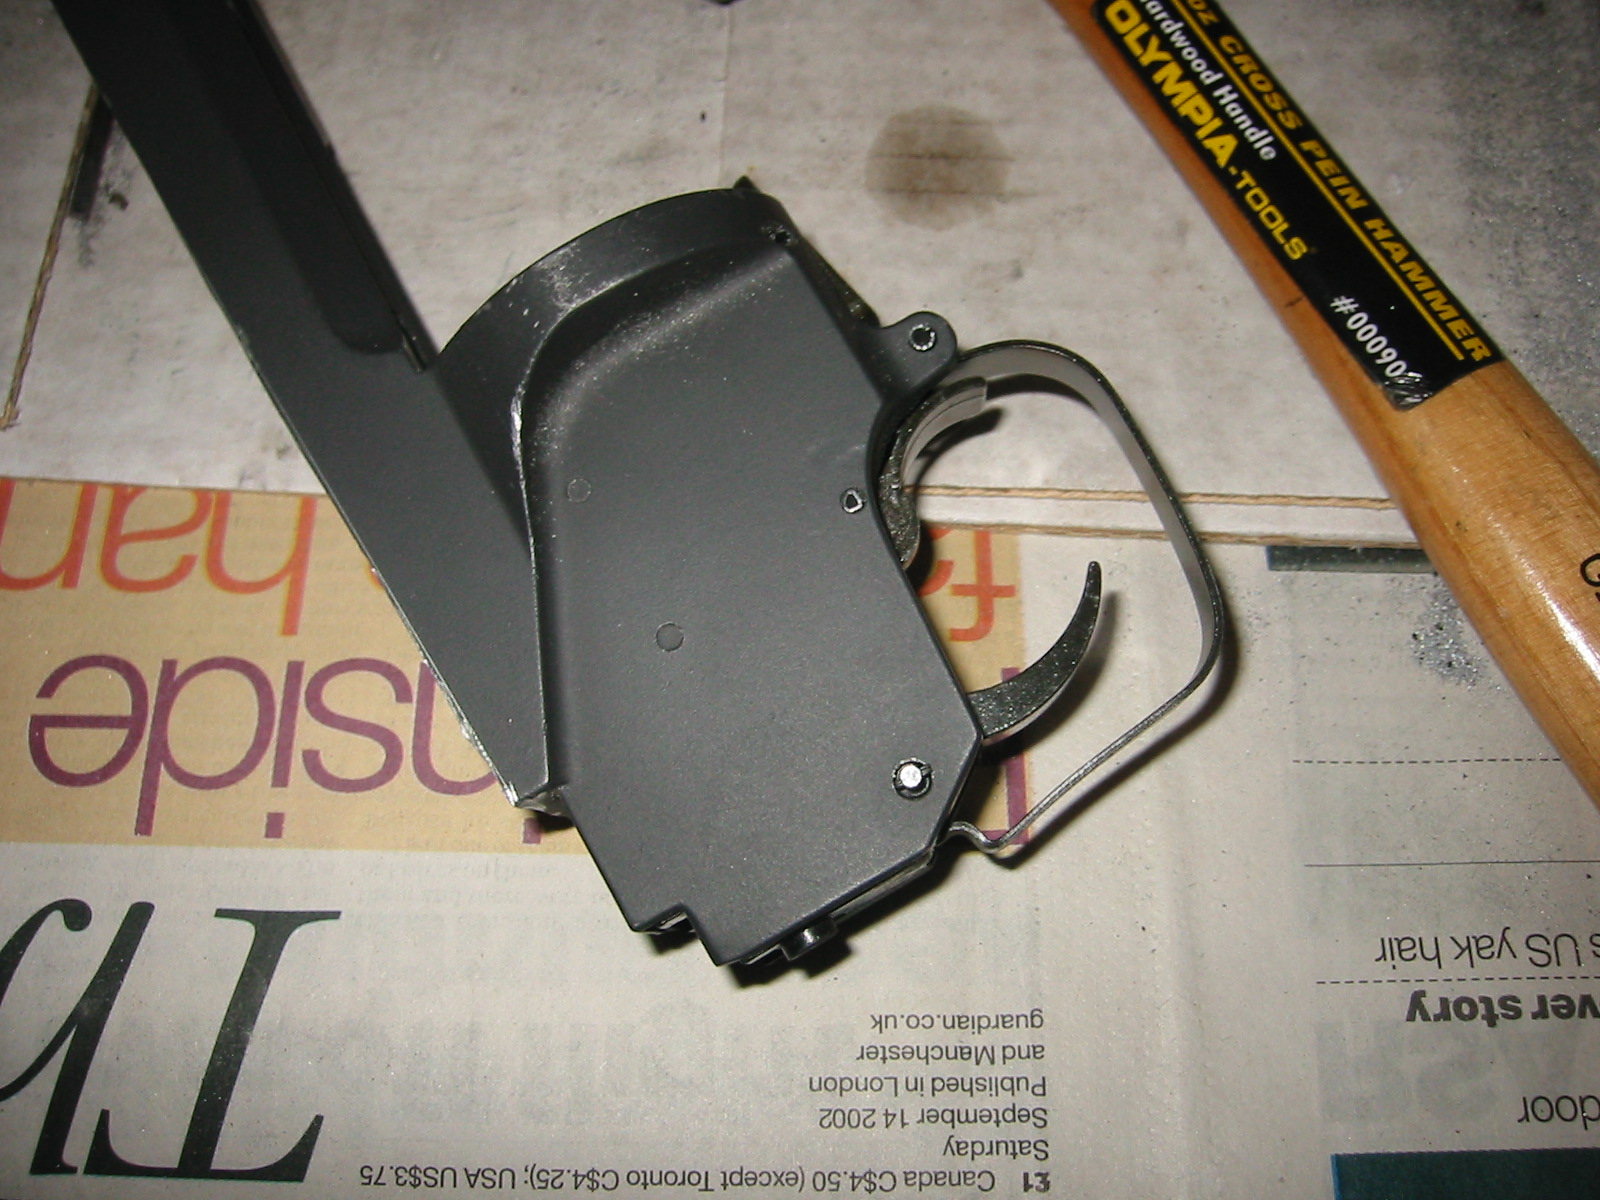
One
further bit of information I've received is from a nice
guy in the US (he asked to remain anonymous). Above you
can see a photo of a real M203 grip, and that of the real
deal. As you can see the Airsoft version is very wrong in
looks. When I get a bit further in the SP M203 grip will
be sanded down with sequential grades of glasspaper to achieve
that nice flat matt black look.
(September
16,2002) Day 5: Well it's been some time since I've
had the ability to get back to this, but after a good few
hours of work tonight, I've re-cut the SPM203 and shaped
it as shown. There's more to be done, as it's not quite
laterally straight (yup I'm a bit of a perfectionist), but
the look is getting there.
The
cuts along each side were milled out with the dremel with
a ferodo stye cut-off disk (this takes about 1 hour or so),
and then I proceeded to cut off the top section by hand
with a large hacksaw. Needless to say this is a long painful
process. The reason for the difficulty is that I don't have
a bench vice that's suitable for clamping/securing the M203
frame to for cutting so I have to hold both peices by hand.
Here's
some more photos of my living room carpet: ^_^
Warning
tangent approaching!
It occurs to me that I haven't mentioned the 'dremel' I'm
using. To be fair it's not really a dremel, but it's much
the same. Black
& Decker make a clone of the original US Dremel
for about 1/3rd of the price called the memorably named
'RT650KA'.
It comes with handy features such as being "In FireStorm™
orange". But yay, lest thee not forget the saving
power of orange tools.. .it saves us Brits from losing them
in the workshop. Nope I couldn't figure it out either, personally
I prefer my tools not to look like a Bob the Builder
accessory (for anyone in the US, Bobo is a kid's animation
about as annoying as that Purple dinosaur you guys get subjected
to), or a Terry's Chocolate Orange (for anyone that
I've lost here a TCO is chocolate, round and tastes of orange
and comes in a bright red foil wrapping) but there you go,
that's the price you pay for cheap tools. I picked mine
up from Argos
"why?" you ask, well Argos
know nothing about powertools, the only difference between
them and any other UK DIY chain being that they don't pretend
to know anything about tools, hence making them trustworthy.
Oh before I forget it costs around 39UKP, and comes in a
handy tool box with loads of sandy bits and other wierd
looking brush like things (yes, yes I know but I threw the
manual away didn't I? I am a bloke after all). You'll need
about 7 of the black cutting discs, you get two in the pack,
and you can get more as 'Dremel' accessories in a cutting
pack (costs around 10UKP).
What's
left to do now is to fit the customised grenade sight to
the RHS of the grip, and to re-spray the M203 frame black.
The grenade sight is basically an 'L' shaped piece of steel
with the original M16/M203 sight bolted onto it. I've sourced
somewhere to get a custom muzzle/flashhider made and anodised
(I hope) with some friends of mine in the US.
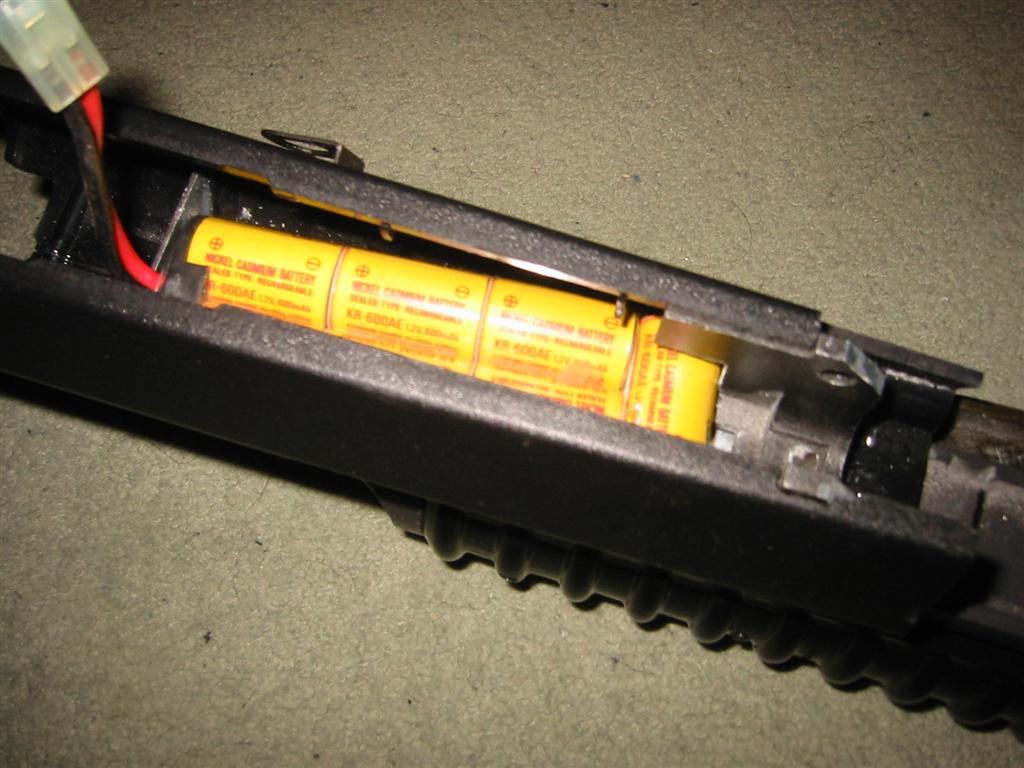
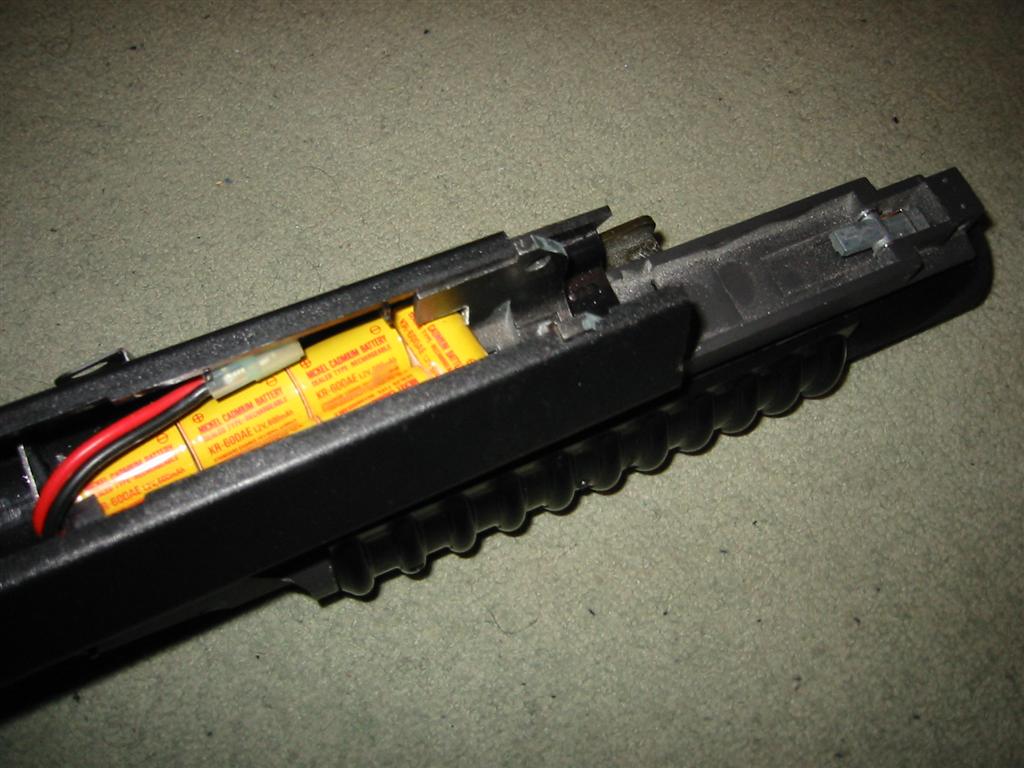
Oh
I cut away enough inside to fit a standard mini battery
inside the SG1 grip perfectly.. not bad I thought. ;) A
big thanks go out to Jeremy Morrison (aka LoneWolf)
for helping me out with this one, he was kind enough to
send me a couple of mini batteries which gave me the physical
dimensions I needed to do the work below.
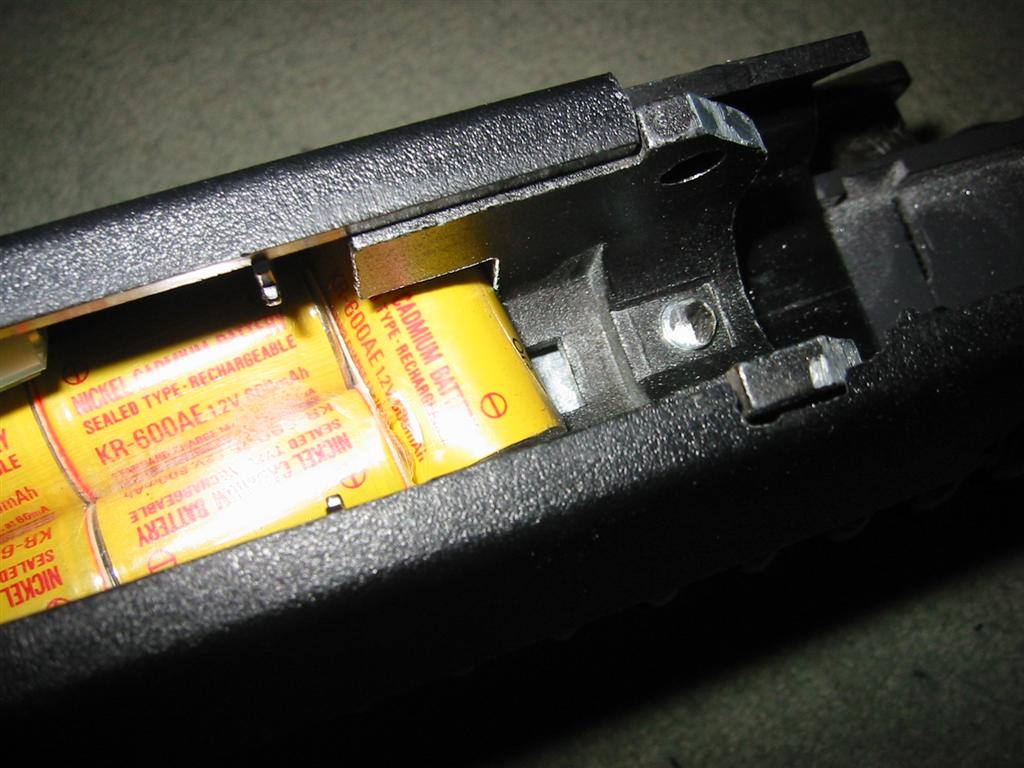
To
do this you need to cut away some of the original SG1 foregrip
end. I recessed mine by 3/4 of the end cell of the battery,
so that there's room to get it in. There is actually enough
steel left in the front section to recess it further for
a 9.6v mini battery if needed. Anyway with the newly cut
innards there's enough room for a mini to slide inside the
grip and sit between the reinforcing plates and the front
end. Underneath the battery a securing bolt comes through
and a nut secures it to the lower reinforcing plate. The
bolt and nut have both been cut down so that they protrude
as little as possible. Thus the battery sits as flat as
possible (the nut is in the middle of the battery underneath
it).
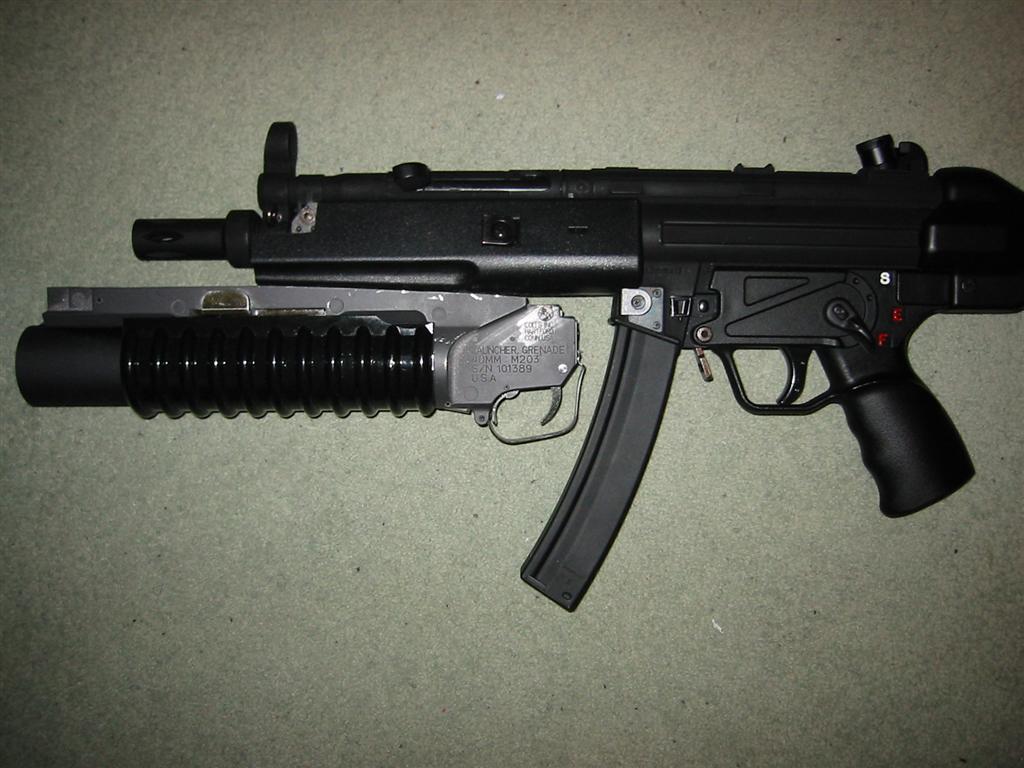
(September
18,2002) Day 6: Well I've done the last filing,
and the M203 is now mounted on straight. Sadly this has
to be done by eye, as cutting down an M203 to fit a shaped
grip requires a lot of patience and time.
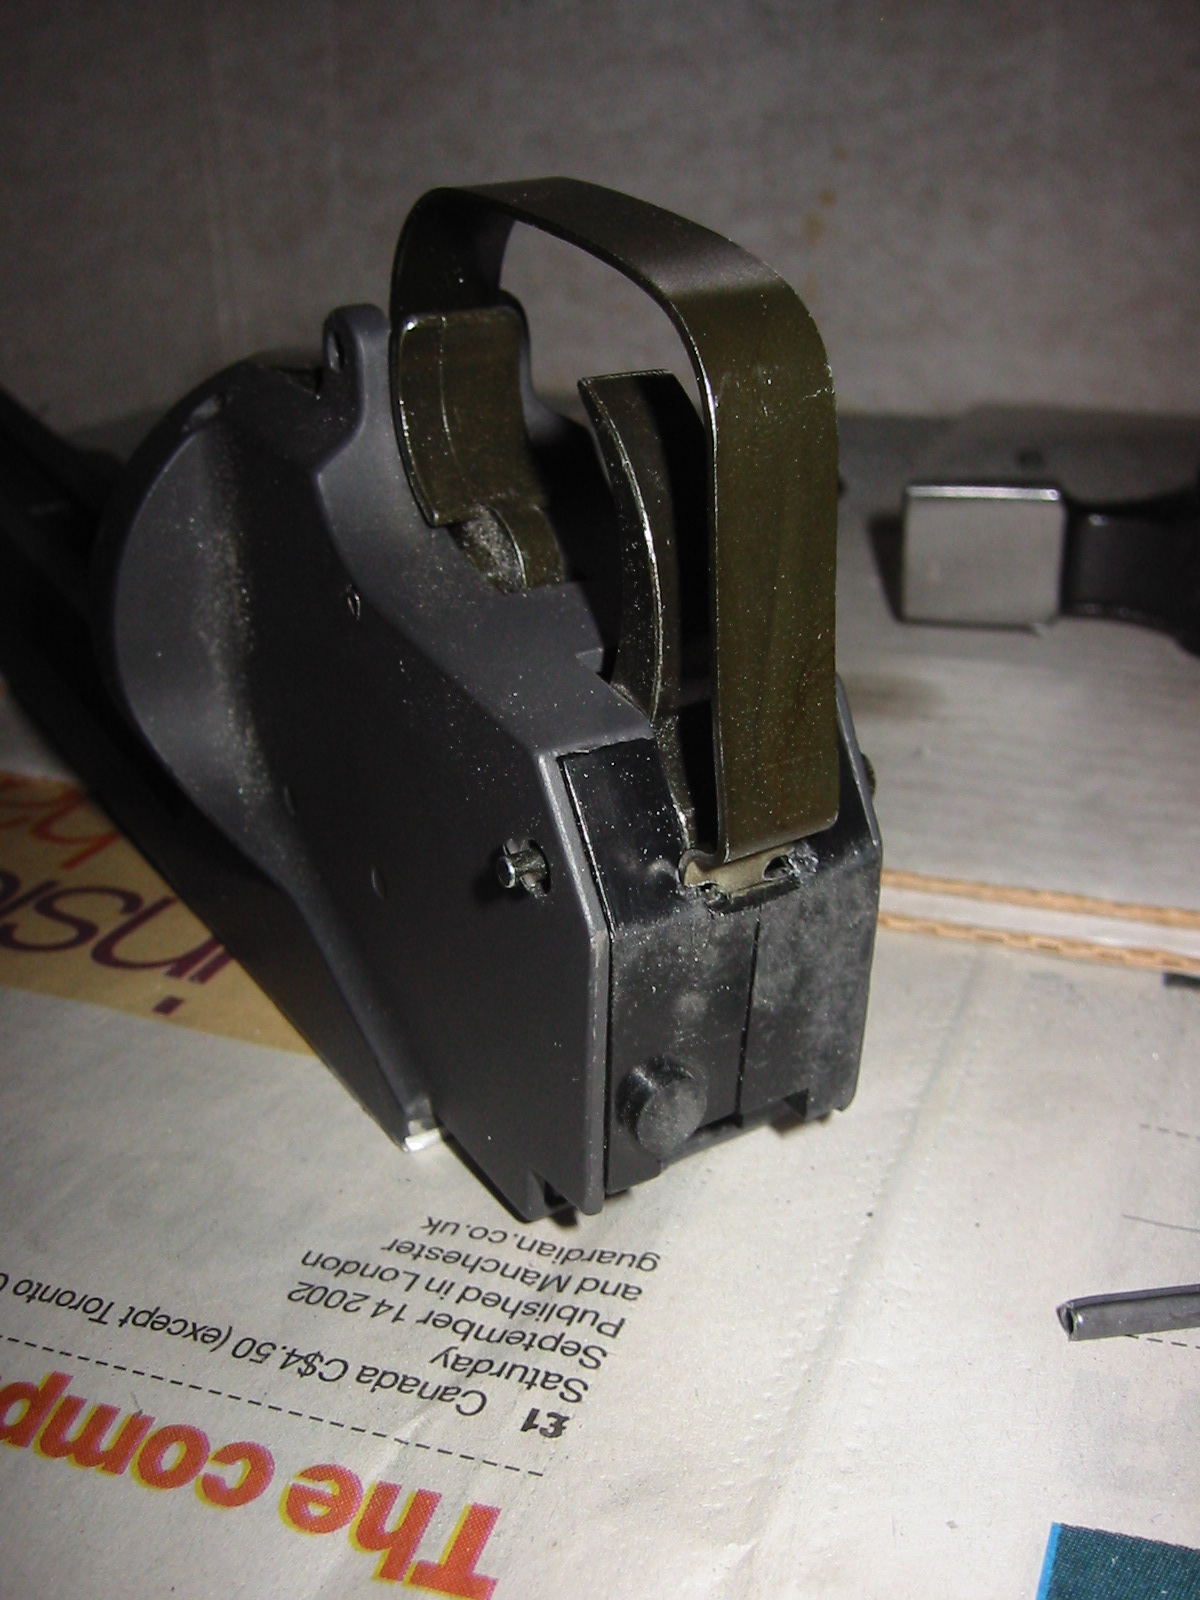
Two
major bits have now been done. The trigger guard has been
looped around so that it is secured against itself. The
way this is done is to cut two grooves into the end of the
trigger guard, and the recess it into itself. Sounds complex,
but it's actually quite easy.
Take
a hammer and a punch and nock out the split pin in that
hold the trigger guard to the front. This detaches the trigger
guard from the M203 itself. Now carefully cut two grooves
into the end of the guard (as shown in the photo), they
need to be about 3-4mm long and about 2mm wide. Now this
is why you detach the front of the guard, you need to angle
the guard into the recessed plastic, and then when it's
in place replace the front split pin. To make it all a bit
easier I bent the end of the guard that I was levering into
the black plastic flatter than it originaly was.
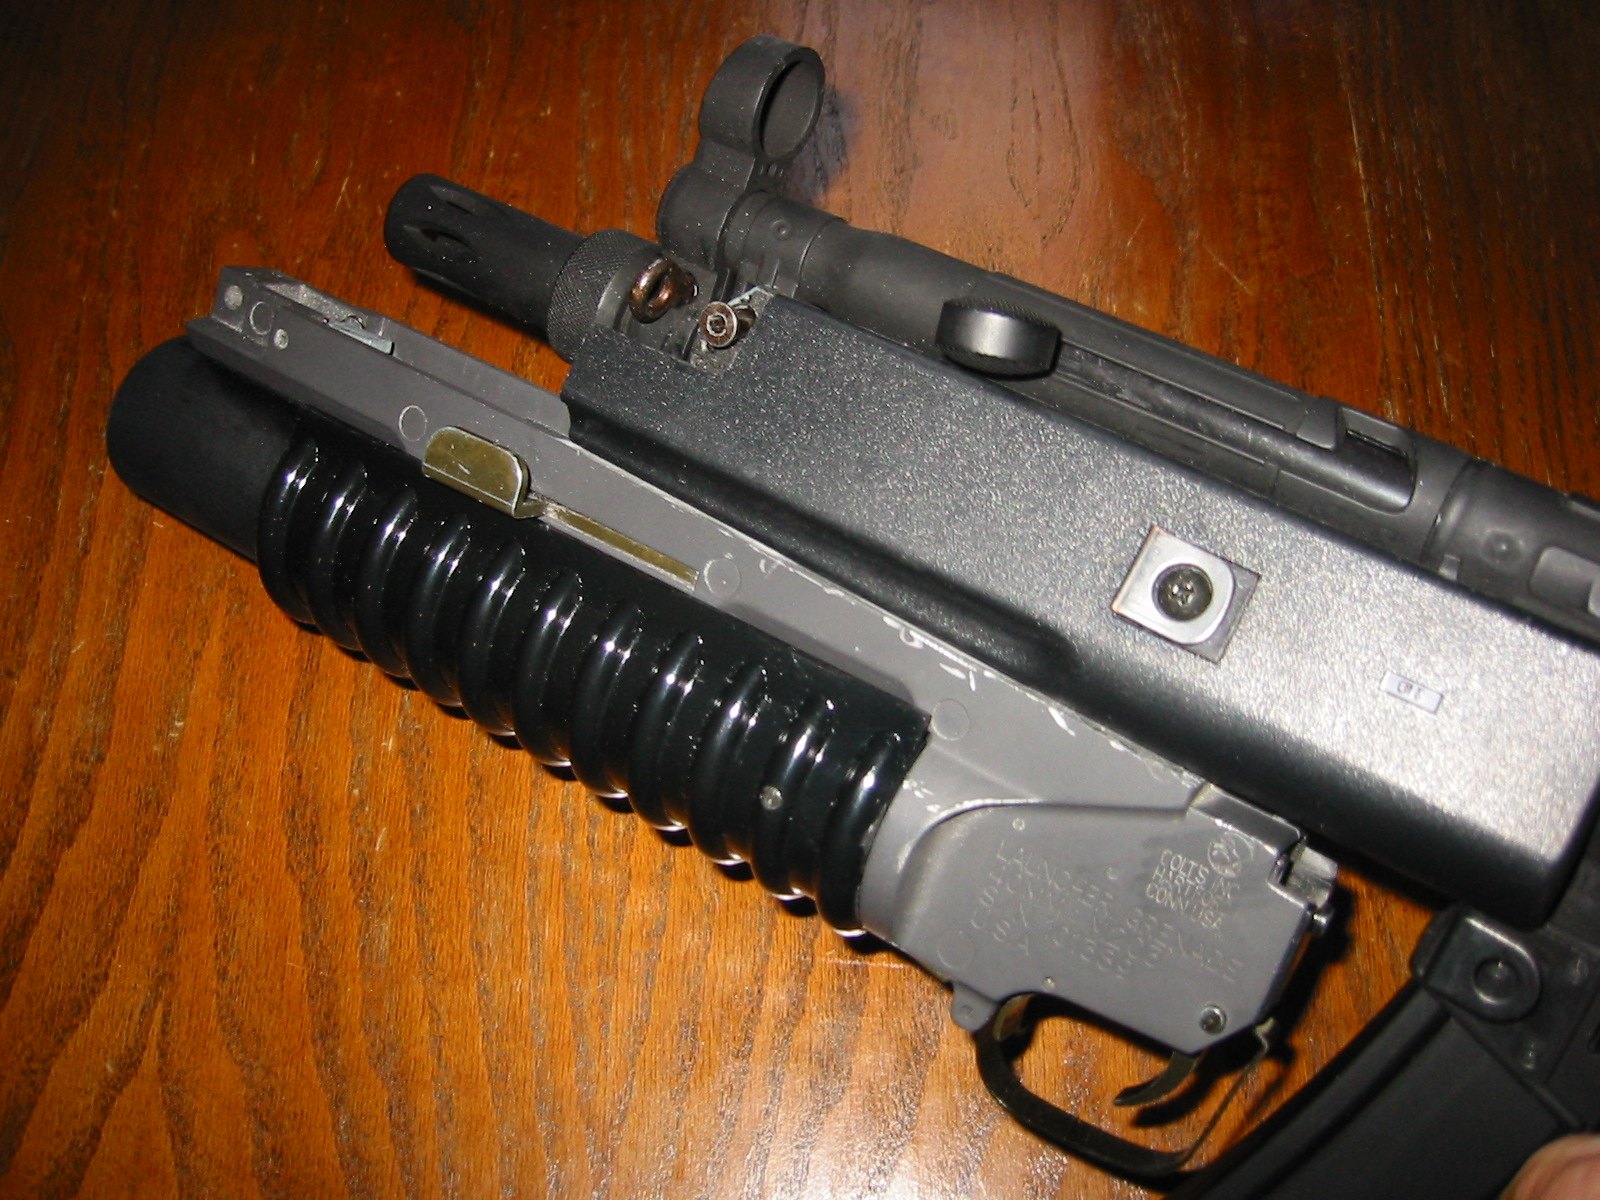
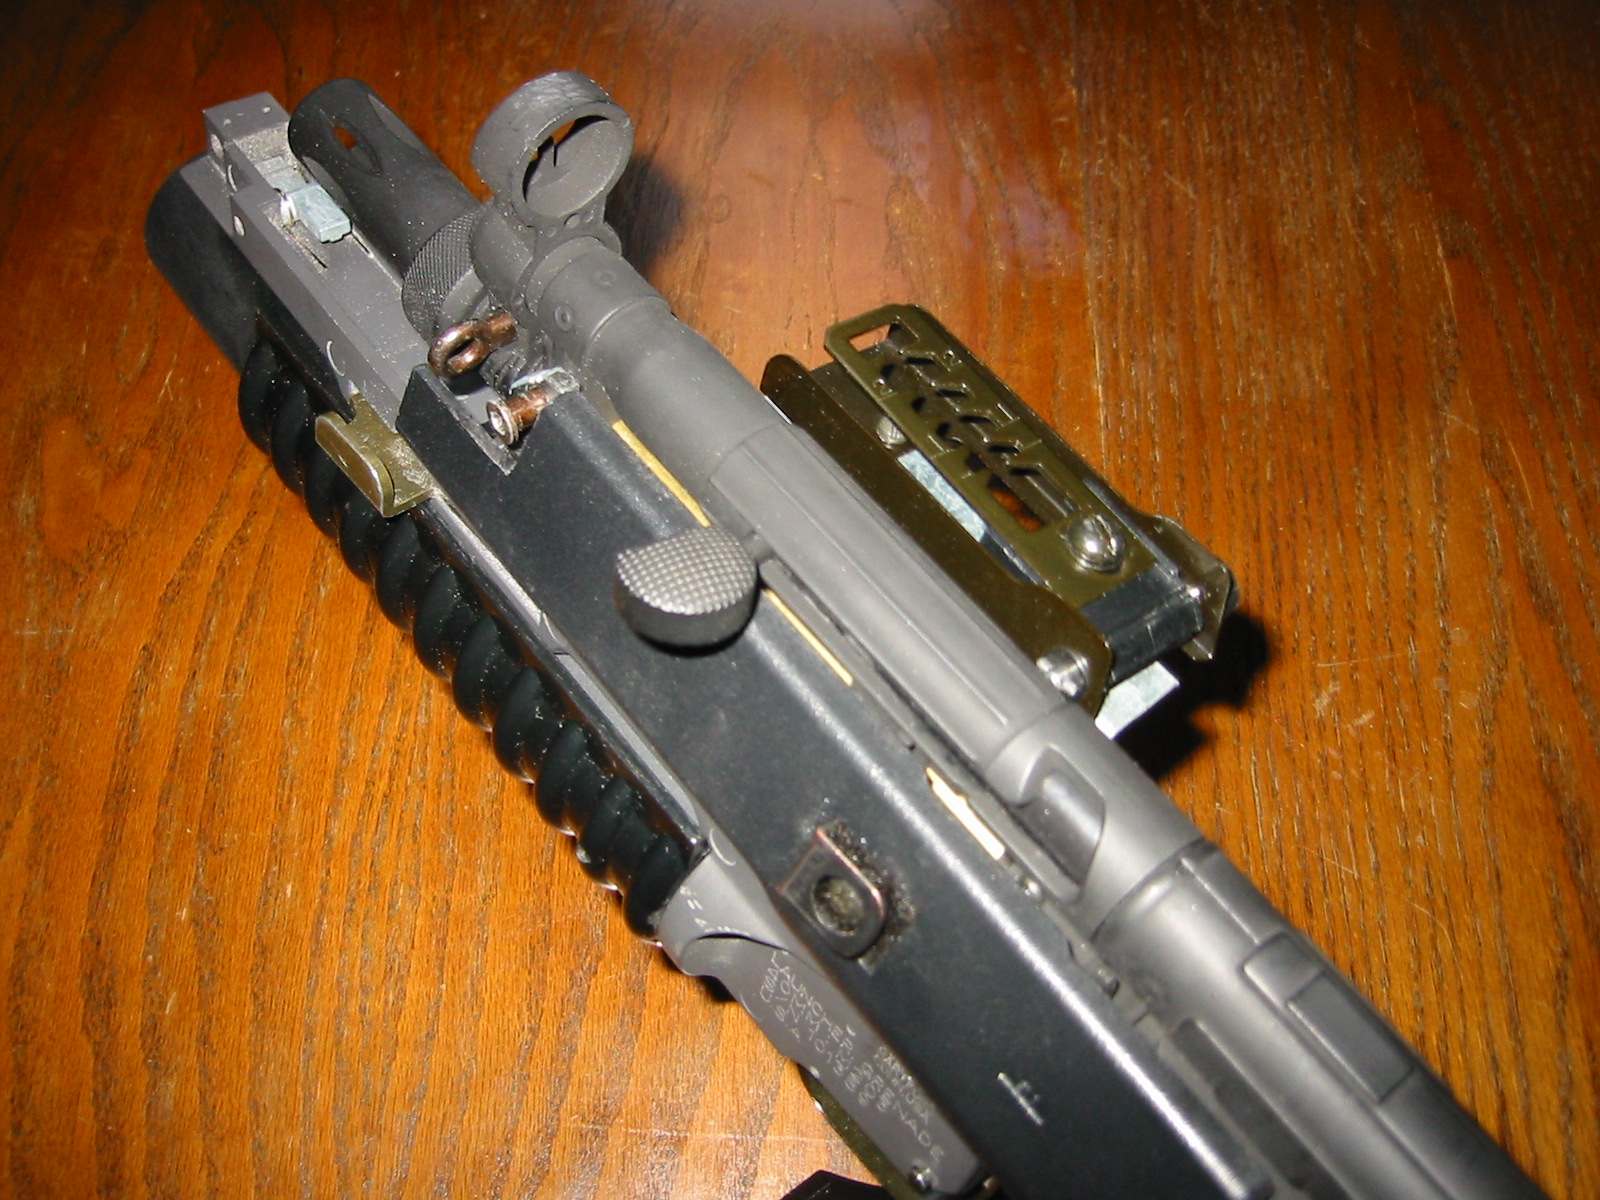
Next
up was fitting the grenade sight, this unbolts off the original
M203 M16 kit. This really is quite simple. Cut a piece of
sheet steel that's twice the size of the bottom of the grenade
mount, and then bend it in half, bolt the sight to the top
half, and then bolt it to the side of the grip. I drilled
two 3mm bolt holes into the SG1 grip. You'll need to cut
down the bolts so that they don't protrude too far into
the grip, otherwise the battery won't fit back in.
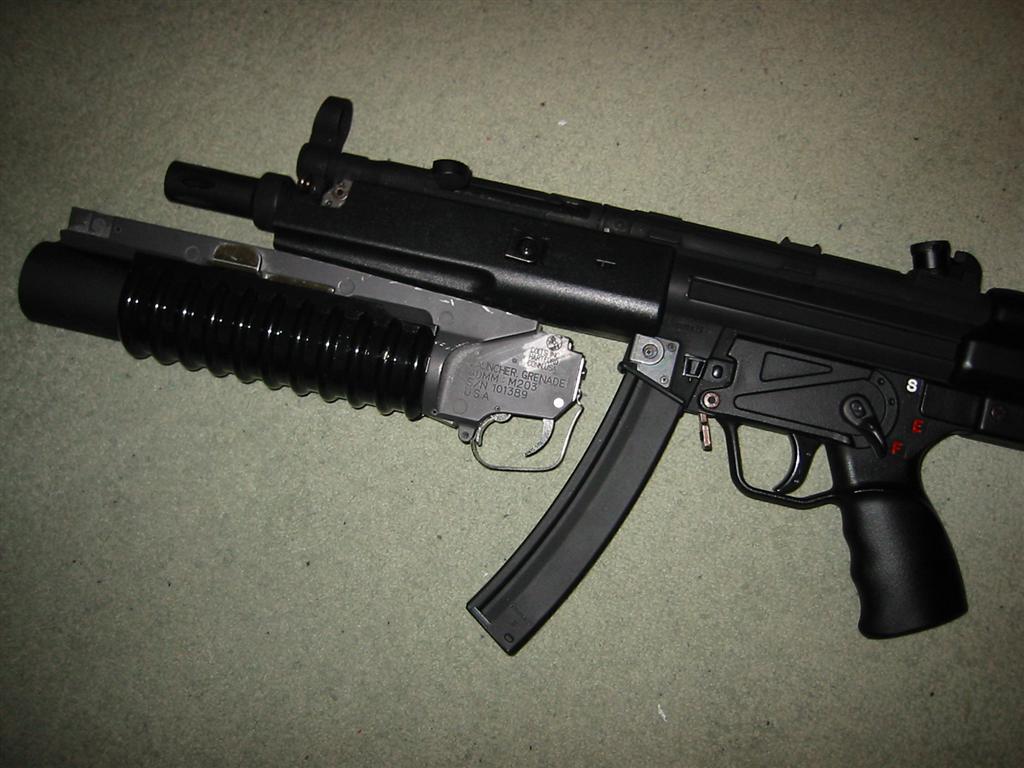
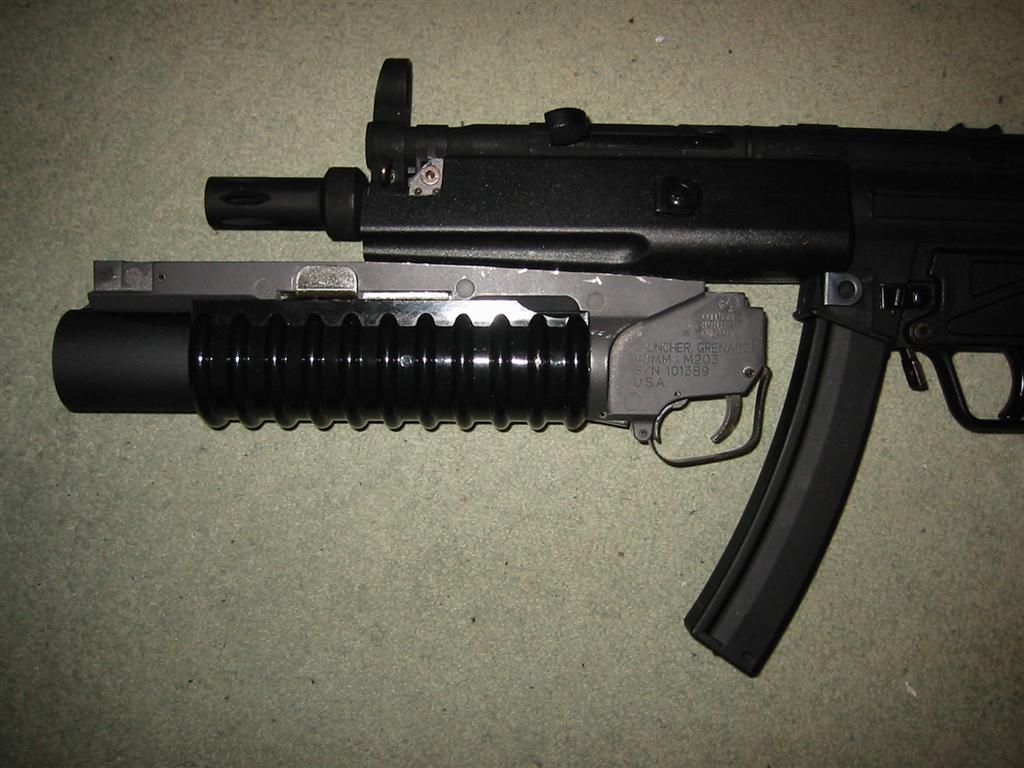
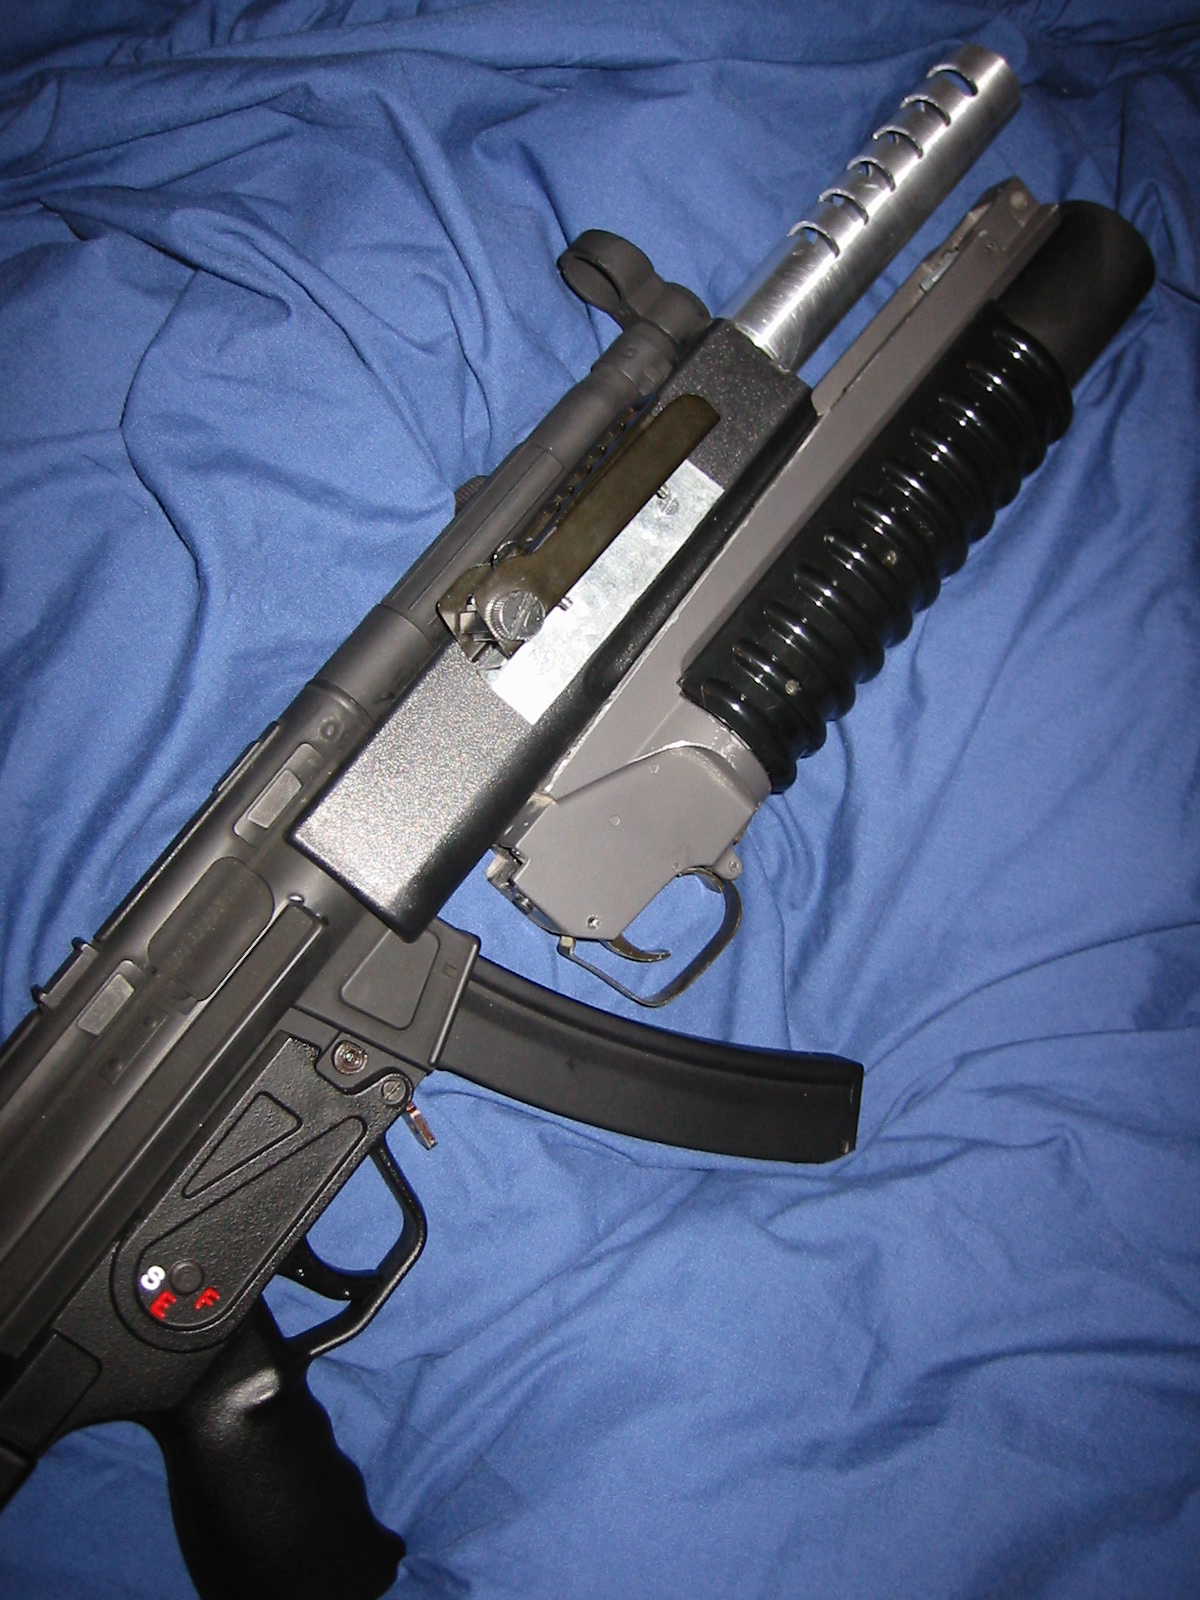
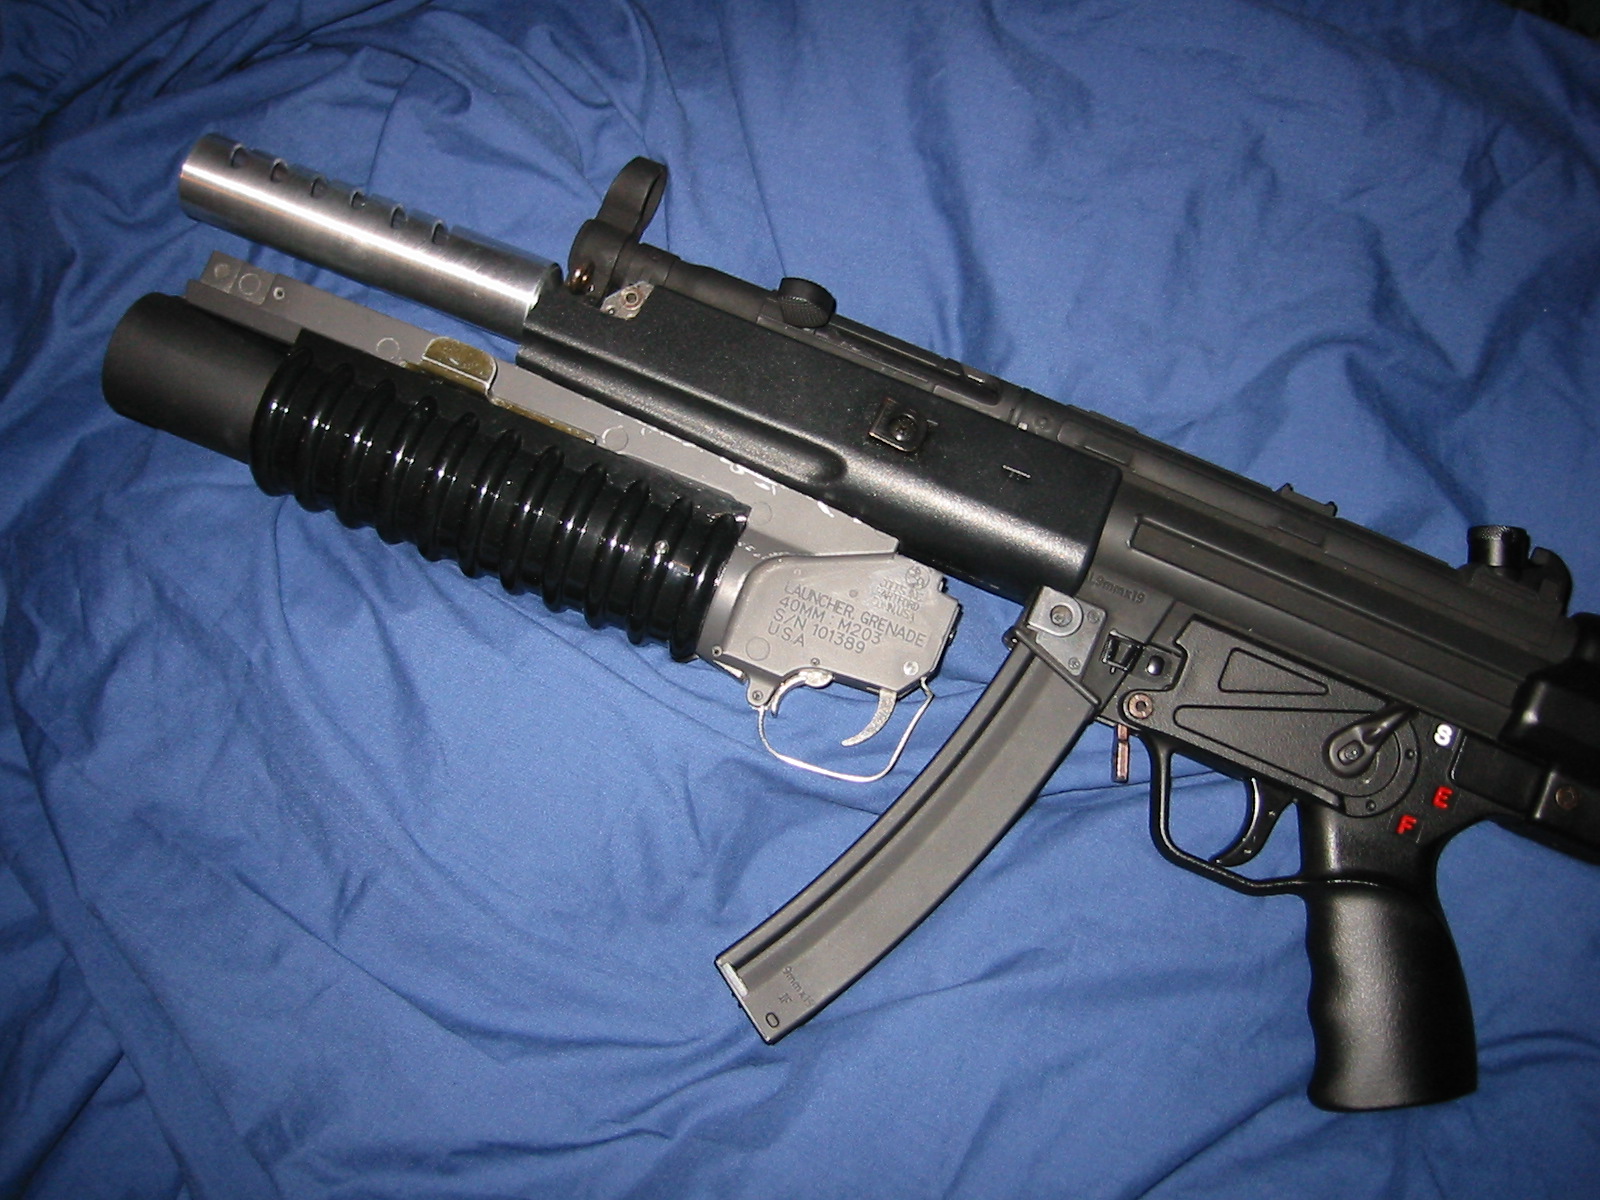
Well
all that's left now is the painting of the M203, the sight, and
the rewiring and the new flashider building. I really need more
days ill at home to get this finished (I wasn't well today, hence
had the time mid-week to sit at home in the warm). Here's some
photos of the work so far:
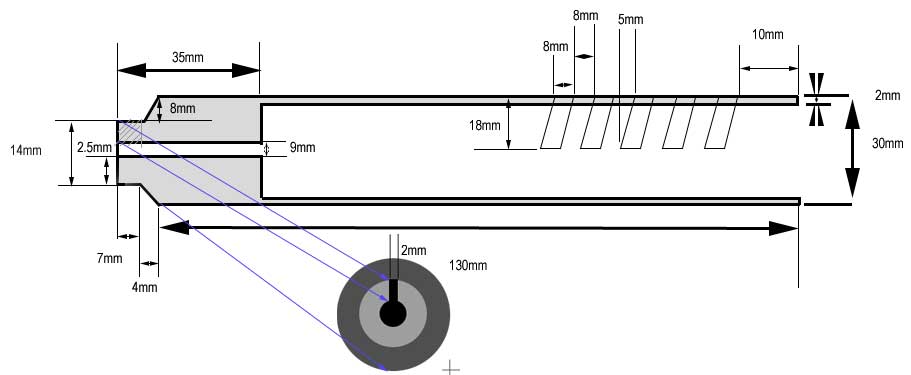
(September
20,2002) Day 7: Something completley unexpected
happened yesterday. A UK company has offered to make the
muzzle for me right out of the blue, which to put it mildly
was much appreciated (thanks heaps guys!).
I've
attached to the project page a "rough" diagram
of the muzzle that the final product is to be based on.
Sadly I don't have a CAD package installed, and don't have
the time to dig through my CD collection to find where I
put it, so I've done this in Photoshop. Hopefully
the final version will be done sometime next week. Again
a big thanks go out to the guys that offered to get this
made up for me!
(October
9, 2002) Day 8:
The prototype muzzle is here, well it's been here
for a good few days actually, but I've only just had
the chance to take the photos and put it all online
for you guys ('n glas) to see.
Please
note the muzzle/break is only a prototype, and is
to gauge the sizes and evaluate the design. The next
version will be in anodized black.
The
company that kindly created this muzzle for me are
relatively unknown in the Airsoft world, not because
they aren't big (far from it actually), but rather
that up until now they have been supplying dealers,
rather than direct to customers. This is going to
change in the future, and by their talents and devotion
to the industry I can almost certainly say that they
will be a hit with everyone.
The
guys who kindly made this product are Area51Airsoft,
more specifically Dave
(their R&D guru), who kindly offered to lend a
hand with the muzzle design and production. For this
I really can't thank him enough - as mentioned above
milling items like this by hand without the correct
equipment is messy and very difficult
(February
15, 2003) Day 9:
Well with a few coats of some Hamerite black car spray paint
I've managed to get a decent coat of paint onto the flashhider.
Sadly I've lost contact with Area51Airsoftso I was left with an unpainted flashhider (if anyone
hear's from them please do let me know). So as I lack the
machine shop tools to mill my own muzzle I've sprayed the
one that I have. Now to do this perfectly you'll need to
spand down the alluminium to achieve a dull finish, and
then apply a primer coat so that the Hammerite sticks.
...that's
if you want to do it properly. I wanted to take this to
the last CQB site that I visited so had to somewhat rush
the job. It's not as perfect as I'd like but it's good enough.
To spray
the muzzle I mounted it on the end of Biro, and then stuck
the biro into a beer box. I angled the muzzle upwards so
that an streaks were minimized and then applyed 4 light
coats (each around 5-10 minutes after each other ) from
about 6 inches away. I did this in my living room, but I'm
careful with paint - if it's not too cold I'd recommend
that you do this outside.
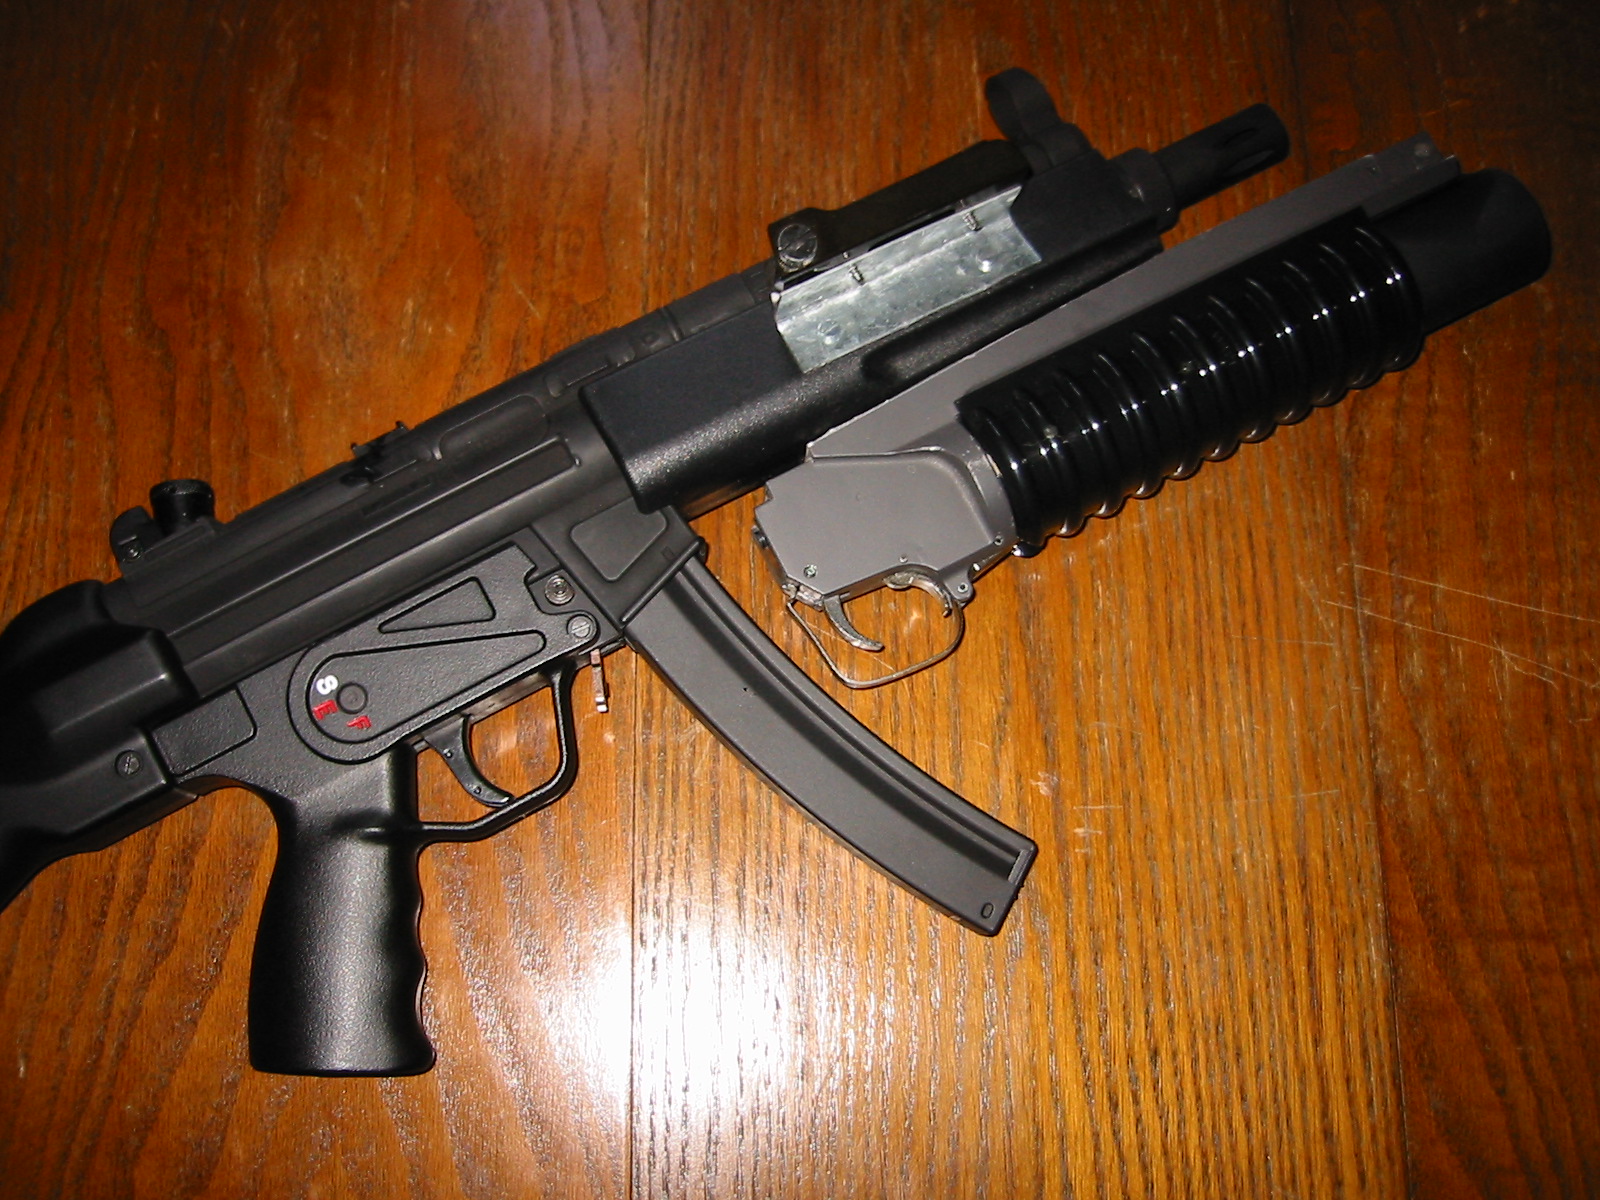
I've
also aquired a ClassicArmy MP5 folding stock now.which was
kindly supplied by Al at AirsoftArmoury
(cheers mate!). On a side note if you are after any CA bits
in the UK, I'd give him a ring. Fitting of the stock is
dead easy, sadl I'm currently missing the sling hoop, which
seemed to have gone missing the the CA bag, but that's no
biggie I'll have to scrounge one of them.
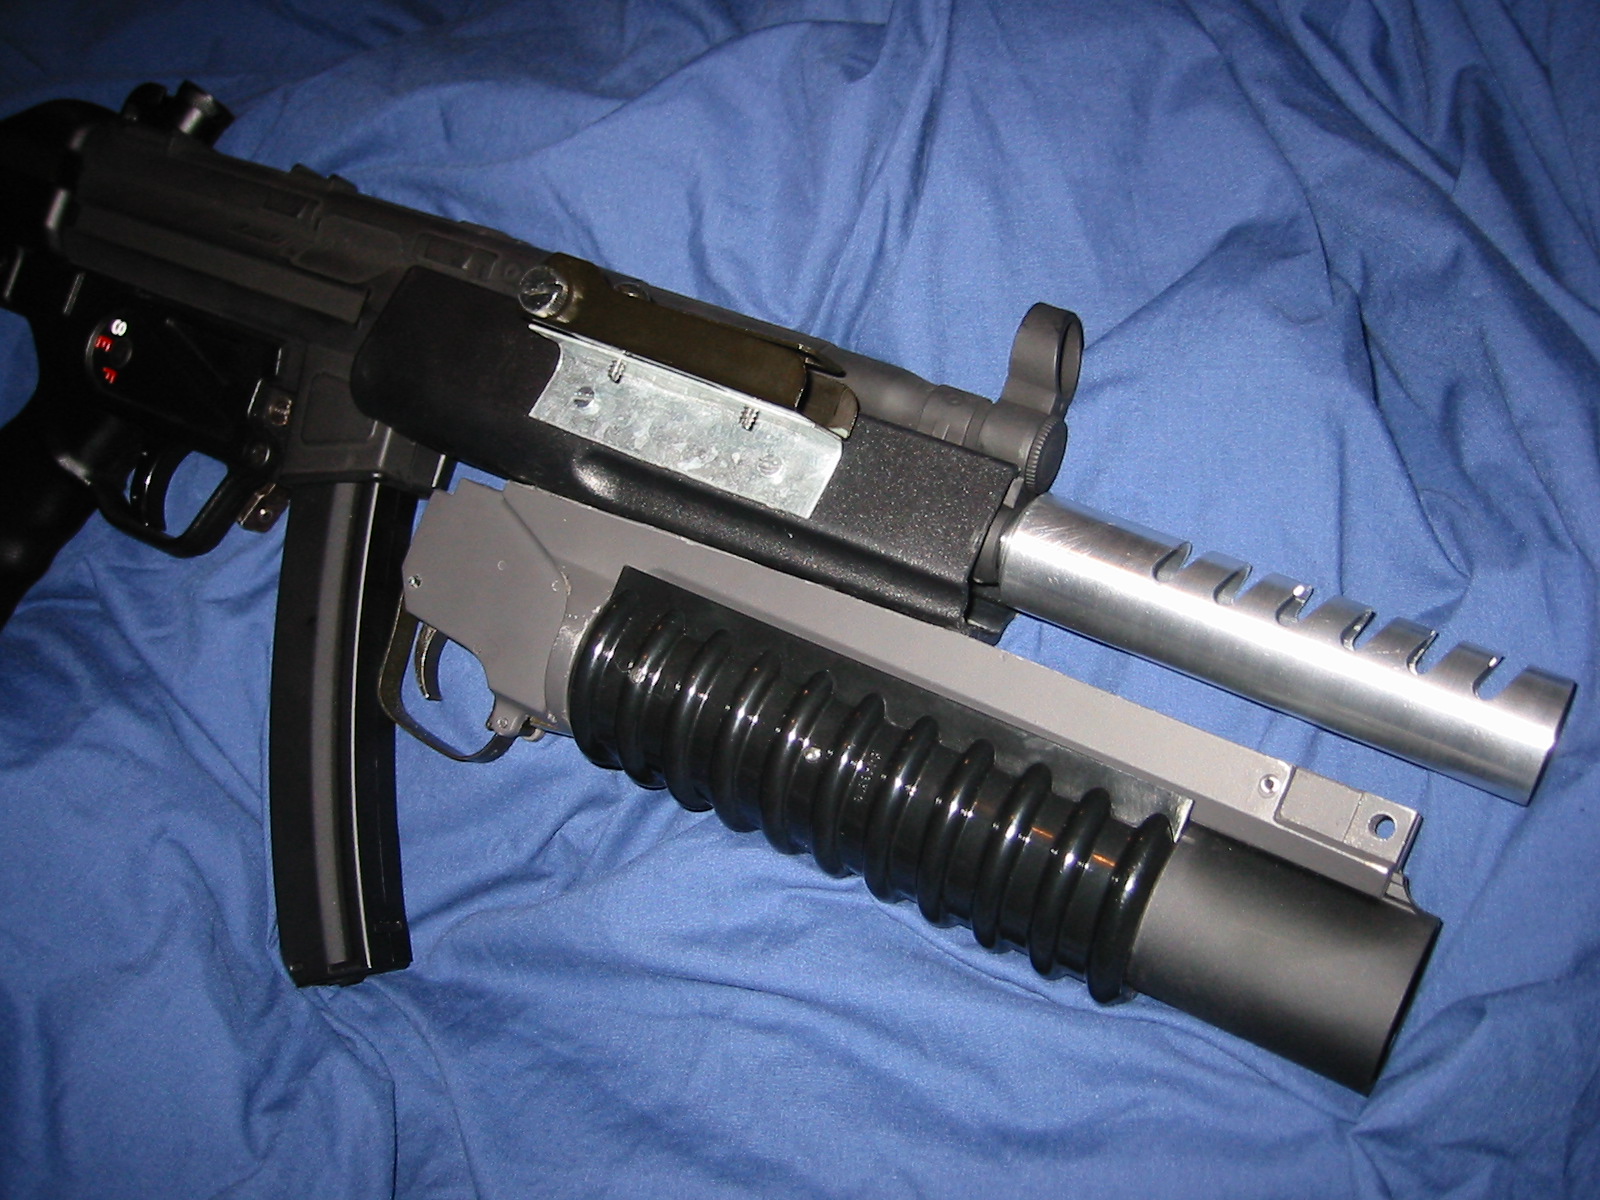
Here's
some photos of the my newly hoovered carpet progress
so far:
One
other point of note - stock CA gear comes with a spacer
on the spring guide that increase the FPS to around 350fps
with a 0.2g. An 8.4V mini battery simply can't drive that
at a high RoF, so I highly recommend taking the spacer out.
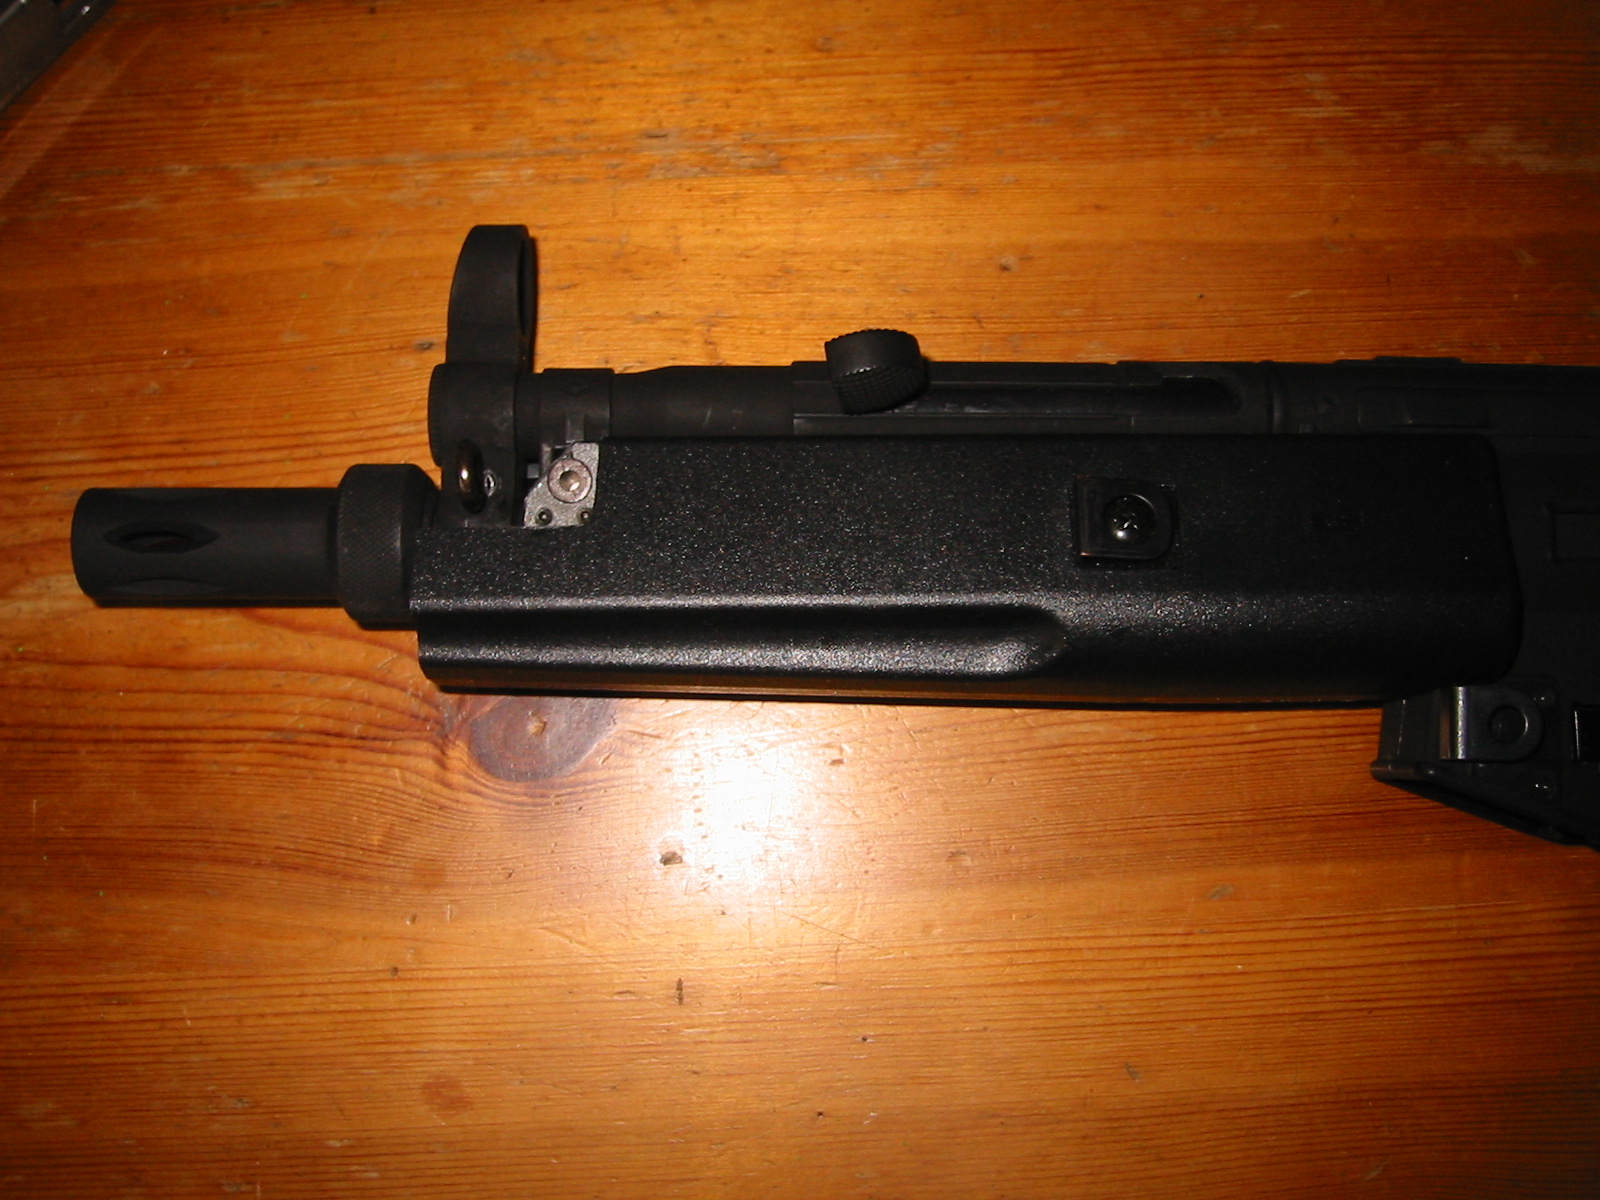
Oh gosh
darn it - almost forgot. The CA muzzle is held in with a
small grub screw under the figure-eight foresight. As this
grub screw is nigh on useless (and because it had already
fallen out)I replaced it with something better - a nice
handy self tapping screw. This screw goes into the bottom
of the sight, and screws into the bottom of the muzzle ensuring
that it stays securely in place. CA's foresights are held
on by friction really (My original CA MP5 seemed to have
been built by the "bash it into place with a hammer"
assembly school).
There
were a few scratchs on the frame from light skirmish use,
and from where I'd been using tools on the frame. I do plan
to spray paint the M203 frame matt black too, but haven't
got there yet. On useful tip is that if you wish to quickly
cover up a scratch ona black surface pen it in with a black
magi-marker. Yup believe it or not it's a good fix in the
short term, that's if you're short of black paint. ^_^
Is
this the end of this project then... nah.. I'll be back.
^_^
Put
in your comments: I've started up a section in
our forums
where people can post their feedback. Please feel free to post
advice, comments, suggestions or sketches there. All comments
are greatfully appreciated. The idea is, rather than just build
something and showing it off, I'm going to build this project
page up with photos of the project as things progress and accept
advice from anyone that cares to give it.