The Sun Projects M203 was not designed to fit TM AEG’s, but was originally intended for the JAC M16A1 a gas powered assault rifle, one of the original ‘Classic’ Airsoft weapons. It comes in 2 versions the original and the QR, the difference between the 2 is that the original retains the original mounts – and actually looks like a real M203, where as the QR version has had the mounts removed and replaced with clamps for a 20mm weaver rail, as found on most RIS units. I have had 3 M203’s over the years; the most recent one arrived today, destined for Project Metz. With my previous experience I knew what I was buying and what to expect from my M203, but it occurred to me that many don’t – and with no clear review or comparison between the Sun Projects M203 and the TM M203’s people are often left up to themselves to decide which one to splash out on. I hope this helps…
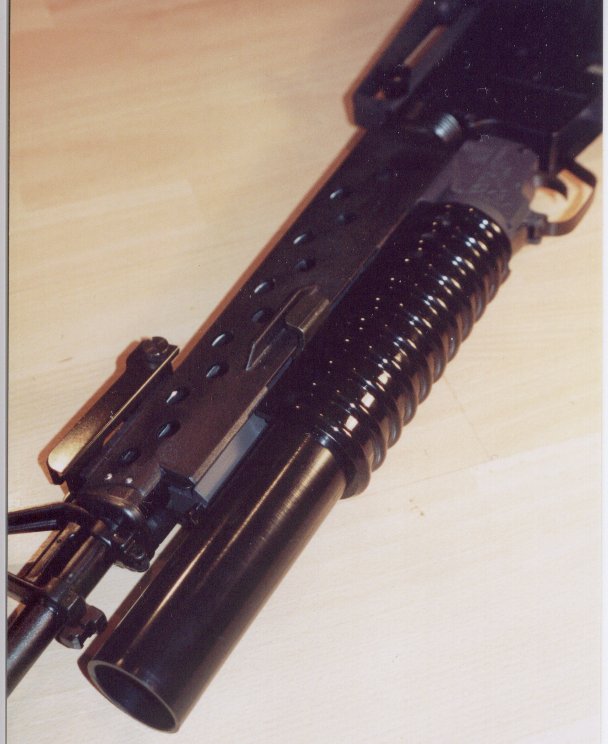
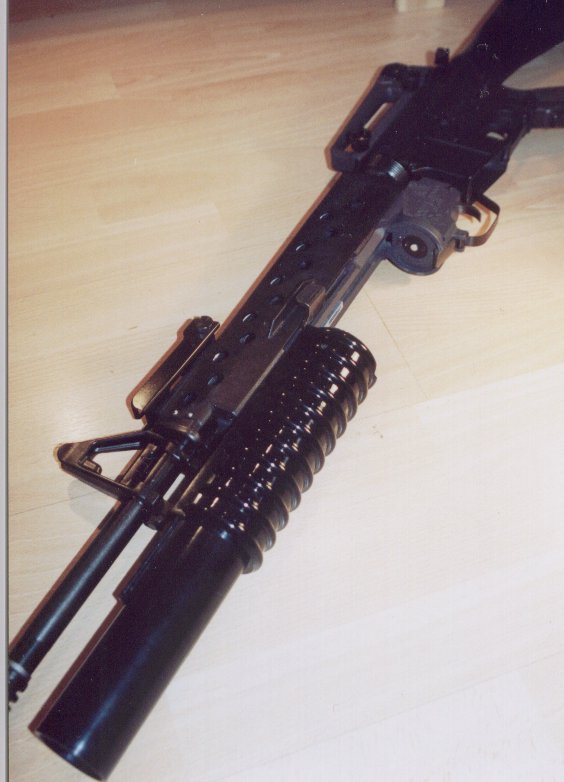
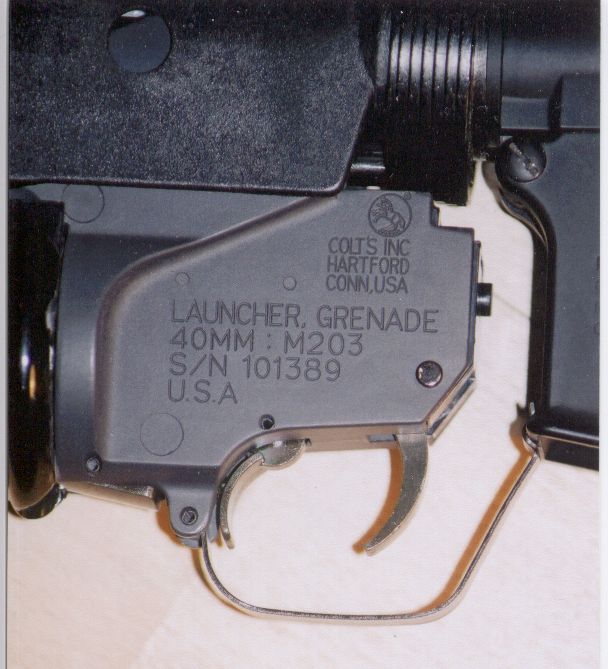
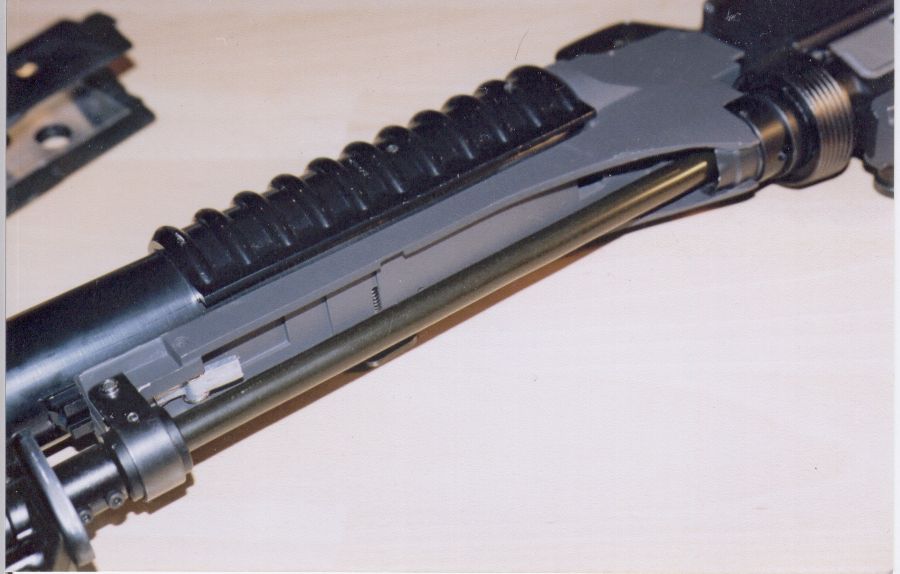
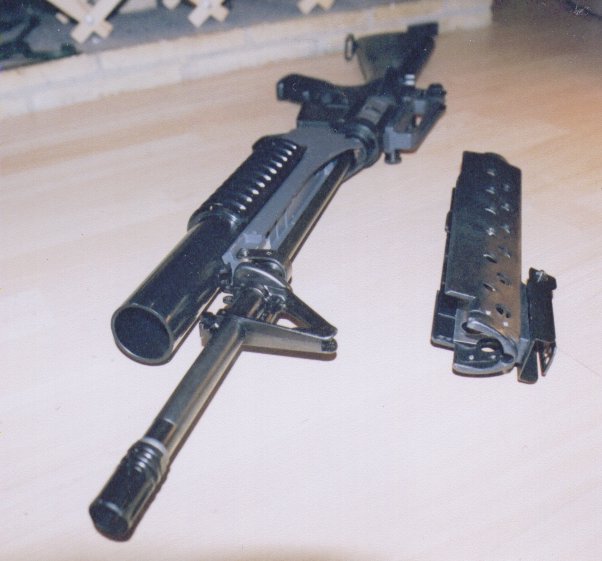
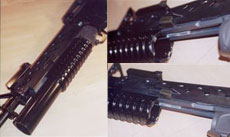
IMPORTANT – Mount Kits One additional, essential piece of information if you are intending to fit the SP M203 (Original) to a TM M16 variant you MUST order the relevant ANGS mount kit. Mount kits are available for the M16A1, M16VN, M16A2 and the M4A1. You can mount the SP M203 on the M4 RIS and SR16 but the mount kits require modification (See Notes). So budgeting for an M203 you have to factor a mount kit in, which are usually £40 from any UK retailers (although only Airsoft Dynamics had them in when I purchased mine). Although I ordered mine from Guns n Guys, at ½ the price (1 week from price quote to delivery from GnG, where as other UK retailers were stating 3 weeks for delivery – who says UK retailers are more convenient?!). Overview The M203 comes packaged in a tough corrugated cardboard box, with “SUN PROJECT M203 Grenade Launcher” stencilled across it. Inside the M203 is wrapped in bubble with the instruction leaflet packaged loose on top. When unwrapped you find both the Grenade Launcher and the M16A1/A2 Heatshield complete with leaf sight. My first impression was how heavy the unit felt, at least a kilogramme – unloaded. The M203 is comprised of the Barrel with handgrip and the Receiver, which houses the firing mechanism and trigger unit. The Barrel and handgrip, are made from ABS, and finished in a gloss black. The real M203, just like any projectile firing weapon has rifling in the barrel to improve range and accuracy – however the SP M203’s barrel totally lacks any rifling. While the M203 receiver is a dark grey and is made from cast Zinc Alloy. The receiver comes complete with accurate Colt logos and markings.
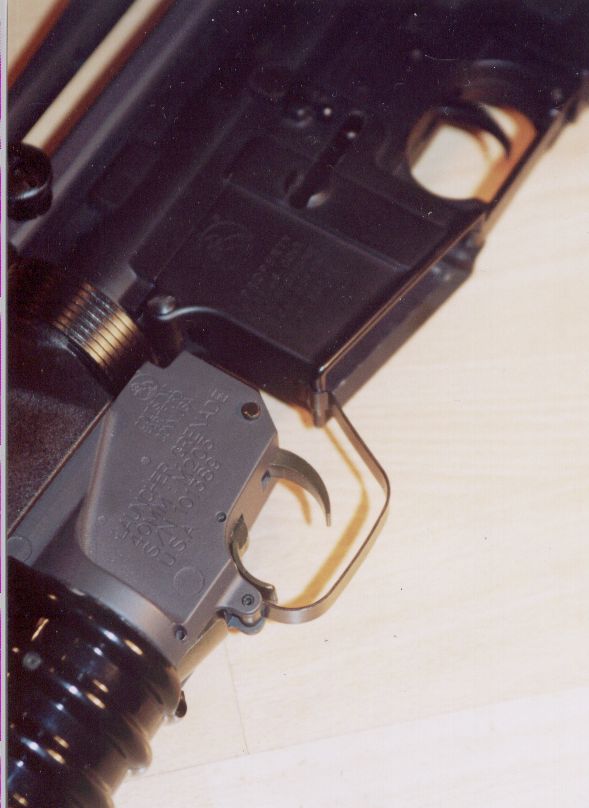
The SP M203 is fully functional, and has been designed to fire grenade shells – just like the real steel launcher. At the receiver end of the unit there is a trigger unit, compete with guard and safety that are linked mechanically to a fining pin inside the chamber of the M203.
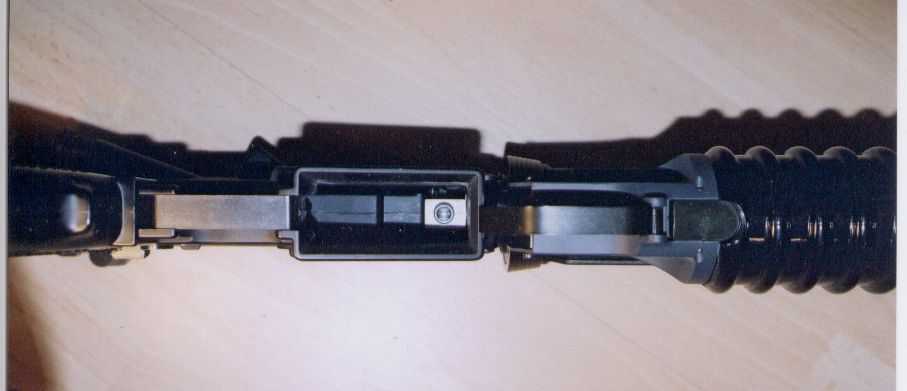
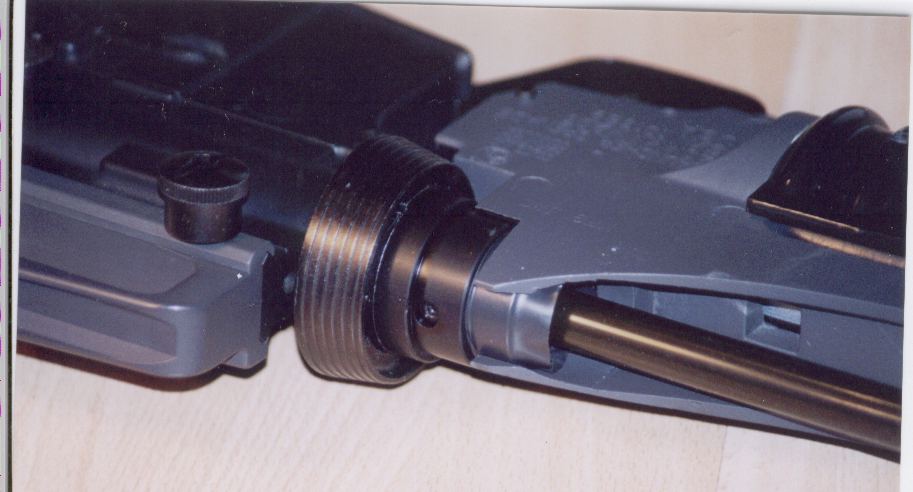
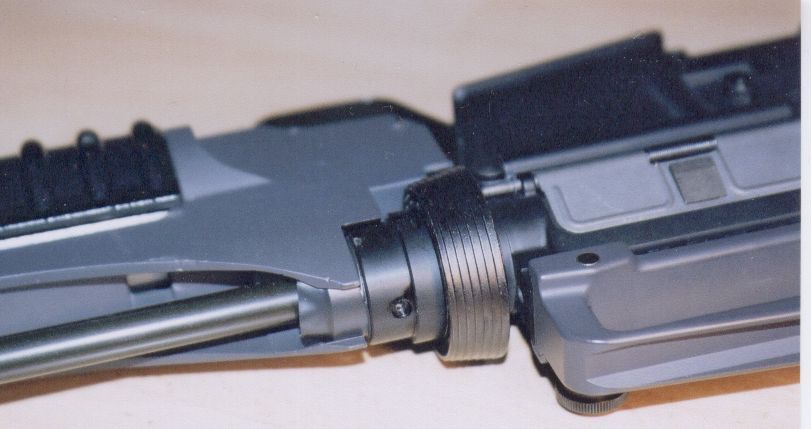
Visually it’s a compromise, the receiver looks VERY realistic but the gloss barrel and handgrip are a major let-down and elude to the fact it is a toy. But the firing mechanism means that is can be employed, as a weapon should it be used with a grenade. Overall I was impressed, the unit felt very robust and solid. Fitting I fitted this latest M203 to the M4A1 that was making up the base on Project Metz – or at least the components of that M4 that were on the Systema metal receiver that was the heart of the Project. So I used the ANGS M4A1 mount kit for this M203. Installing the Mount Kit is relatively straight forward, and admittedly the hardest job when installing the M203. First job is to prepare the M203, to do this you have to remove the front barrel mount (loop and barrel spacer) included in the M203 kit and attach the barrel spacer included in the mount kit (this can be difficult as the mouldings are not as precise). You then need to attach a spacer to the stabiliser at the rear of the M203. The metal stabiliser slots into the tube spacer included in the mount kit and prevents the M203 from swinging to side to side then its attached. You attach the spacer putting it over the peg and lightly force it on – with a hammer.
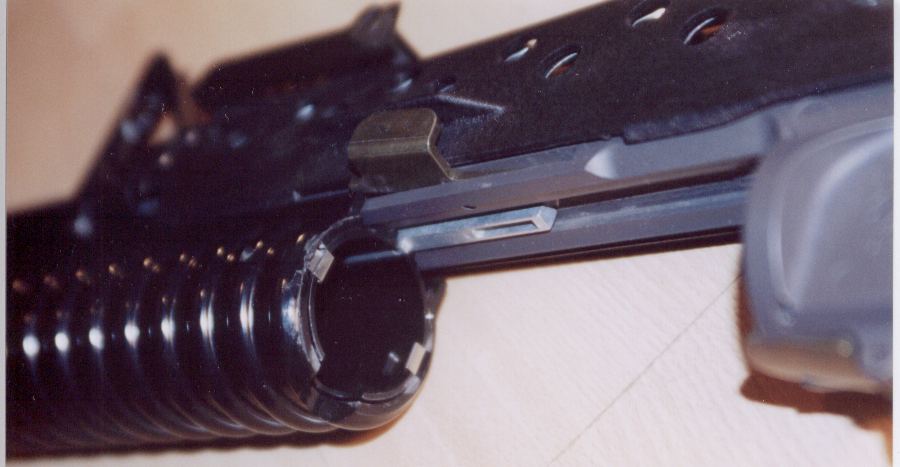
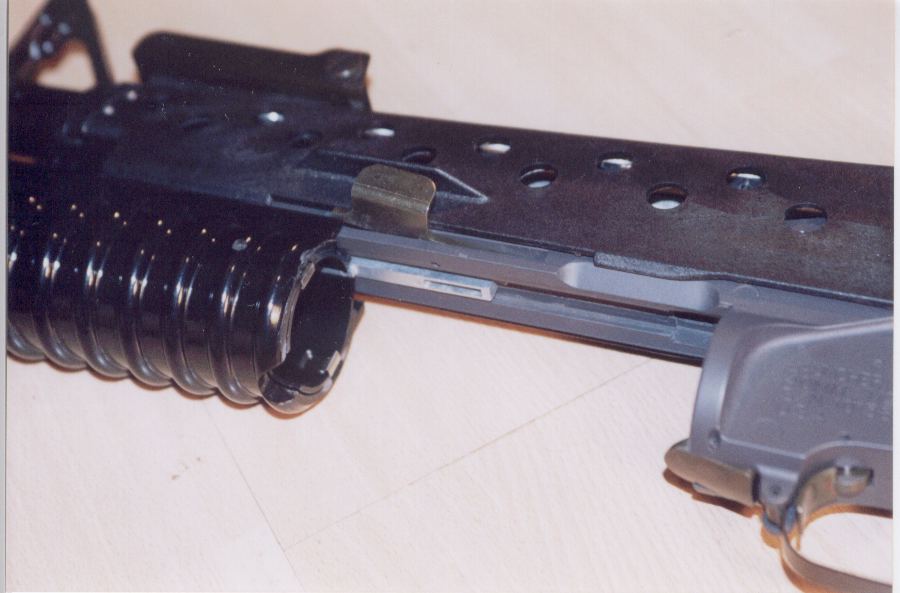
Testing Once installed it was time to load up the rifle and M203. When I had my first M203 the big problem that I encountered was battery storage. The regular 8.4V 600mAh or 9.6V 600mAh will fit, but the 9.6V 1700mAh U-Shaped batteries won’t. In fact the only high capacity batteries that do fit are the 1100mAh packs. Also to get the packs in the upper handguard you need to modify them, by removing the tabs. With a battery in place I decided to load a shell into the grenade launcher. To load a shell you have to depress the latch on the front left side of the M203, and push the M203 barrel assembly forward. As the barrel open it will expose the firing chamber. Carefully slide the grenade into the barrel, and close it by pulling it back to its original position. A note on safety here – always load a shell whilst holding the AEG as you would when reloading magazines – making sure its horizontal, and ensure the M203’s firing mechanism is reset (I saw an idiot load a Mosquito Molds Shower grenade into his M203 whilst it was vertical with the barrel pointing skywards at the Combat South Safezone. He dropped in it, the firing pin engaged the valve on the grenade and the grenade fired putting a lot of new holes in the safezone’s shelter). Once loaded pull the trigger and watch the fire works. Admittedly the last time I used a grenade in an M203 was with my original M203 and the shell was one of the first generation ANGS versions. It was fun while it lasted, and always causes a smile. To unload a spent shell you simply depress the barrel release latch and open the M203 barrel – just make sure the shell does not fall onto your foot, or into any mud or puddles. Lots of fun!! Comparison Well since the M4 came out there have been an explosion of accessories for it. Responding in part to the success of the Sun Projects M203, and customer demands TM released their own M203 replicas in late 2001. This M203 was very difference both in terms of its construction and its application. Based on their very successful line of spring shotguns (SPAS 12 and Bennelli M3) the TM M203’s did not have a hollow barrel for the aftermarket grenades, instead their M203 had shotguns built into them. They use the same shells as the shotguns, and fire 3 pellets in one go out of 3 barrels. The TM M203s are made entirely out of ABS, and include mount kits for the M16 and M4 series AEG’s at no extra cost. For £10-20 less than a Sun Projects M203 you get effectively a new weapon, spare shells (2) and a mount kit. Sounds like a no brainer – go for the TM M203 every time right? In my case the answer was no. I have major concerns about the TM M203, and they centre around the shotgun mechanism and its all-plastic construction. The TM shotguns are fragile, dry firing – even a dozen shots will break the mechanism. The other problem with it is that when you cock the shotgun mechanism you have to pull back on the AEG, exerting excessive force on the M203 mounts and the M4 receiver – which are problem area. Although I have never seen a breakage happen from cocking an M203 I suspect it well happen. That said, apparently the TM M203 can actually stop the barrel wobble problem by adding a spacer onto the chamber block. On top of that there is the aesthetic factor. The TM M203’s barrel terminate about 1cm from the end of the M203 barrel – meaning they are VERY visible, which in my eyes detracts from the realism and makes the TM M203 an eyesore. The Sun Projects M203 offers a lot of flexibility; in my case I stopped using the SP M203 to fire BB grenades and used it instead to hold my high capacity 10.8V batteries. Plus it looks the most realistic out of the two, with only the ABS barrel detracting from the realism. The final deciding factor for me was the actual requirement for a backup weapon. I carry 9 Hicap magazines with me in the field, plus a loader bottle filled with 2000 rounds and sometimes a spare bag or 2. Now I rarely get through ½ of the magazines in a game, sometimes not even a full hicap, so I can’t foresee the need of a redundant weapon in the eventuality I run out of ammo – because it will never happen. In the more serious situation of my AEG breaking I would generally be too hacked off to play the remainder of the game! One of the most important features of the SP M203 is its modularity. With the TM M203 you are fixed to the original length of the M203 since the inner barrels run the length of the outerbarrel. This means that if you want to build a SOPMOD M4 with the TM M203 then you’re out of luck. Where as you can cut down the SP M203’s ABS barrel with no adverse effects, or you could buy one of the aftermarket barrels available for it. Its fairly black and white, if you want a cheap simple all in one solution go for the TM M203. But if you want the more realistic and flexible solution then go for the SP M203. Conclusion The Sun Projects M203 is not cheap, at £125 excluding the mount kit and the price of the shells you would need to use it you are looking at close to £220. This is not a cheap price tag, but the Sun Projects M203 offers un-paralleled realism and modularity that means despite its design pre-dating most of the current TM AEG series its still very much a relevant product. For those looking to build up a SOPMOD M4A1 the only option is to go with a SP M203, and a shortened barrel. Those looking to buy the most realistic and flexible M203 on the market should buy the Sun Projects M203. The 3 SP M203’s that I have owned have performed brilliantly – no breaks, cracks or damage. That despite some heavy abuse, at many skirmishes. Once cautionary note is that on my first M4 fitted with an M203 the front receiver hinges cracked, most likely as a result of age but I suspect the weight of the M203 accelerated the damage. I now use one M203 to store custom 10.8V 1500mAh batteries, and the newest one will be used in its proper role with a Mosquito Moulds Shower grenade, and in conjunction with the new Guarder SOCOM Short M203 Outerbarrel. If you want the Spec Ops look the first accessory you should buy should be an M203 – whether it’s the TM or SP one is up to you, but I know I will never use a TM M203 on any of my M4’s. Notes: Fitting SP M203 to SR16/M4 RIS The TM RIS units of the SR-16 and the M4 RIS are not immediately compatible with the ANGS M4 M203 mounting kit. However with the use of a Dremel – with cutting blades and grinding attachment the M203 will fit with the RIS unit. You first need to remove the RIS unit and the RIS mounts from the AEG. Once you have got these off you need to turn the main RIS block (3 Rails) upside down, where you will see the 4 mount columns. You need to cut the rear 2 right back to the metal side of the RIS unit – this will allow the M203 to fit underneath it. Next you need to modify the rear M203 mount ring. To do this you must trim the outer ring. What you are aiming to do if to cut back the ring so that so extra metal protrudes beyond the M203’s rear receiver. Once this modification in complete you will be able to mount the M203 on the AEG. Once this is complete you just clip the RIS block back on the front barrel section. The only disadvantage to this is that the RIS block will not be as secure as it was before. UPDATE Well the Airsoft market never stands still, and 2 other manufacturers have released functional grenade launchers. First Fammo, have released an M203 that is nearly identical to the SP QR M203. Secondly Mosquito Molds have released a mini-launcher, whilst not being a replica of any existing grenade launchers it if small and light weight, and comes with one of the 165rd Shower grenades. Whilst the later is definitely not for me the Fammo version will appeal to those looking to easily mount an M203 to a M4 RIS. I dislike the Fammo, and the SP M203 QR because they are simply not viable. If I were to attach a real M203 directly on to a RIS on a real rifle and then fire the grenade launcher it would probably tear off the RIS and kill the operator! An update on the grenade shells, they are currently being produced in a variety of specifications by manufacturers including: Mosquito Molds, FIRST, Classic Army, ANGS and GB-Tech. They come in both 8mm and 6mm BB variants, and in realistic shapes and markings. The ultimate grenade on the market at the moment has to be the 165BB Shower Grenades by MM, lighter than most other shells on the market but temperamental they are the pinnacle of BB grenade technology, so much so Classic Army have ripped off their design and producing an identical grenade. by Permian Comment on this review in the forums Last modified: Wednesday, May 9, 2001 9:37 AM copyright 2001 ArniesAirsoft
|
 Possibly
the first accessory for the TM M4A1 when it was first released
was the Sun Projects (SP) M203. A 1:1 copy of the Colt M203 widely
fielded by the US Armed forces since the 1960’s. Designed to be
a force multiplier. The M203 was borne out of a project to eliminate
the requirement for infantrymen to carry a separate dedicated
grenade Launcher, the M79. Developed from the XM203 project in
was formally accepted into the US services in 1969 where it was
designated the M203. Mounted on the M16A1 at the time it, 2 were
carried by every infantry squad. Since then has been seen mounted
on the M16A2, CAR-15, M4, M4A1 AK47, Gali, AUG, FAMAS and numerous
other weapons across the world.
Possibly
the first accessory for the TM M4A1 when it was first released
was the Sun Projects (SP) M203. A 1:1 copy of the Colt M203 widely
fielded by the US Armed forces since the 1960’s. Designed to be
a force multiplier. The M203 was borne out of a project to eliminate
the requirement for infantrymen to carry a separate dedicated
grenade Launcher, the M79. Developed from the XM203 project in
was formally accepted into the US services in 1969 where it was
designated the M203. Mounted on the M16A1 at the time it, 2 were
carried by every infantry squad. Since then has been seen mounted
on the M16A2, CAR-15, M4, M4A1 AK47, Gali, AUG, FAMAS and numerous
other weapons across the world.