So what is it? Well the ANPEQ is a dummy box that allows you to hide a larger battery fto drive an AEG. The ICS unit also allows space to fit a real laser unit, which is a real bonus. The battery pack can work as a stand alone unit on it's own, but you'll normally need to buy the ICS laser and battery separately.
Thanks go out to ZeroOneAirsoft for supplying the battery pack (I understand from ICS themselves that ZeroOneAirsoft are one of their larger stockists in the UK). The laser unit is available in various models, so be careful what you get:
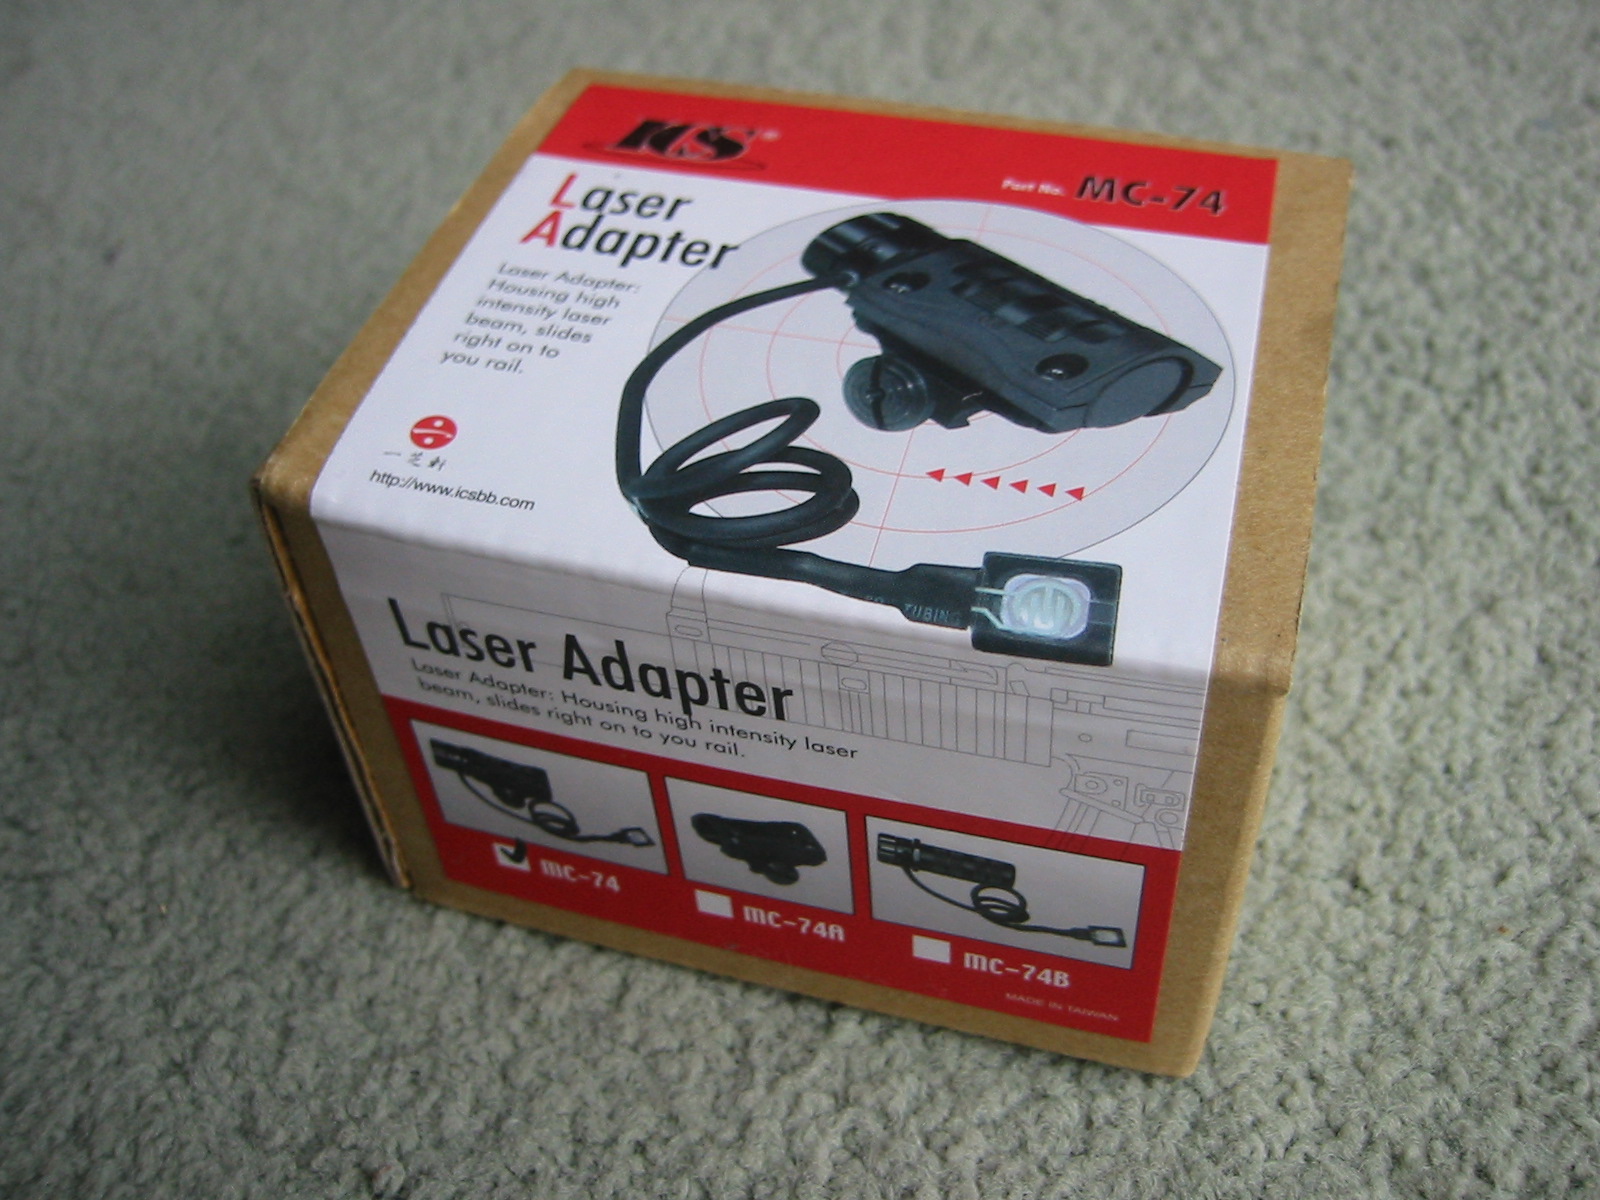
MC-74 or MC-74B will work, although the mounting kit becomes a spare part if you intend to build the AN-PEQ setup using the laser unit. Out the boxes: What you need to do is get each part out of it's box and prepare it for assembly - it's quite easy really. First up is the laser unit: Inside the MC-74 box you'll find the laser unit itself, mounted inside the rail mounting kit, with two allen keys and a small piece of sticky velcro. One allen key (the smaller one) is for adjusting the laser, the other is for removing the laser from the mounting kit. You'll also find some handy instructions. These instructions relate to fitting the laser to the ICS MP5 cocking tube.
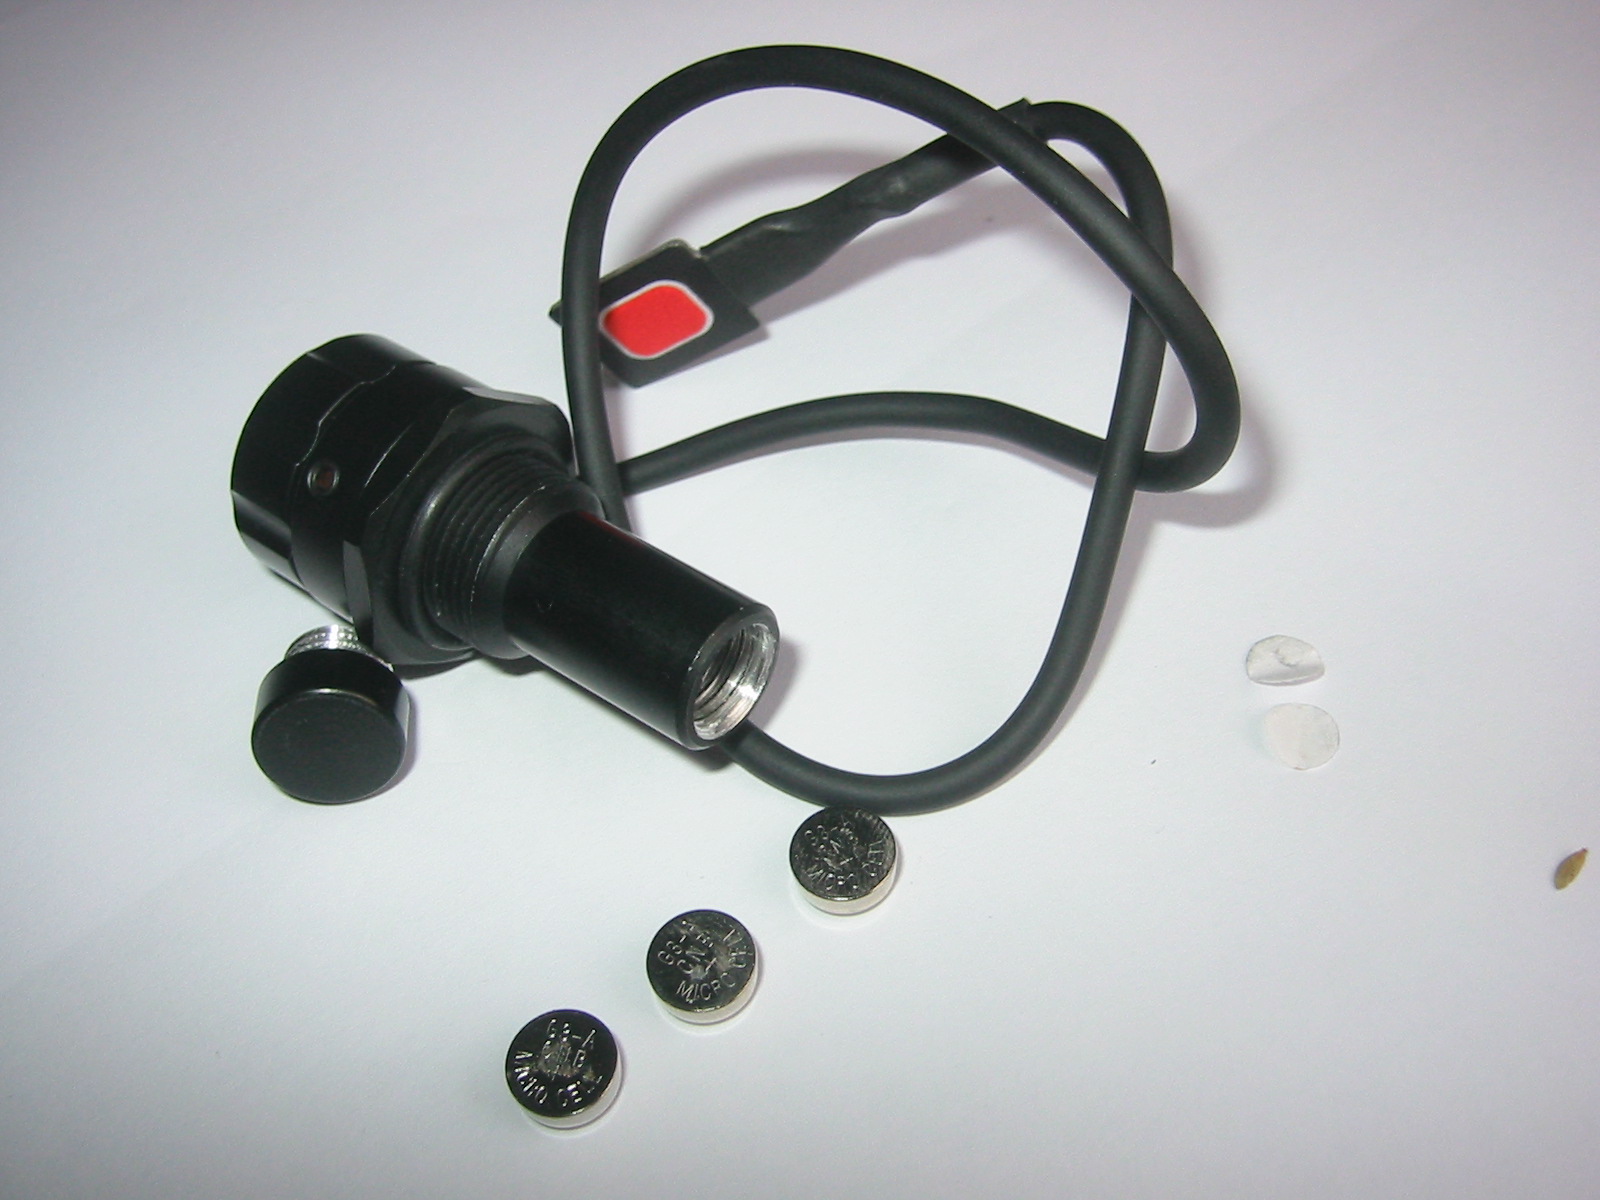
Out the box you'll find nothing works at all. This is for the simple reason that although the unit comes with batteries supplied in it, but with little bits of paper between them to prevent draining/use whilst in storage (the bits of paper are actually leftovers from holepunching paper ^_^). Well first things first - time to get that laser unit out of the mounting. Don't worry here about unscrewing the mounting kit, the laser can just be unthreaded from its mounting.
Now you can unthread the end of the laser unit. Be careful when you thread anything on or off here. Each threading has an o-ring on it, you don't want to pinch or tear those, as they help keep the unit sealed form the elements. With the endcap unscrewed you can remove the batteries. Make a note of which way you took them out - they have to go back in the same way (flat side pointing towards the unthreaded end cap).
Looking inside the ICS laser you can see the inner workings of the part, and the teeny tiny laser module at the end of the can. The end of the laser also unthreads. There's no need to do this - I've just taken it off to show you inside, and the supporting struts that provide the aim adjustment.
The laser beam pint on this version that I have here is somewhat angular in shape giving a rectangular dot.
This isn't a huge problem, remember we are dealing with Airsoft here.. not real steel; a red dot is a red dot. ^_^ "Pulse laser in the 5mw range...": Whilst I'm on the subject of dots, I thought I'd compare the ICS laser beam to that of the mil-spec M72 laser. The larger dot in the shots is that of the SureFire, the smaller more angular dot is that of the ICS laser. Obviously larger dots mean that they can be seen over further distances, but remember that again we are dealing with Airsoft here, and engagement ranges will normally be in the 30-60 foot range. There's no need to have a laser that can cut mild steel mounted on the side of your AEG, unless you want the best laser money can buy that is. Now remember guys, I have to say this every time, you must take precautions with lasers. You can get laser resistant goggle sets, and you shouldn't flash lasers at people's eyes, but then again you won't flash someone in the eye unless you're aiming for their head, and well that's not sporting is it? The ICS laser unit is in the 5mW range, with a wavelength of 630-670nm. This makes it a class IIIA model. "...A Class 3 laser or laser system can emit any wavelength, but it cannot produce a diffuse (not mirror-like) reflection hazard unless focused or viewed for extended periods at close range. It is also not considered a fire hazard or serious skin hazard. Any continuous wave (CW) laser that is not Class 1 or Class 2 is a Class 3 device if its output power is 0.5 W or less. Since the output beam of such a laser is definitely hazardous for intrabeam viewing, control measures center on eliminating this possibility..." See the Laser Safety FAQ for more information.
With the laser pointing towards you, and the cable as 3 o'clock you will find adjustment screws at 12, 4 and 8 o'clock. All three screws need to be adjusted to move the laser. They hold it in a pincer formation (seen in the inset shot). TO adjust up down, simply adjust the two nut, and wind in one side nut. You will need to wind the opposing side side nut the same amount, thus pushing the laser either up or down. To adjust left and right the same needs to be done, just in a different direction. To be honest the easiest thing for me to do is explain how the system works and show you a photo, as to be honest you won't want to adjust your laser that often as it's rather tricky to do. When you have the laser sight zeroed you'll want to tighten up each allen bolt the same amount. This stops anything coming undone in the field. There are three batteries that drive the unit, sporting the label G3-A, CNB. I'd recommend getting some new ones as the ones that I have here ran out during this review (most probably been on the shelf a bit). The activation pad that turns ont he laser is the wire with the red dotted pad at the end. In the box you'll find a small adhesive velco strip. This is for fixing the pad to a convenient place. Be sure to stick the red pad outwards (i.e. you press down on the red side) as the pad doesn't work that well the other way around. Battery: The battery is a 9.6v 1700mAh pack made from Sanyo KR-1700AU cells. They can be fast charged at up to 2600mA, and charged at a slow rate of 170mA. Slow charge will take 14-16 hours, fast charge is about an hour. Full specs can be found on site here, with the full Sanyo spec sheets (in PDF format). AN/PEQ 2: The AN/PEQ 2 is a replica of a versatile mil spec LAM unit: "... AN/PEQ-2 is a dual laser system developed to allow a combination of both pin point aiming and broad beam target illumination. It can be handheld or mounted to a weapon for operation. AN/PEQ-2 is available in three models allowing a selection of laser power, infrared only, or infrared/visible light source. AN/PEQ-2 when weapon mounted allows both lasers to be bore sighted individually. Each laser has its on azimuth and elevation adjustment knobs. Mounting is with a rail grabber, optional brackets are available. Cable switches are supplied that attach to the weapon for firing the lasers. When used in a handheld mode AN/PEQ-2 is activated by depressing the fire button located on the top of the system..." NightLine Inc. The ICS version is hollow inside and allows the fitting of a 1700mAh 9.6V battery and the ICS laser unit. At the back of the box is a simple 21mm rail adapter, allowing you to blot it onto any available rail interface.
If you don't do this you'll most probably rip it in two as it bridges the seal between the two halves of the clamshell box. To remove the label carefully peel back one corner until half of the sticker is removed. Now unthread the two ribbed caps on one end, and the recessed cap on the front. To unthread the caps twist them anticlockwise 90 degrees.
You'll need to gently lift the two halves away from each other, as the false laser is fitted in such a way that the halves will not slide apart unless they remain parallel.
With the two halves apart you'll be able to fit the laser unit. Remove the false laser unit and taking the real laser unit carefully move the large rubber o-ring down the threads and undo the large nut behind the laser's face. When you have undone it enough you'll be able to slide the laser into the fittings for it.
You should note here that I have mounted the laser correctly aligned to be mounted on a top rail, not for a side rail. The cord for the laser should come from the side, thus allowing correct alignment with the adjustment available on the laser. Sorry - I didn't think about this until I fitted it to the RAS.
With the sides together, simply attach the old end cap covers for unit, and you're ready to mount the sucker! On the MP5 RAS I've chosen a simple fitting, with the RAS unit on the RHS away from my body (I'm right handed). This allows for minimal snagging on any equipment ported on the body, and keeps the ANPEQ out of the way of the sling mounts.
As you can see the battery flex is somewhat visible with the fitting style I have chosen, so a little black PVC tape won't go amiss. ^_^
As you can see in the end result the LAM unit doesn't look out of place at the end of the RAS, and provides a hefty power upgrade to the otherwise stock (internally) AEG.
Conclusion: Well it looks the part, and it is a much nicer way to hide a battery than a battery bag of gaffer tape. The 9.6v battery is a real boom, and will be a welcome addition to anyone with an ungraded folding stock AEG with a limited mAh 8.4v driving it. The extra voltage helps return the rate of fire back to it's former glory. The box does add a significant nose weight to the rifle, but certianly doesn't look wrong on an M4 RIS or similar. Just be sure that when you mount it the laser is adjusted and installed correctly. Not just a battery box, well built and cheap to boot. Sure the laser may not be milspec quality, but it's versatile and adds a depth of realism to the fake LAM unit. External
Links: Site
links: Comment on this review in the forums Last modified:Wednesday, December 11, 2002 10:02 PM Copyright 2001 ArniesAirsoft
|