(click
for a larger image)
Marushin
Gas Type SSB |
MARUSHIN |
An M1 carbine - in fact Meh-Lindi's M1 Carbine - a fine beasty of an AirSoft gun. Or to give its full and illustrious title: The Marushin Gas Type Super Sonic Barrel U.S. M1 Carbine "MAXI". S'what it says on the box - no really.
The important bits in the box are: An M1 carbine, A magazine, and a wee allen key - which is for adjusting the hop up.
So why the M1? So I was happily pootling along, with my AEG in one hand, pistol in the other, and dragging a 90kg sled loaded down entirely with batteries and bags of ammo behind me, and was thinking surely there's a better way?
Actually I was looking around the web, and thinking about one too many films with romanticised images of snipers in them...
No. Sorry. I must admit the truth. Actually I was just chatting with my work colleague who sits alongside, and we were discussing finer aspects of the Airsoft pastime, and we agreed that it would be marvelous to have a sniper rifle of some description, that we could share between us when we played.
Browsed internet - found lots of info about APS', and what you needed to do to upgrade them. Saw a few second hand on the forums - usually the OR versions which I didn't think would even remotely fit in the car. Usually expensive. (which is why I didn't even mention M40's M24's etc)
Then remembered my first 'real' skirmish, and how in a couple of games, I was tagging along behind a chap using entirely WW2 US equipment - including olive fatigues, sometimes an M1A1 thomson, and sometimes an M1 carbine - and how he was picking people off in a bridge assault.
And lo and behold, an advert for an M1 on the forums popped into view. Being rediculously impulsive, I put an offer in immediately.
 The
Feel When you first pick up the M1 carbine - you immediately
notice how light it is, and how nice the wood feels. Despite the full wooden
stock, it seems almost haf the weight of an average AEG.
The
Feel When you first pick up the M1 carbine - you immediately
notice how light it is, and how nice the wood feels. Despite the full wooden
stock, it seems almost haf the weight of an average AEG.
Putting the magazine in does bring some weight to it as, since it's a gas powered gun, the magazine is a gas reservoir and heavy - much like any GBB magazine.
But still, you start to feel that you can hold this up to your shoulder for quite a while without tiring, and taking standing shots with this is very possible, since you don't have to strain to keep it up - it's not at all like holding an air-rifle for instance.
It's a very short gun, and you can reach the end of the barrel with your fingers whilst holding it in position in your shoulder.
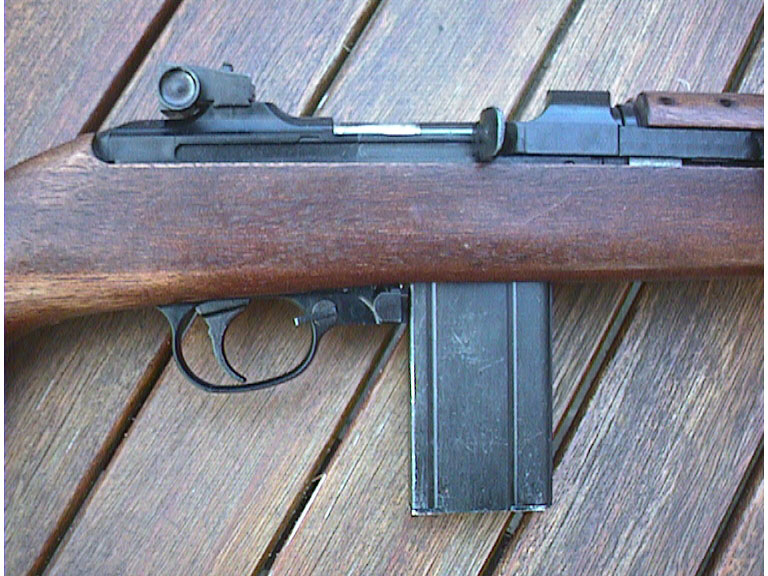
Where is everything? In a right handed hold, your left hand naturally wraps around the foreward part of the stock, and slots into a grooved slide cocking lever. You can either use this to cock it, or the more normal 'bolt' style lever nearer the action.
  |
 |
 |
|
Left
handed, you can only easily use the bolt to cock it.
|
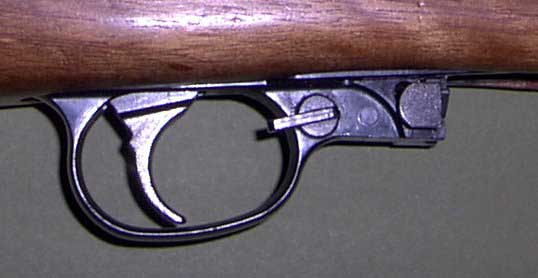
The
safety is on the right hand side of the trigger guard, which is
a small rotary affair, "down" is safe, "back"
is live.
|
The
magazine release is the push button in front of the safety
|
|
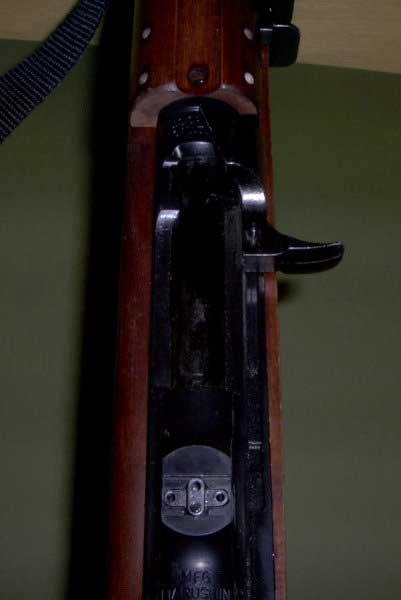
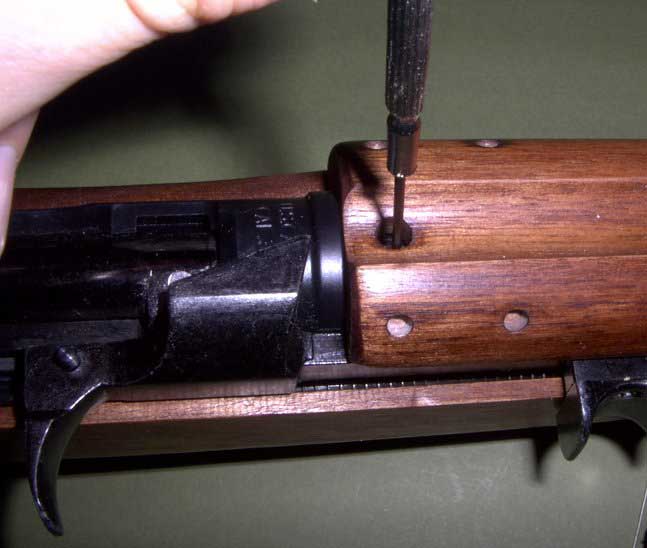
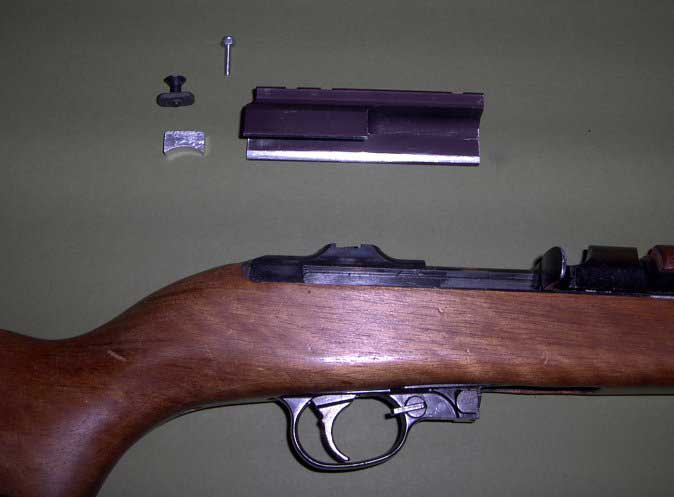
So here you can see the scope mount, the iron sight has already been removed, and the fitting plate with a bolt through it. The purpose of the two sliver bits will be discussed in a moment. In theory, where you have taken the iron sight off, you should then take a little 'double figure of 8' piece out which is what the sight screwed into with two short screws. To do this you have to take the gun completely out of the stock, as the screw to this 88 piece (that's what it looks like two 8's at right angles - the part number is part 17) is underneath.
Unfortunately, although the instructions say you may need to file the plate a little bit - the notch in the gun itself isn't actually bevelled - so by the time you file it to fit, it will just fall out of the notch! If it didn't, then you would tighten against it with the bolt pictured. Ok, so forget the mounting plate and bolt. Leave the 88 piece on - as well as two small screw holes for the iron sigts, theres a slightly bigger one in the middle which is a standard M3 thread. So the long silver
bolt is a carefully cut M3 bolt, which with a washer holds the mount
on to the 88 piece.
Thus you get a gap which you may be able to see in the image to the right. What this means is that it can wobble up and down at the front. As you can see I've filed my edges down a bit which helps.
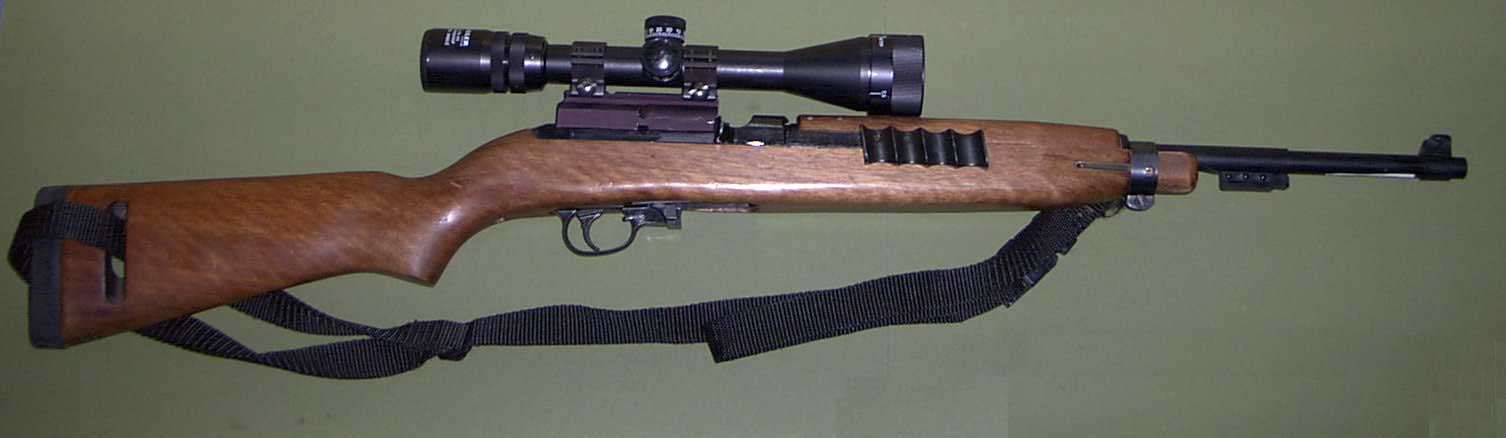
However the best solution is just to wedge the sight. A dead helpful chap at Combat South (Mike Brennan aka Borris the Blade) noticed my M1 t'other day, and supplied me with a bit of shaped metal - the tiny curved bit in the original parts picture. It's slightly longer than the gap between the mount and the gun, so presses, and causes a wedge effect. That way the scope mount's stable. The scope mount itself is 14mm Weaver - however, although the Tokyo Marui rings are 14mm as well, they don't actually come close enough to tighten on! Whilst testing, I padded the gap (less than 1mm) to make a tight bind. I now have a 'proper' set of rings, which fit this (as well as the TM claw mount) beautifully. |
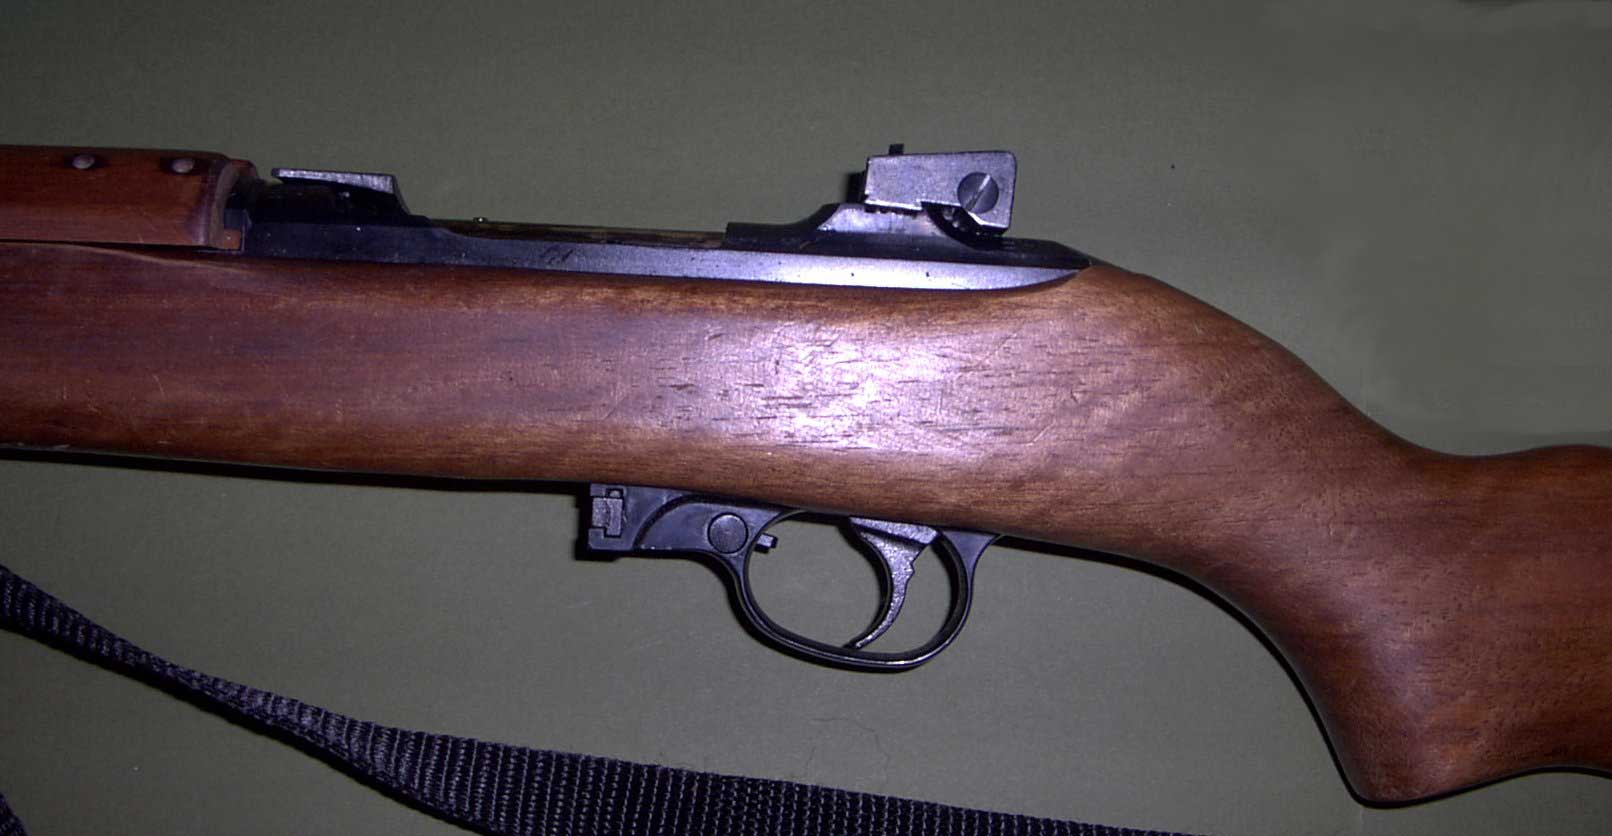


Now about that stock... I find that the scope actually mounts a little far back for me to easily use it without craning my neck backwards.
So I also invested in the extended butt stock plate - which is the thin black rubber at the end of the butt, but thicker - about 20mm thick instead of 5mm.
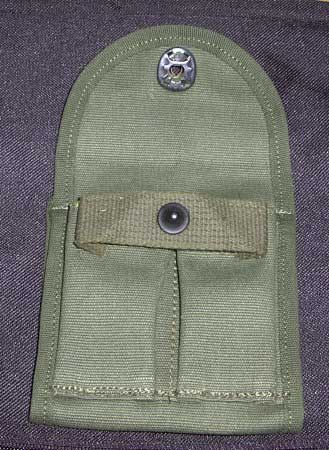
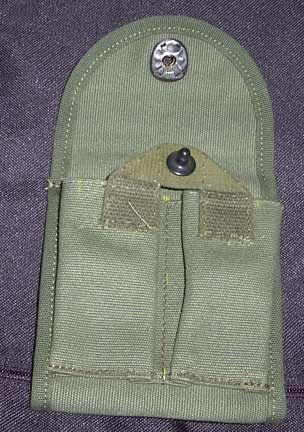
With the extended butt
plate, and with the mag pouch slipped on the butt, it gives me an extra
25mm of eye relief - which is about right for my combination of scope, shoulder
and eye!
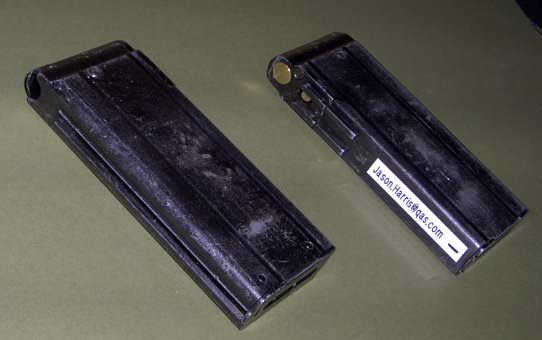
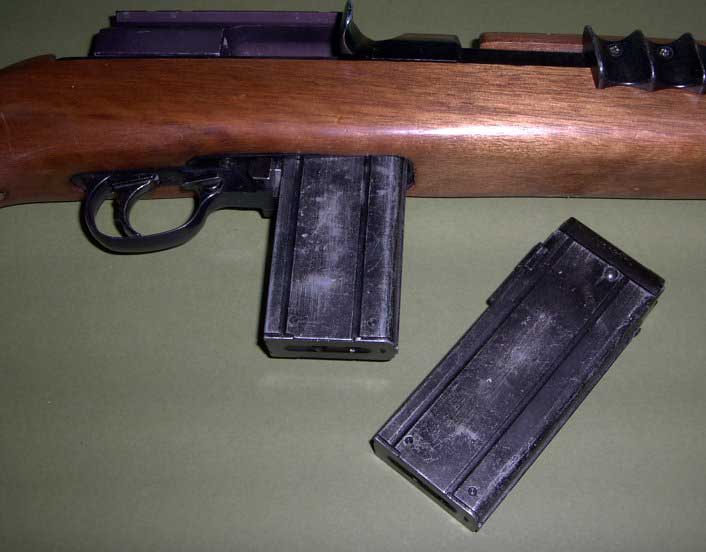
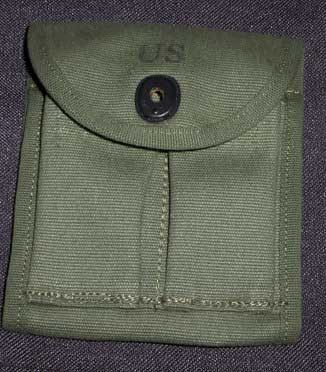
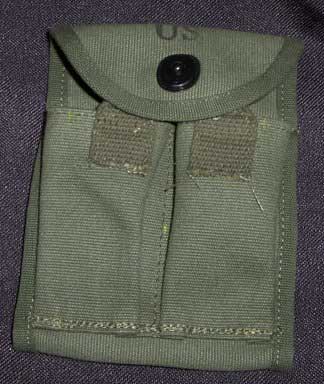
Magazines The magazines, are gas, and take 15 BB's, and enough gas to last for about 70 BB's. They're very heavy, and are 20mm thick by 50mm wide by 117mm tall.. You can get "(real) M1 15 round magazine butt pouches (also for belt)" which can either be put over the butt of the gun or on a belt but be warned - that these are two small for the gas magazines! I altered mine by removing the strip that the button was attached to, folding it and re-sewing it on to the pouch, to give an extra inch of room. They're still tight to close, and aren't easy to put on the butt at all - fine for attaching to my belt though! The M1's magazines are going to be too wide to fit in many pistol magazine pouches which expect mags of about 35mm x 25mm I would think - so think carefully about where you're going to store them - that's why I got the pouches, and then persevered with sewing the necessary adjustment. Power On hfc134a gas, the gun fires at about 1.4J, e.g. 265fps @ 0.43g, 315fps @ 0.30g, 385fps @ 0.20g. Which you've got to admit is quite nice. On green gas you get half again as much power, and could get about 475fps @ 0.20g. I've heard people say that Green gas is bad for the seals - I honestly don't know. I've only used one mag with green gas, and inadvertently left it fully charged for a week and a half (yes I know, I'm stupid, and don't care enough for my guns) - there was a slow leak, but still had more than half charge at that time. |
What about an original sling? I do have a real M1 sling - there is a little Oil bottle you can get - i mean quite tiny little thing.
The way it works is you put the sling through the hole - put the oil bottle through the loop in the sling, and then pull it back through - the oil bottle wedges into it's little slot - holding the sling in place inside the butt stock - and it should all stay there. The front just clips on fairly normally.
I don't have the oil bottle though, and couldn't be bothered to knock up the right shaped bar - so I just ran a normal shoulder strap all the way around the butt plate and through one of those "slide though grips", and then at the front end, put a snap lock (like you get on all modern rucksacks and things) and sewed the strap back through the front sling point around the other side of the snap lock. This gives me and adjustable length, with an extra length I can click in or out, not quite a 3 point sling but good enough for me.
I further converted one of my 2 magazine pouches, so that it slips over the end of the butt (along the length, rather then across it, which is how the pouch was originally designed) and then tightens around the stock - the sling is then trapped under the pouch and can't slip.
To recap then: So to recap - how did I end up with this combo?